QPunch’s Document Library module serves as a central repository for organizing and managing project documents. This documentation is designed to help users efficiently navigate to the Document Library, including creating, editing, and organizing folders and documents to streamline project workflows.
Figure 1
Figure 2
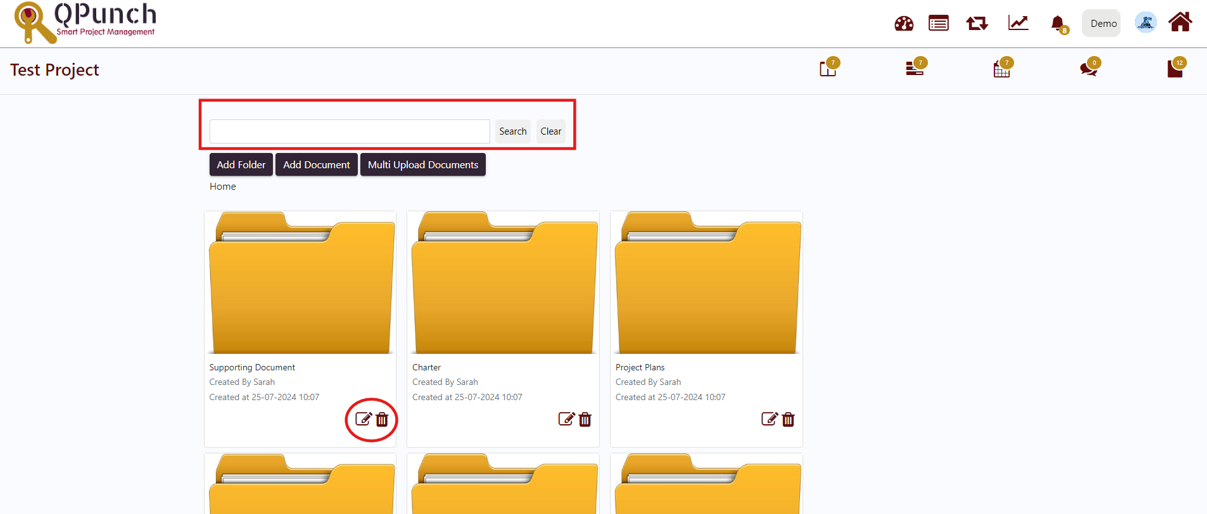
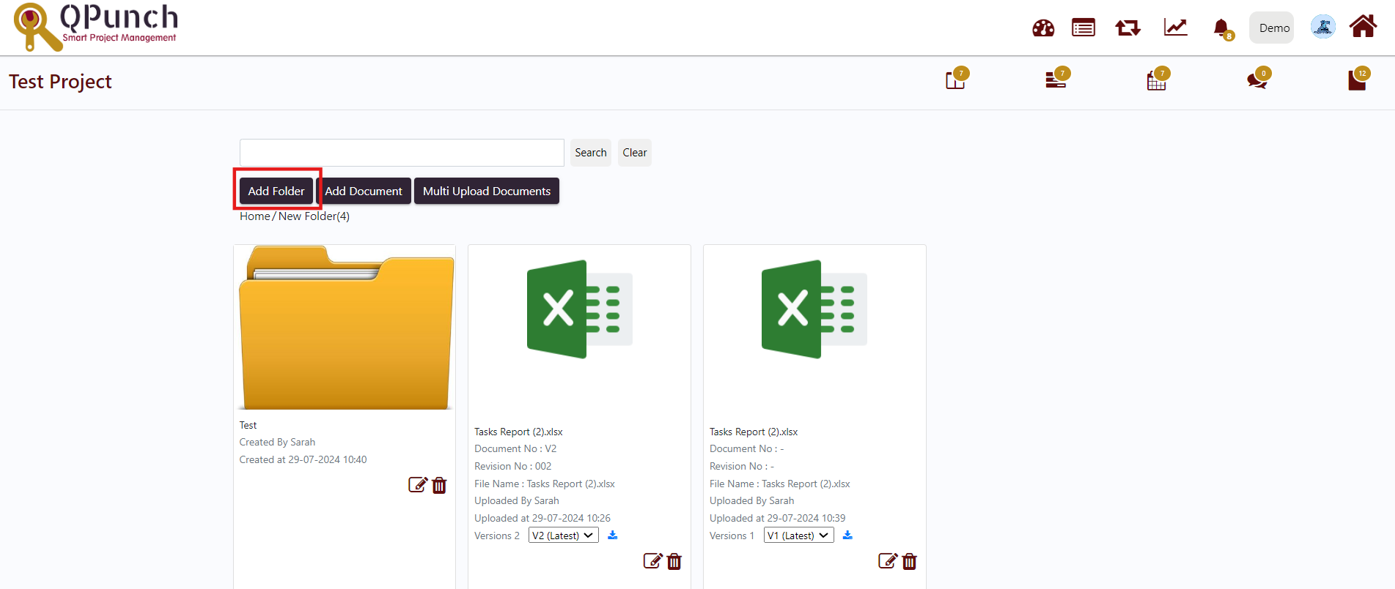
2. The document library automatically generates 12 standard template folders for each new project. You can edit the name or delete these folders using the icons located beneath each folder, and you can search for a specific folder using the search bar located at the top of the page as shown below:
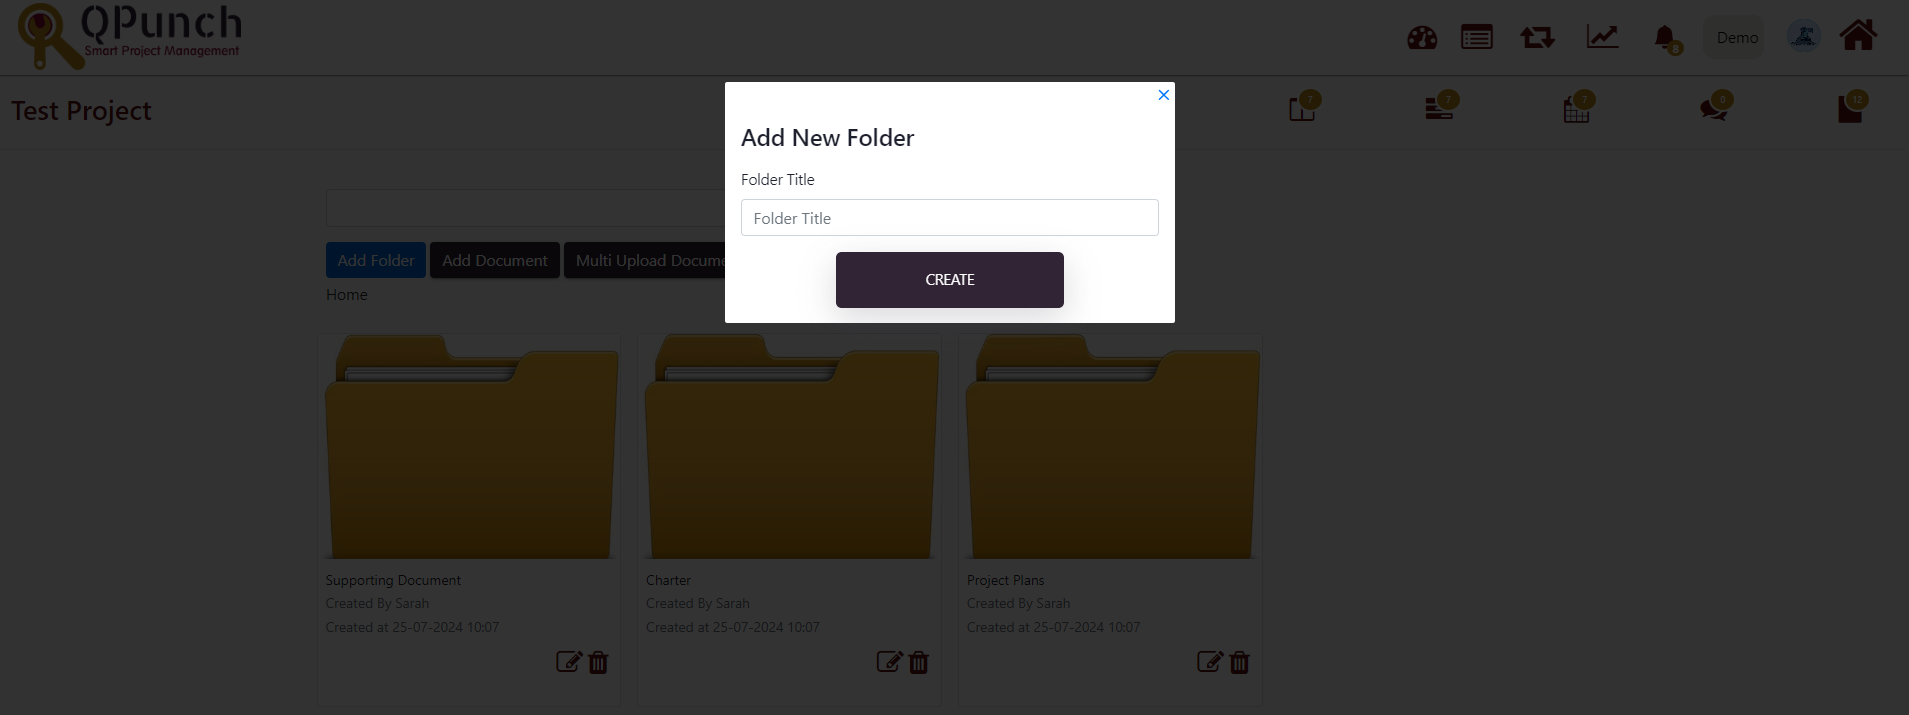
3. To add a new folder, select the ‘Add folder’ button located below the search bar. A prompt will appear to enter a title for the new folder, and then the create button can be clicked to finalize its addition.
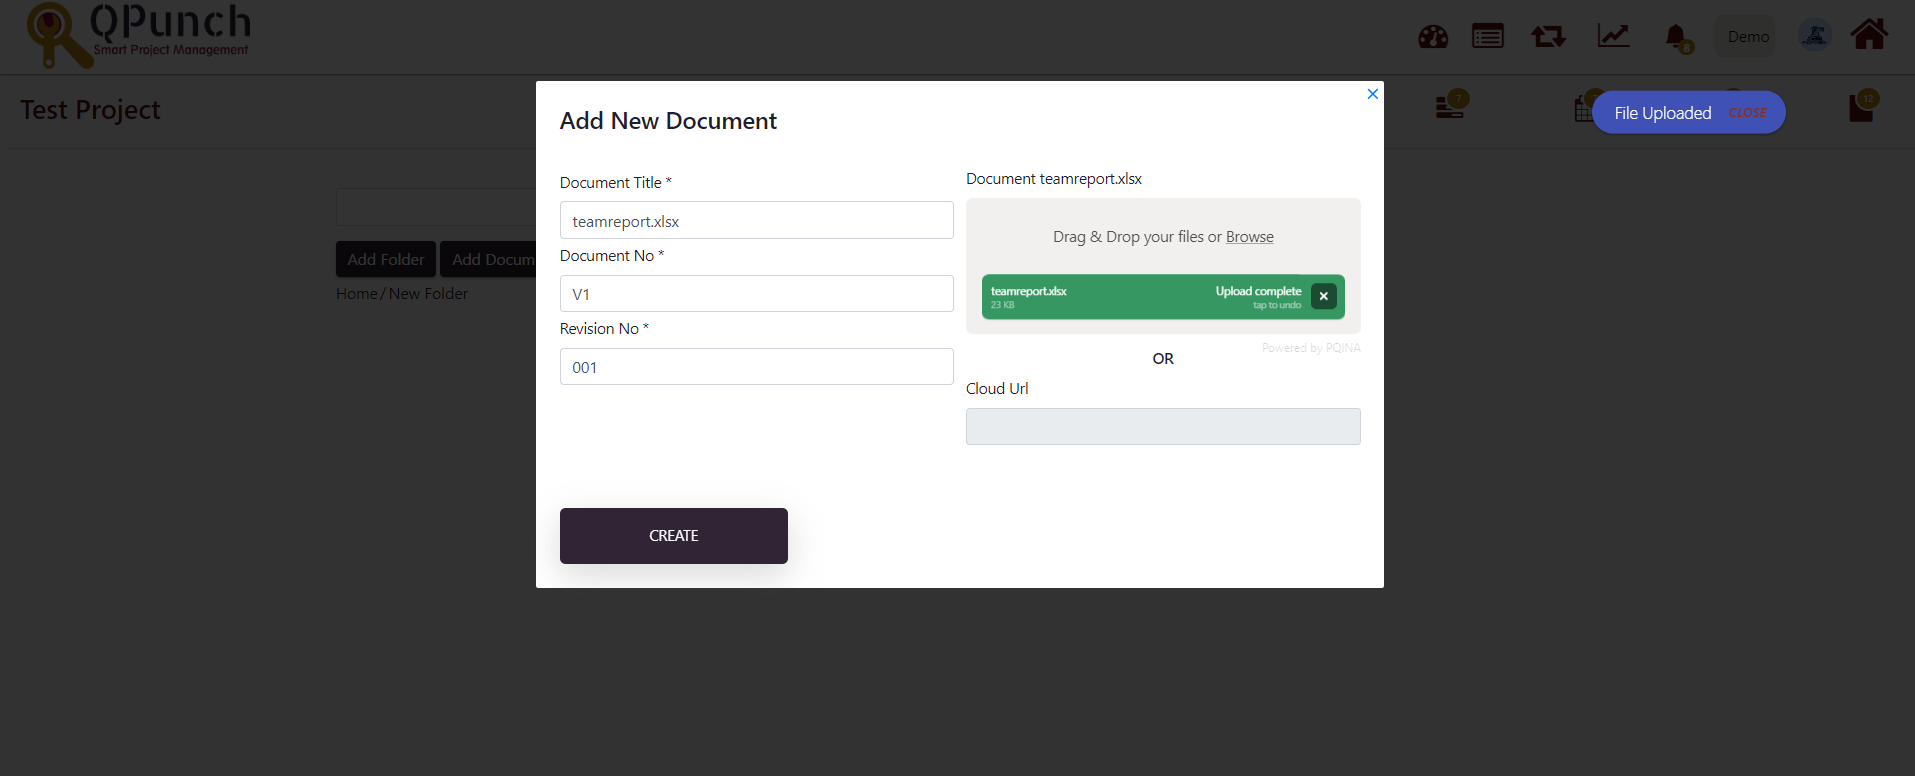
4. To add documents to folders, open the desired folder and click the ‘Add New Document’ button. A prompt will appear to enter the document details. Documents can be added using the drag & drop feature or the browse option, which automatically retrieves default information such as document title, document number, and revision number. Alternatively, the ‘Cloud URL’ feature allows for retrieving and adding a document via a cloud URL. Once all details are entered or documents are added, click the create button to finalize the addition.
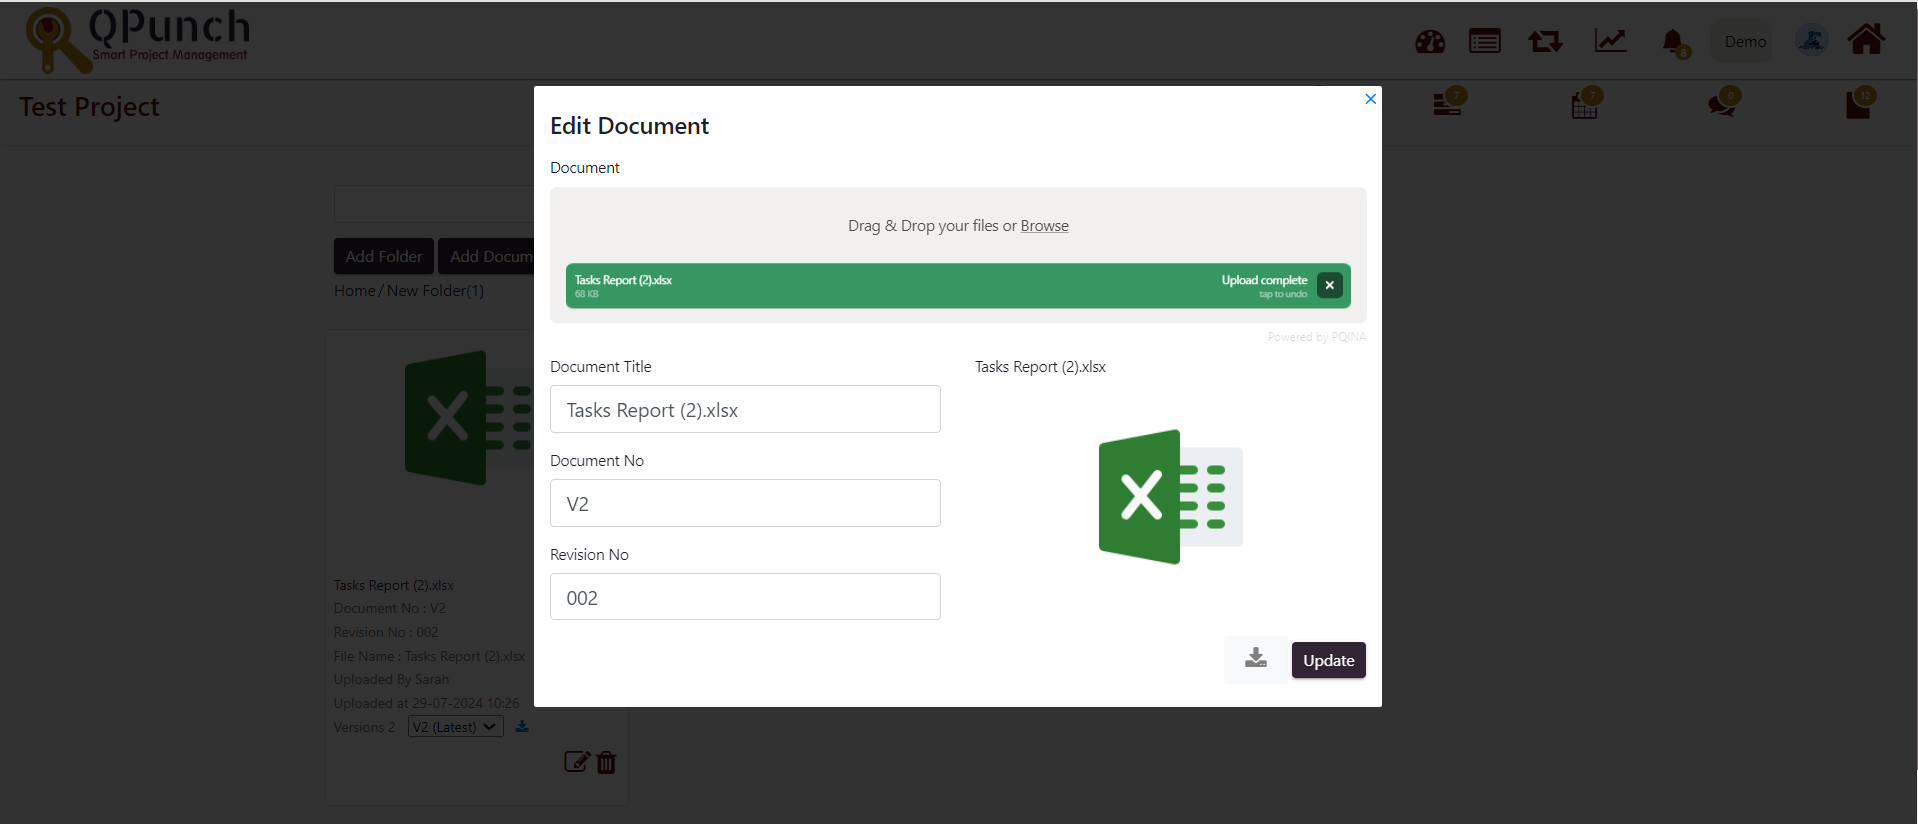
5. After a document is added, it can be edited by clicking the edit icon below the document. This will prompt the option to either add another document or modify the details of the existing one. If a new document is added using the drag & drop feature or the browse option, the new document’s details will be retrieved and saved as version 2, and the ‘Update’ button can be selected to finalize the upload.
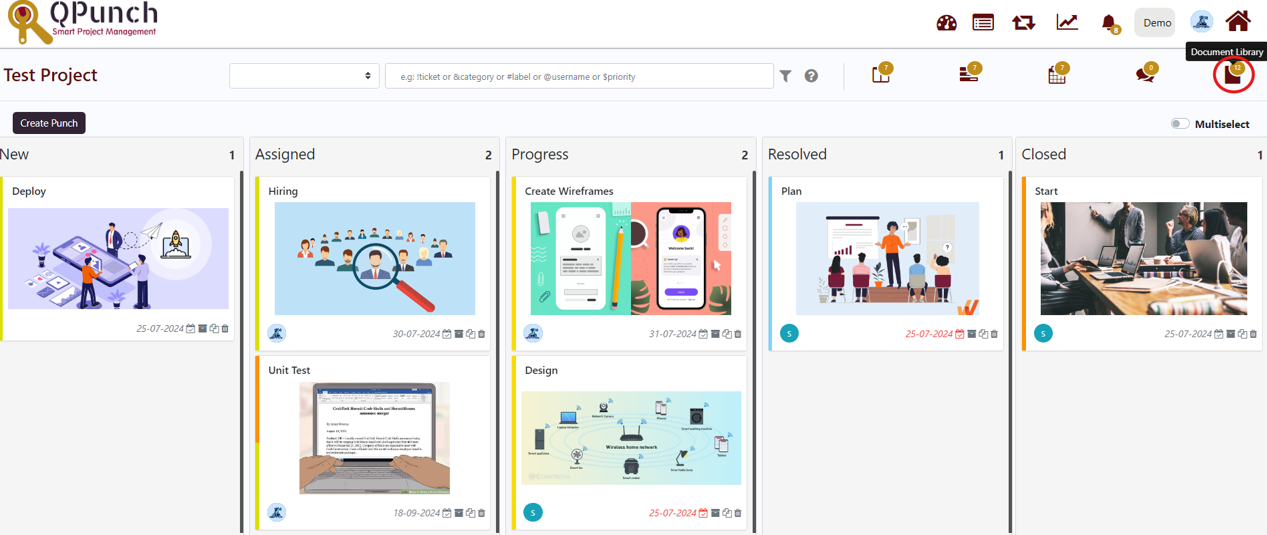
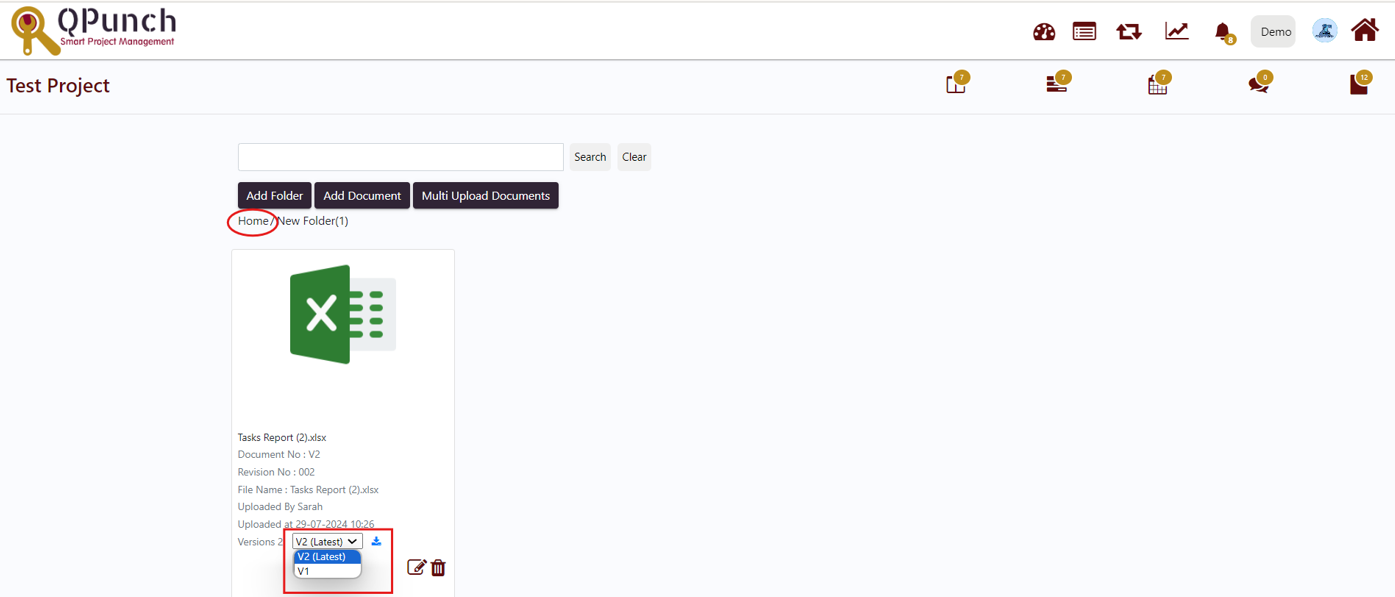
6. Document versions can be chosen from the drop-down menu and downloaded using the download icon as shown in the image below. Additionally, the ‘home’ text beneath the buttons can be clicked to return to the Document Library’s home page.
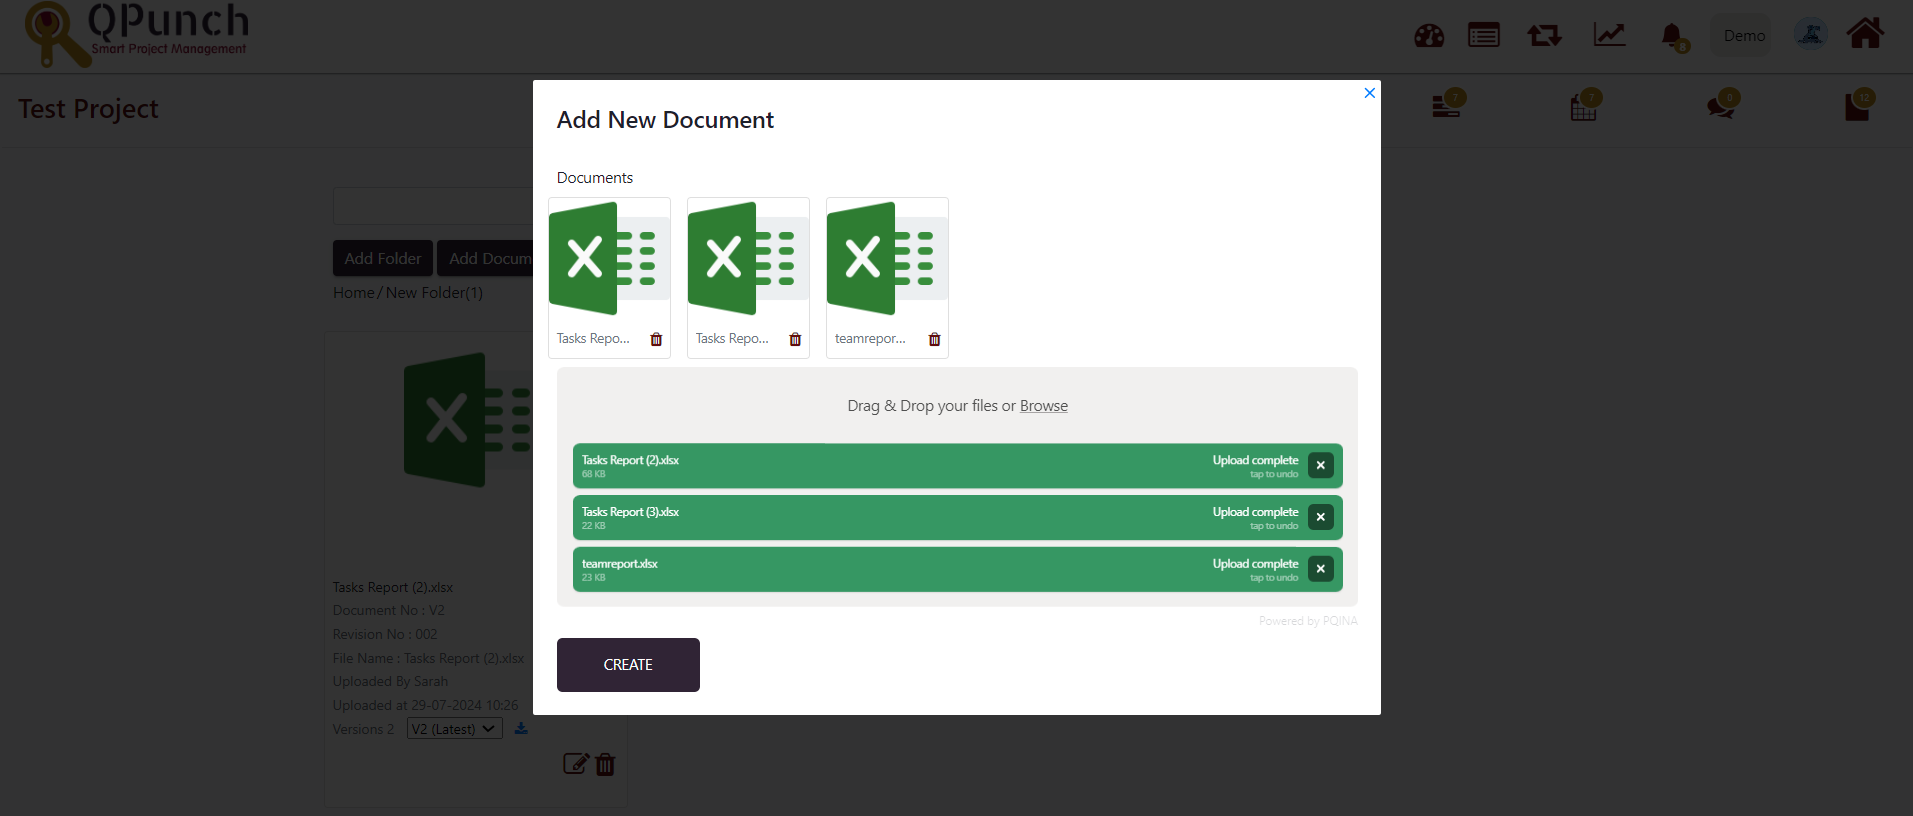
7. The user can also upload multiple documents at once by selecting the ‘Multi Upload Documents’ button beneath the search bar. They can then select the ‘Create’ button to upload the documents to the folder.
8. A user can also choose to add a folder within an existing folder by selecting the ‘Add Folder’ button inside an existing folder, as shown below:
In summary, the Document Library module in QPunch offers a robust solution for managing project documents with ease and precision. Users can efficiently create, organize, and edit folders and documents, ensuring a well-structured repository for all project materials. The ability to handle multiple document versions and utilize features like drag & drop simplifies document management, enhancing both organization and collaboration within project teams.
Ready To Get Started with Smart Project Management?