Split Tasks
The Split Task functionality as the name describes it, allows the possibility to interrupt work on a task, due to cases such as an unplanned event or even a task reprioritization, you can split the tasks so that part of it starts later in the schedule. This can be used in such situation where the work for a task in your project needs to start, then stop somewhere in the middle of the task, and then resume at a later date.
This documentation will help you better understand the working of Split task functionality in the QPunch Smart Project Management Tool. We can apply split task in Kanban board, calendar view as well as in Gantt view.
In Kanban Board:
Step 1: Navigate to the Kanban board
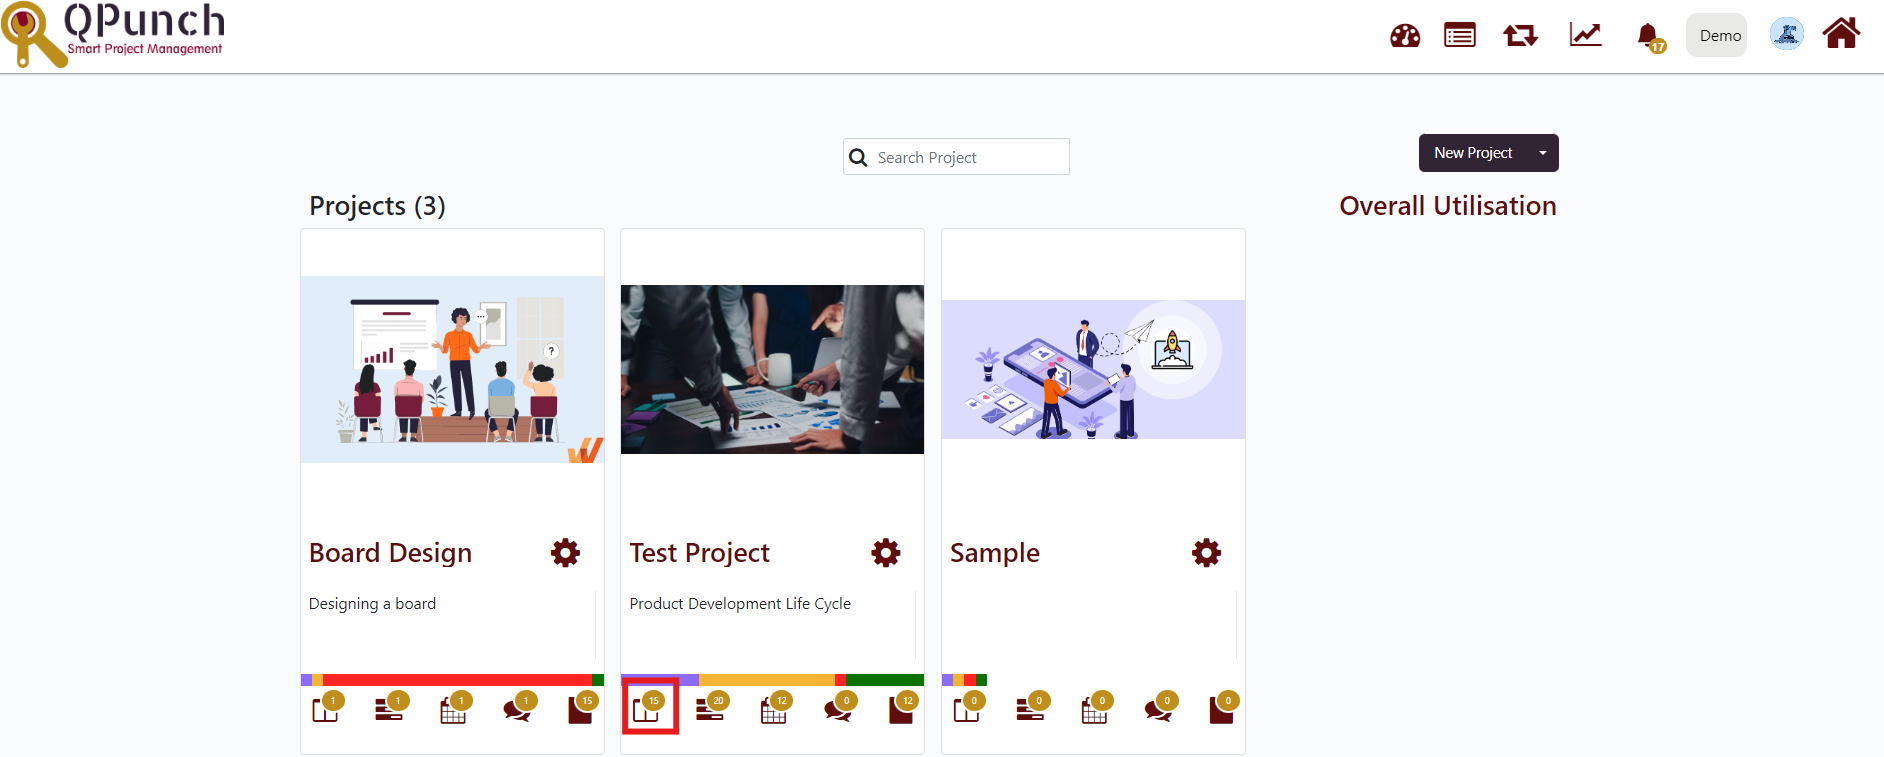
Step 2: In the Kanban board click on any of the task.

Scroll to the bottom. Under the Actions Field we have split task icon available.
Note: Split task icon would be restricted if the task is created for one day or less than a day.
Step 3: Click on the Split Task icon. A Split Punch pop-up screen will appear.
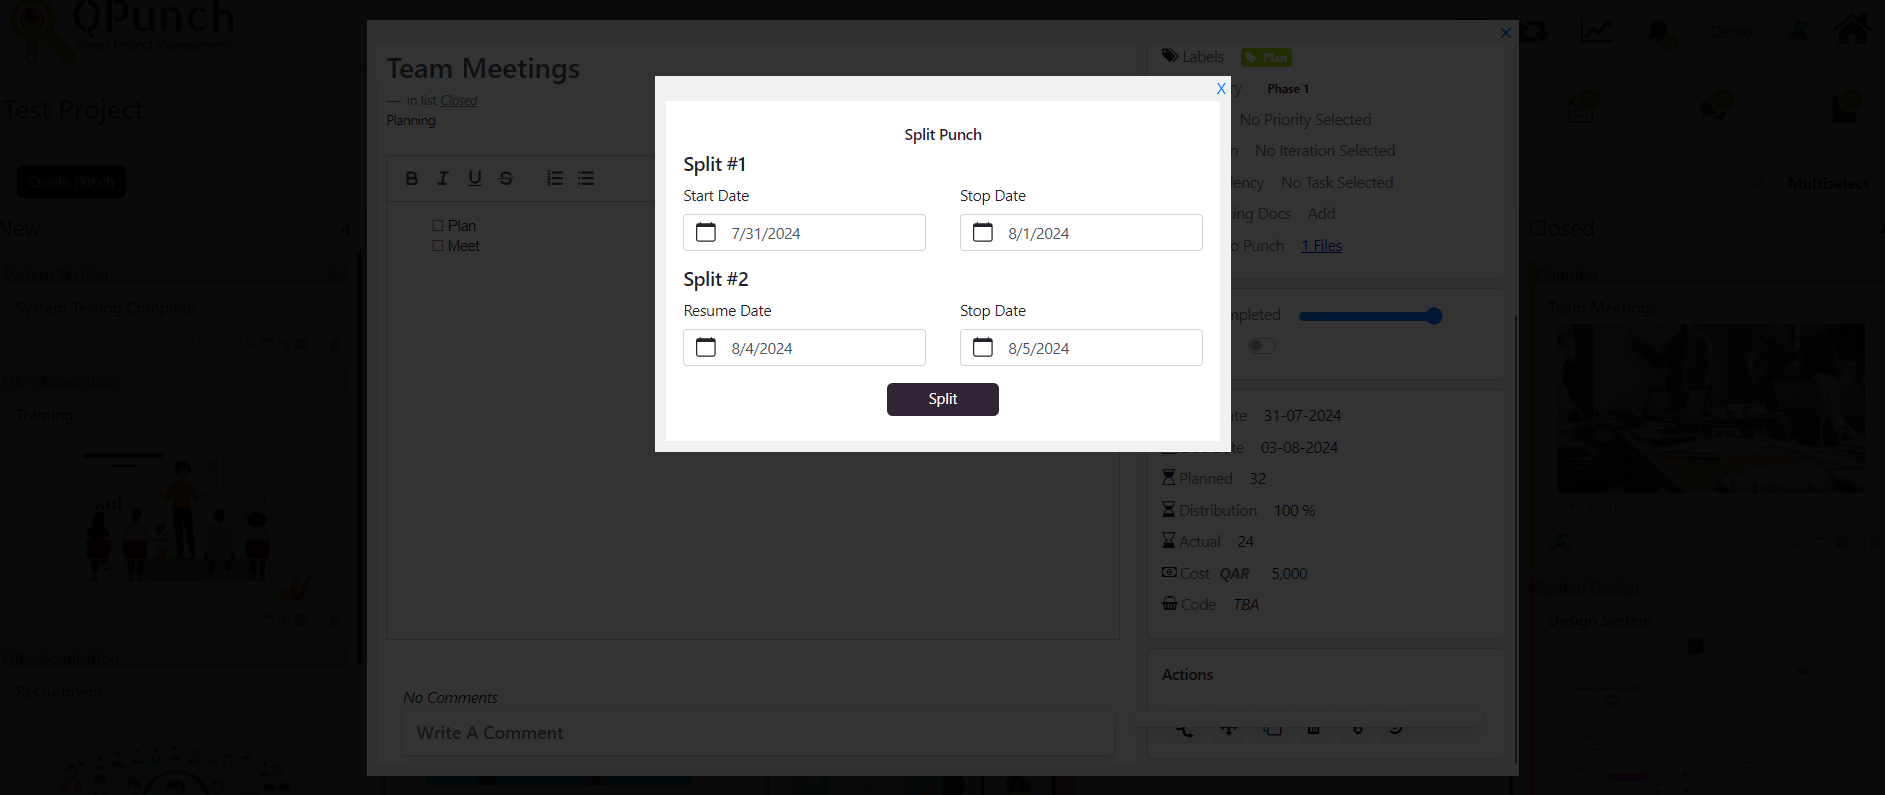
By default, task is split between equal time interval. We can change/adjust the above dates as per our requirement.
Step 4: Click on the Split button to save the spit task.
After clicking on Split button, you will be redirected back to the edit task pop-up screen.
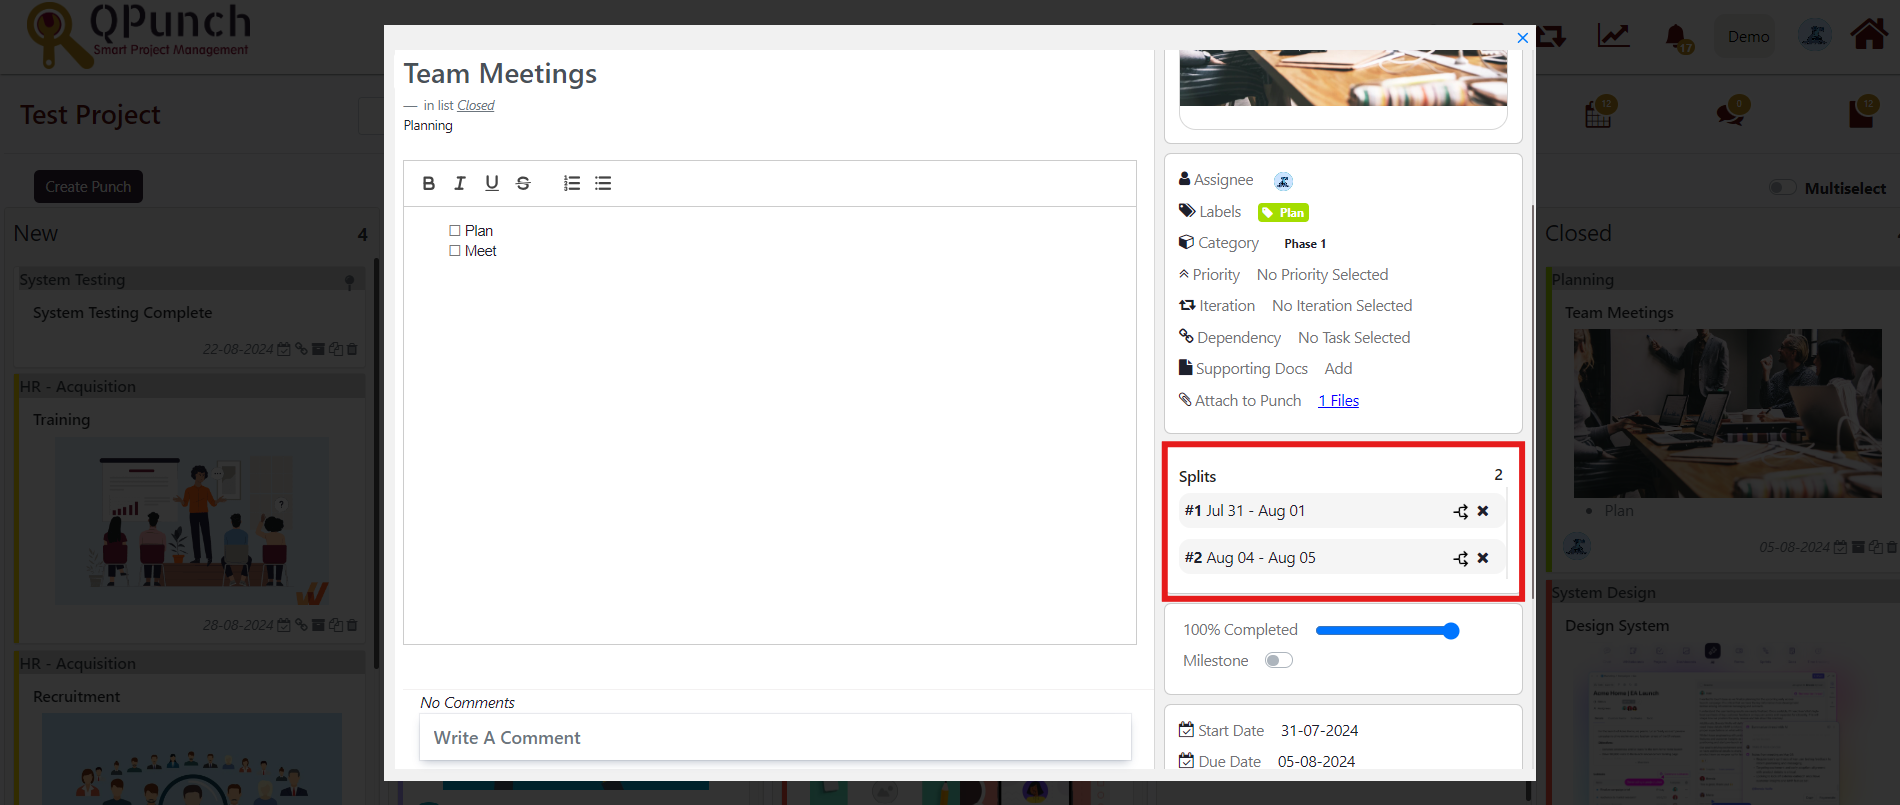
Now the split fields will appear down the right side of the Punch along with their start date and end date. You can edit the split task dates by clicking on them.
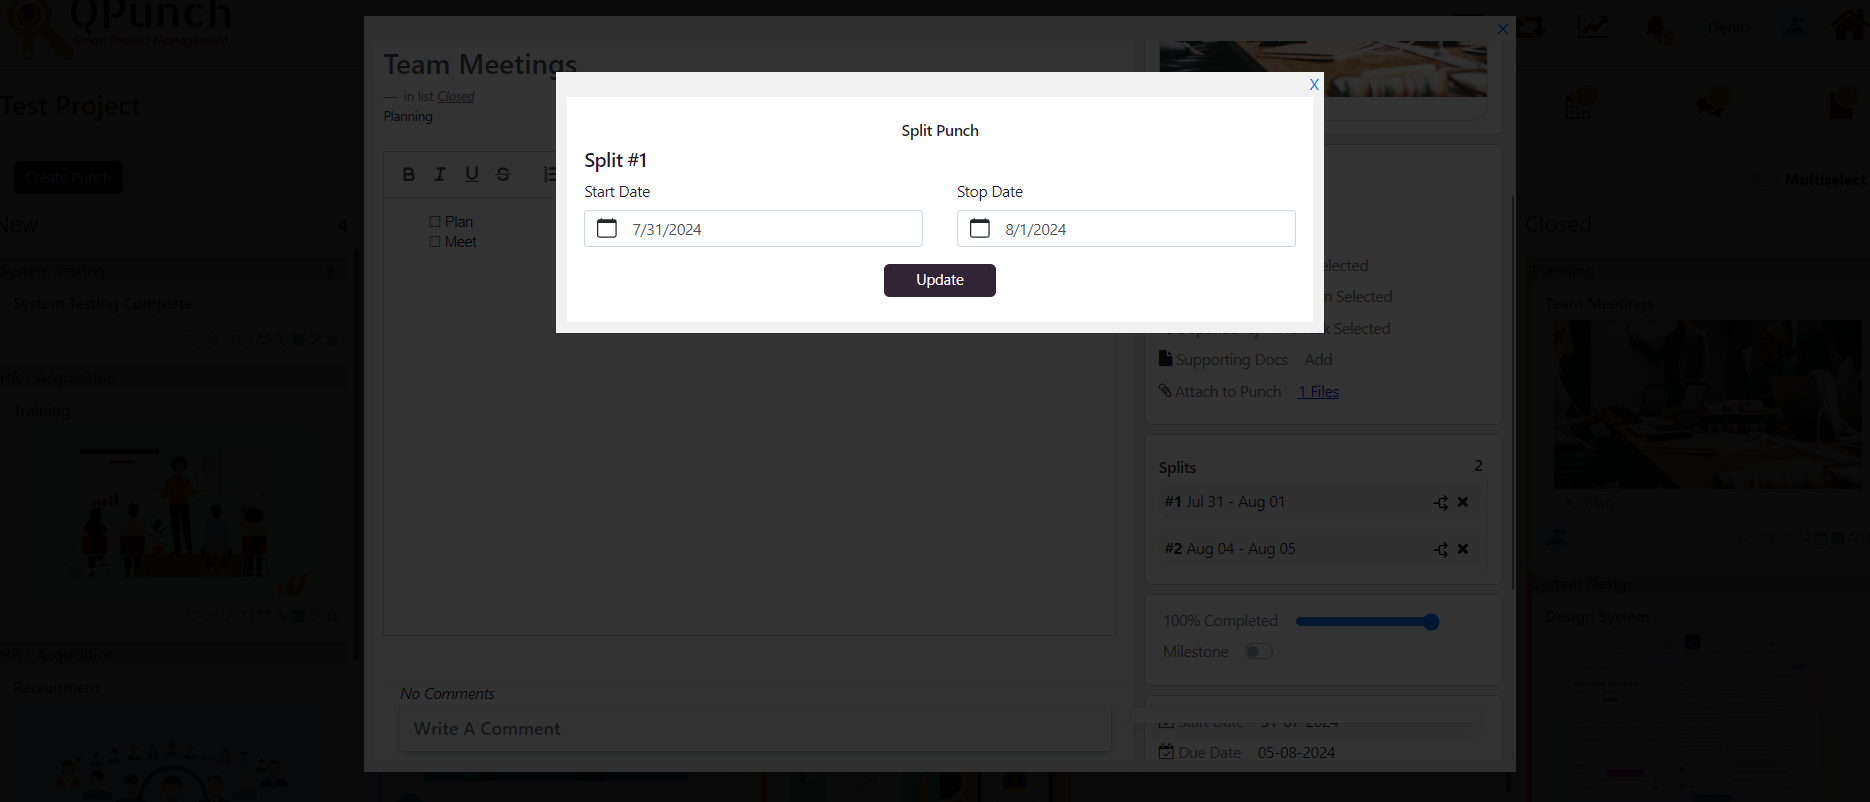
Click on Update button to save the selected dates. If you push forward the dates of Split#1, then resume date and stop date of the Split#2 will be adjusted/pushed forward accordingly.
Note: You can’t split the task more than once.
Step 5: Scroll to the bottom of the Edit task pop-up screen to see the Actions field.
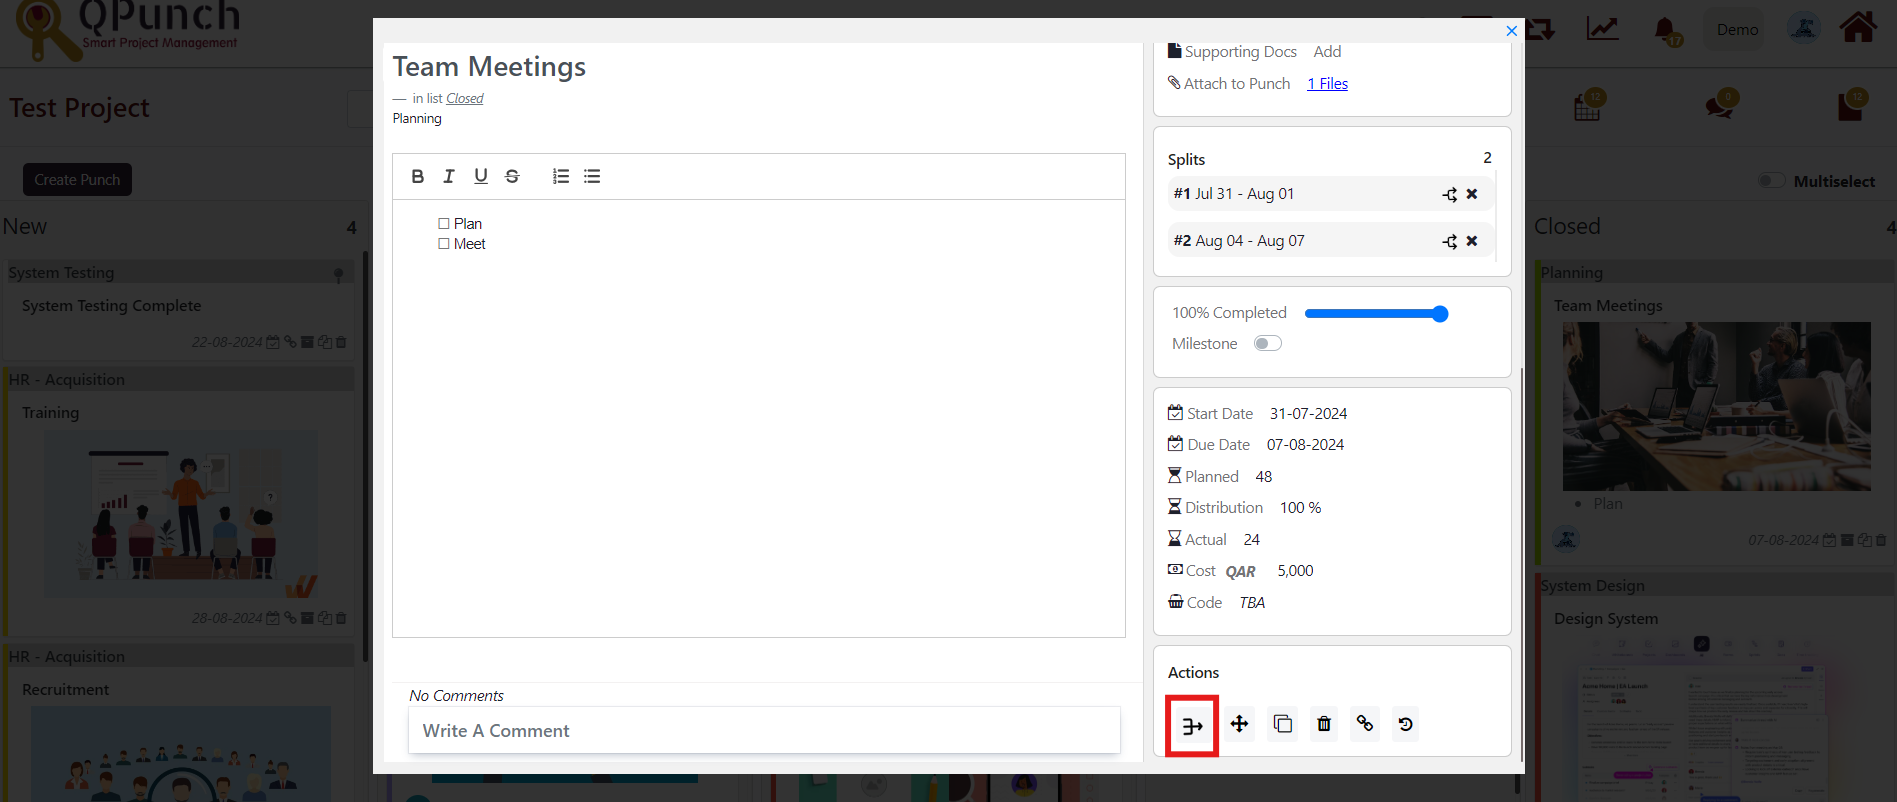
Now the Split icon has changed to Join icon. If you click on the Join icon the split task will be merged back to original task.
In Calendar View:
Step 1: Navigate to the calendar view.
From home dashboard:
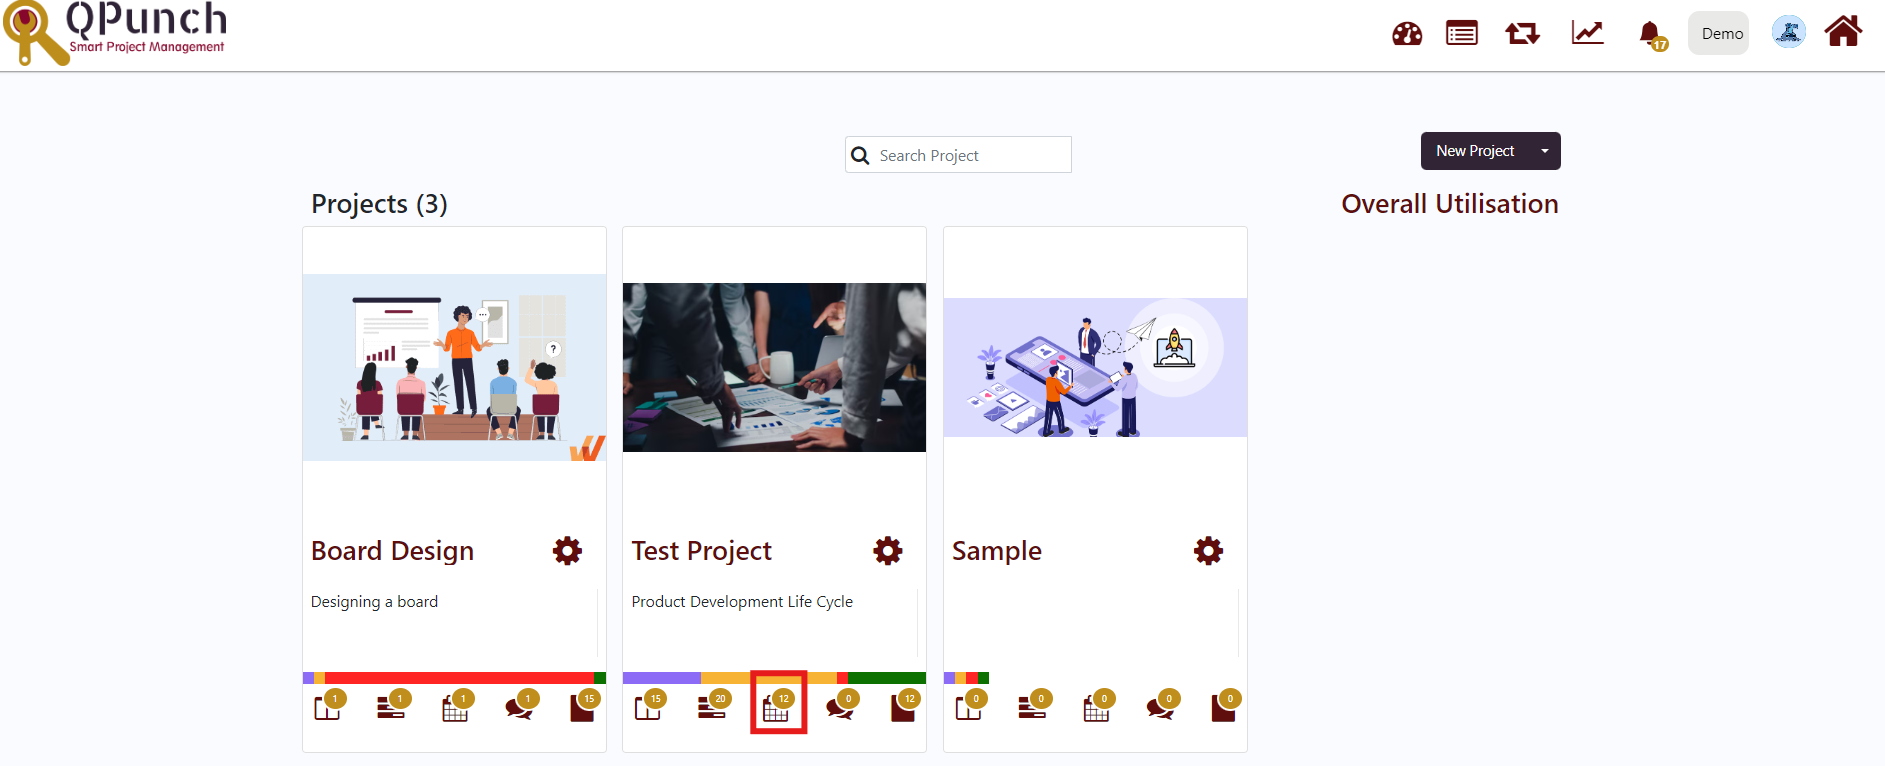
Or
From the Kanban board:
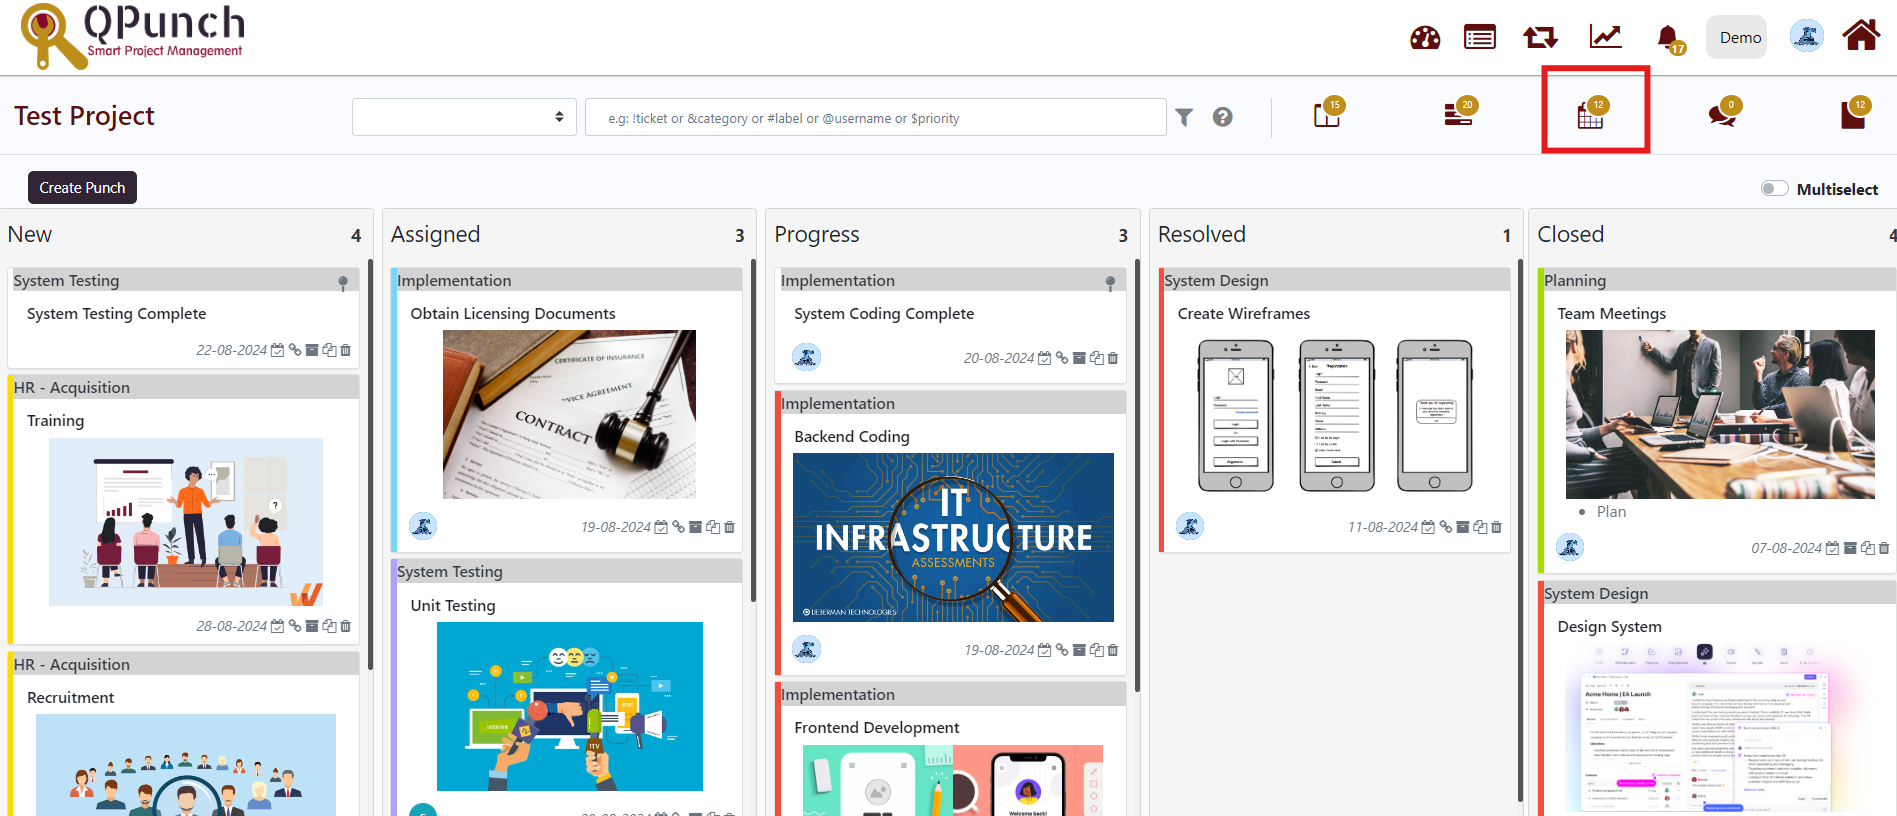
Step 2: To create a split task you can open any of the task in calendar view and click on the Split icon in the Actions field, follow the same steps as we did in the Kanban board.

The above image is a screenshot of the Calendar view. In this, tasks such as “Create Wireframes”, “Backend Coding” are suitable for splitting as it is created for more than one day. Hence it got a Split icon on the top right corner beside the Clone icon.
Tasks scheduled for a period of only one day cannot be split.
“Team Meetings” is an already split task. Hence it has a Join icon on the top right corner beside the Clone icon.
In calendar view, Split tasks will appear separately. All the content of task will be appearing in both split tasks.
For example, “Team Meetings” is a 1-week task starting from 2024-07-31 to 2024-08-07. If we split the task it will appear twice in the calendar weekly view.

If we click on any of the split task, we can identify the split task as its number is mentioned on the right side of the edit task pop-up window.
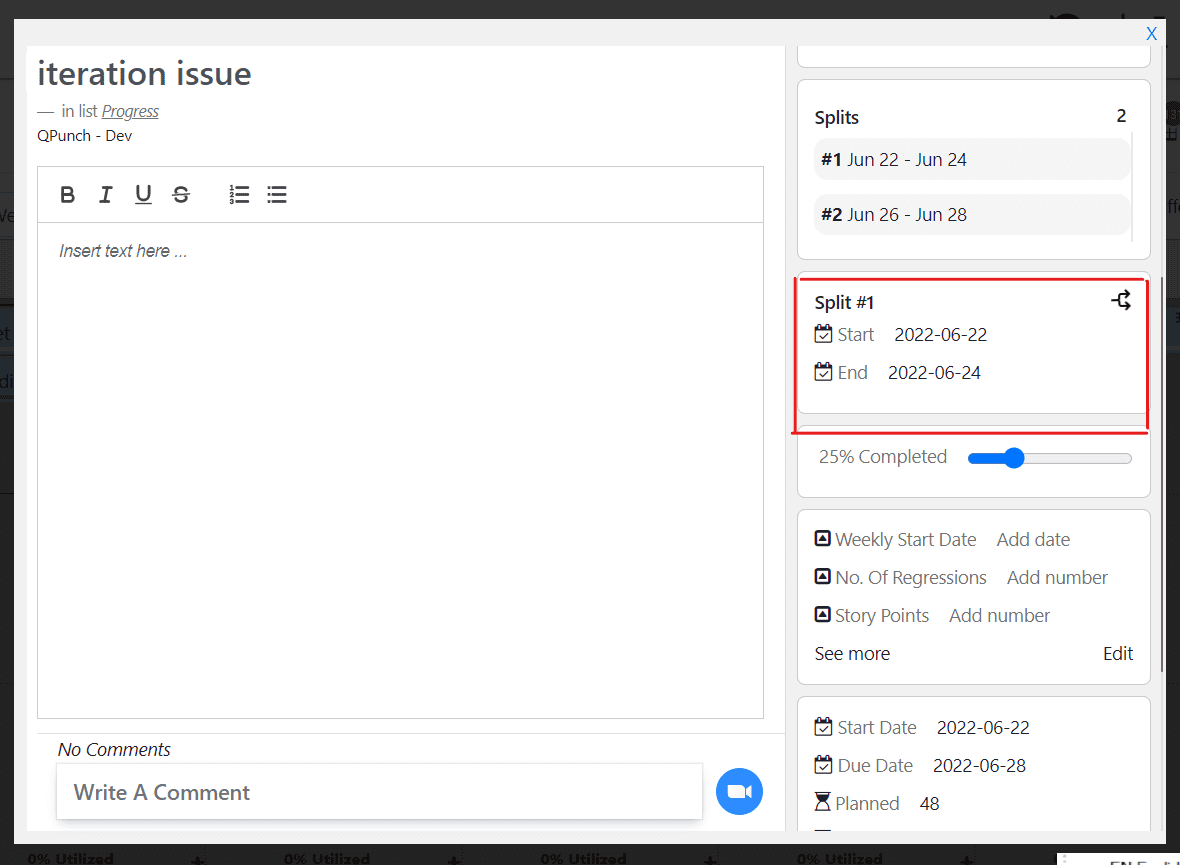
Start and End dates of the Split#1 is editable.
We can increase/decrease the time interval between Split#1 and Split#2 by drag and drop in the calendar view. Also, if we drag and drop any of the split task to a different assignee another split task will be moved automatically to that same assignee.
In Gantt View:
Step 1: Navigate to the Gantt view.
From home Dashboard:
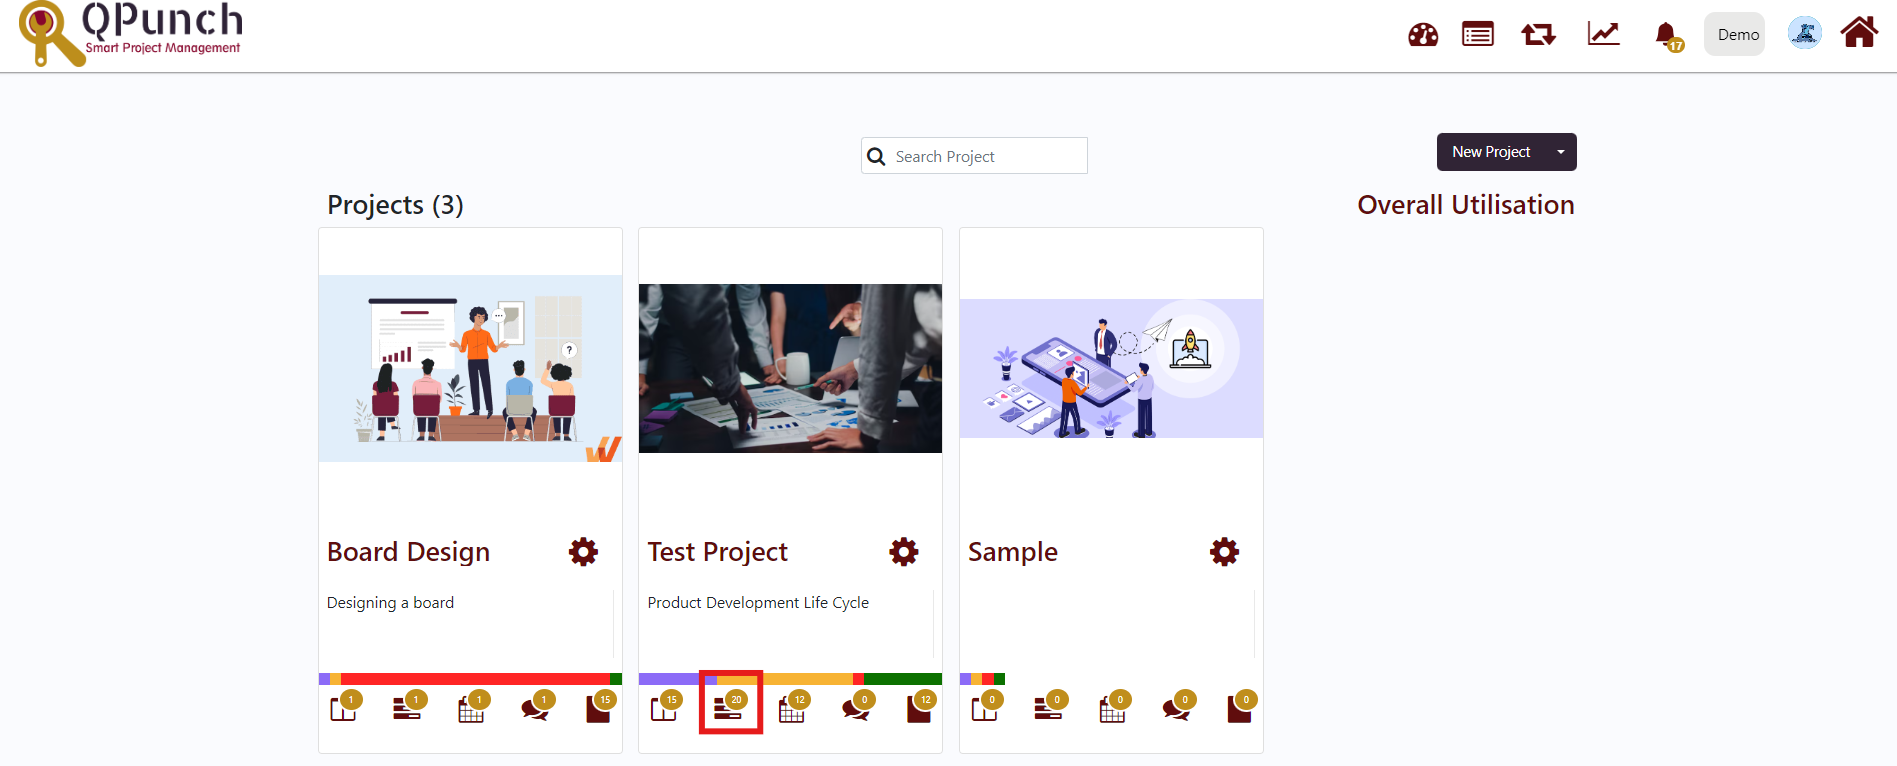
Or
From Kanban Board:

Step 2: To create a split task you can open any of the task in Gantt view and click on the Split icon in the Actions field, follow the same steps as we did in the Kanban board.
In the Gantt view also split tasks will appear separately. All the content of task will be appearing in both split tasks.

If we click on any of the split task, we can identify the split task as its number is mentioned on the right side of the edit task pop-up window. If we change any content in one of the split tasks it will start reflecting in the other one too.
Similar to Calendar view, we can increase/decrease the time interval between Split#1 and Split#2 by drag and drop in the Gantt view also.
Address On Maps
Ready To Get Started with Smart Project Management?
