QPunch provides a comprehensive set of features for managing and updating your Progress Report (weekly status report). This functionality allows users to efficiently track project progress, customize report sections, and leverage integrated tools for enhanced project oversight and reporting. This documentation will guide you through the steps to configure and update your progress report to match your project’s specific needs and workflows.
Accessing the Progress Report
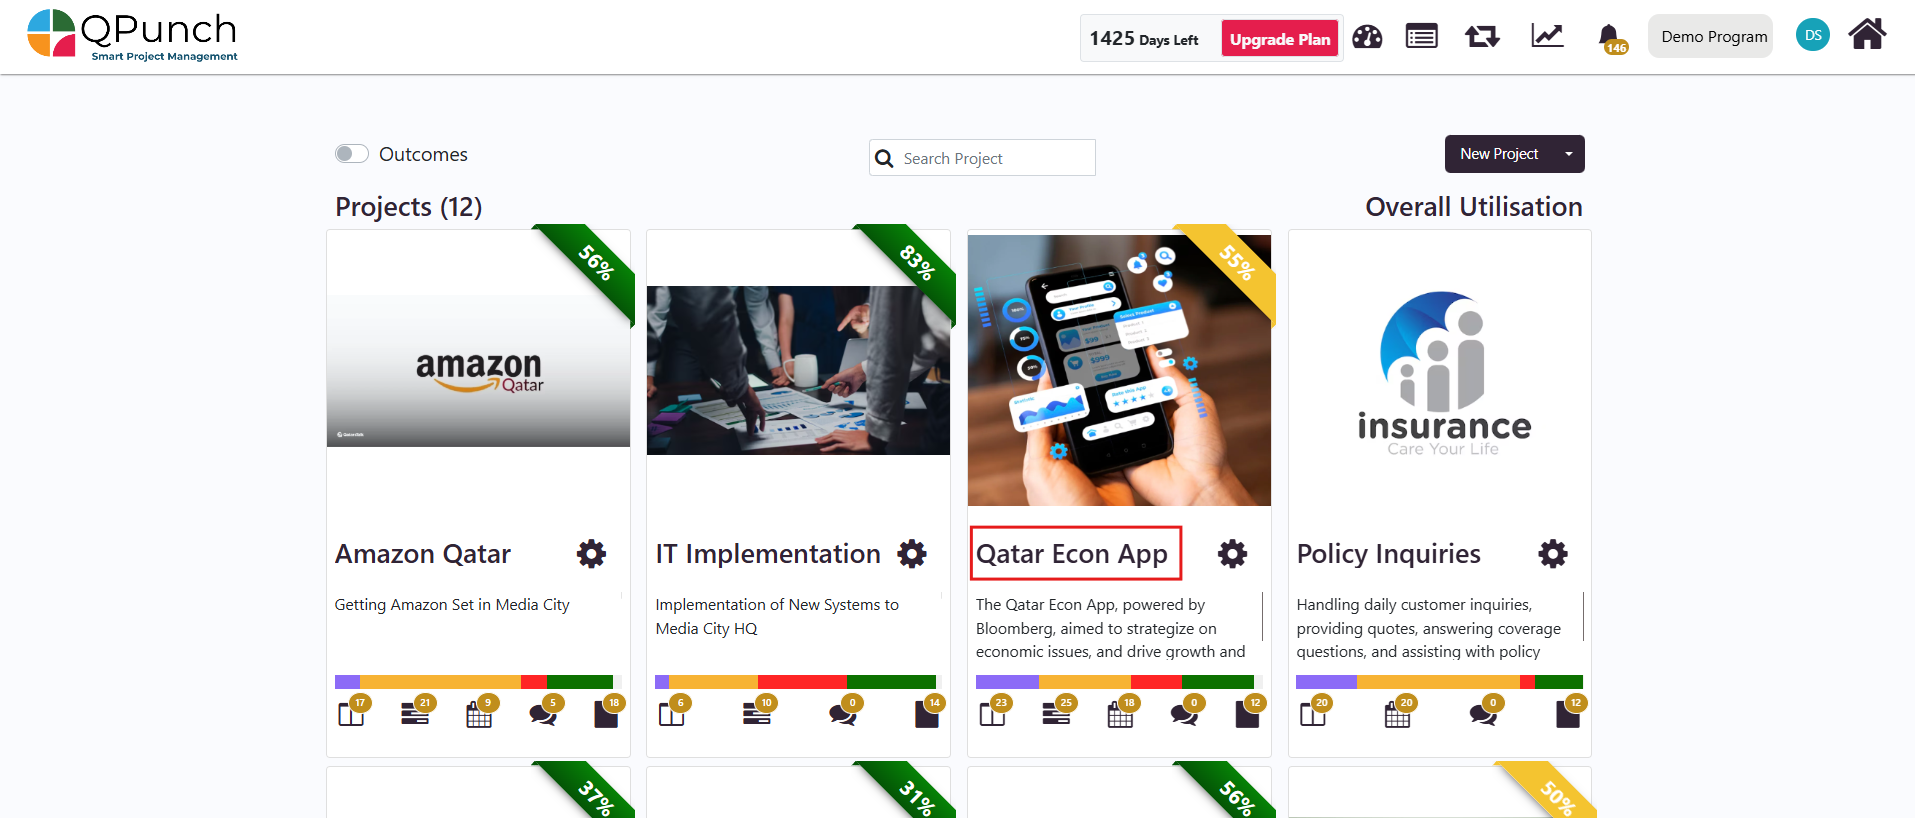
From the home page, click on the project name you wish to access.
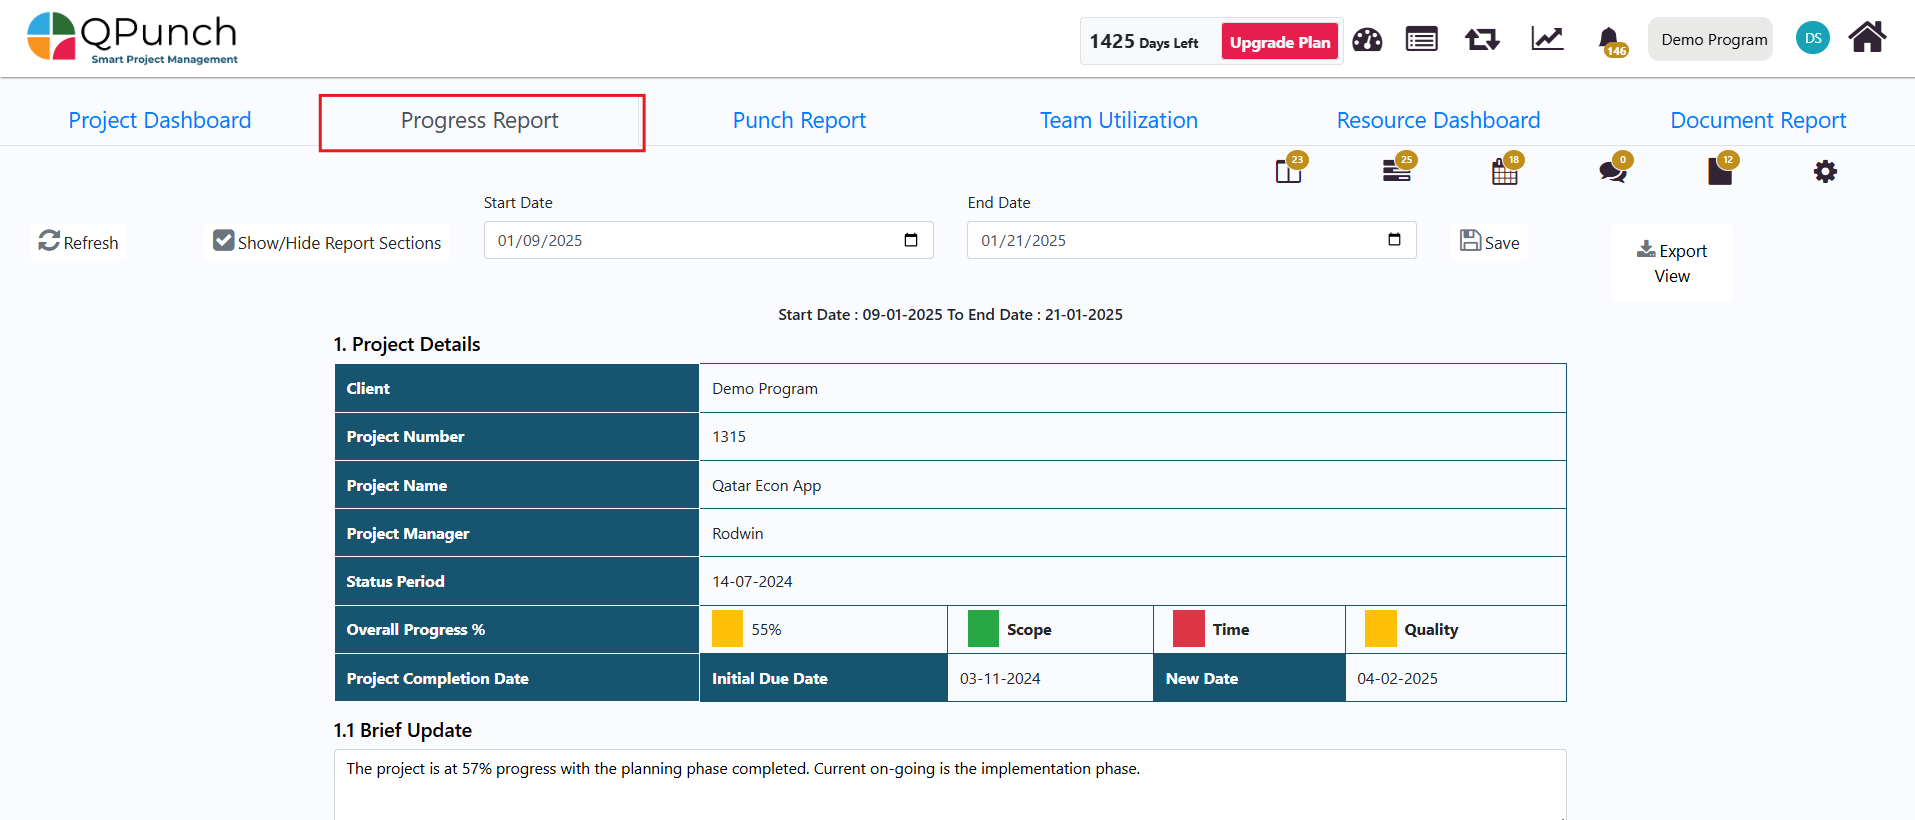
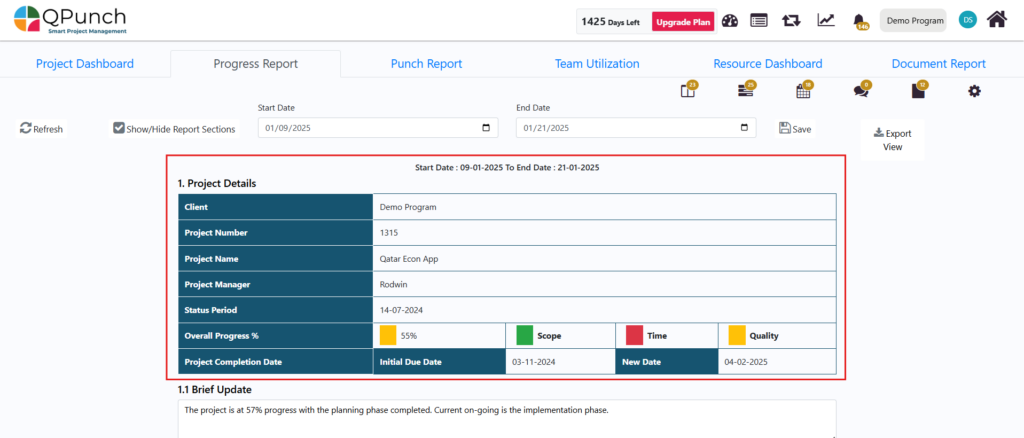
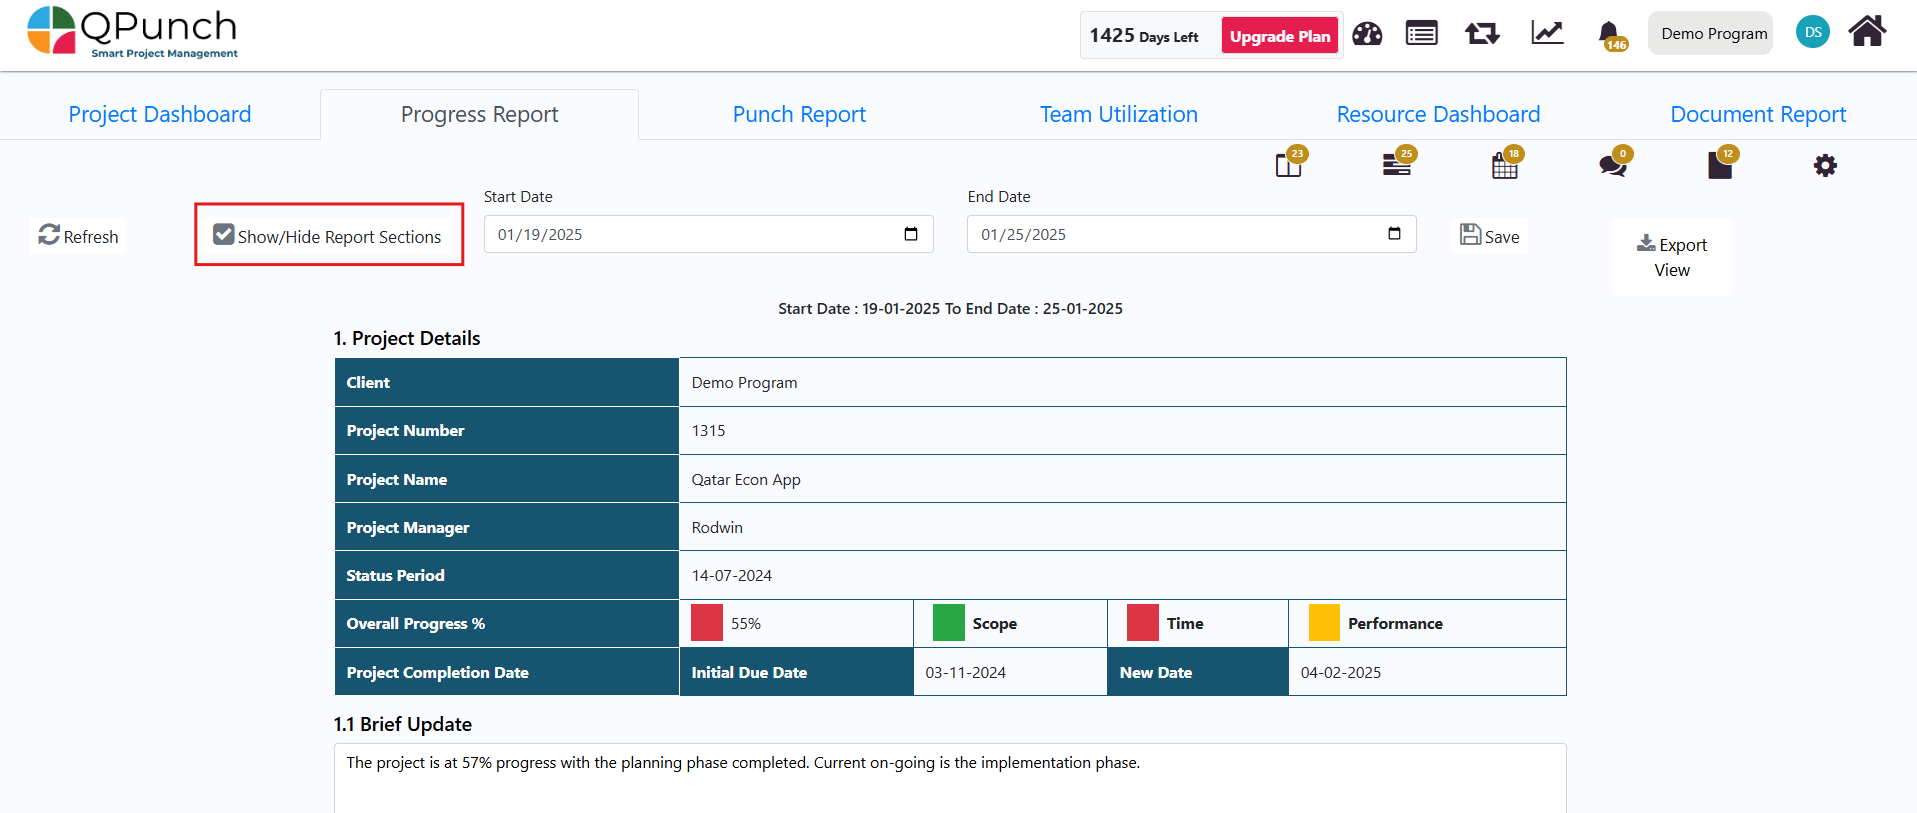
2. Once inside the project dashboard, click on the Progress Report tab.
3. You can edit the start and end dates of the progress report directly in the Progress Report tab to reflect the desired reporting period.
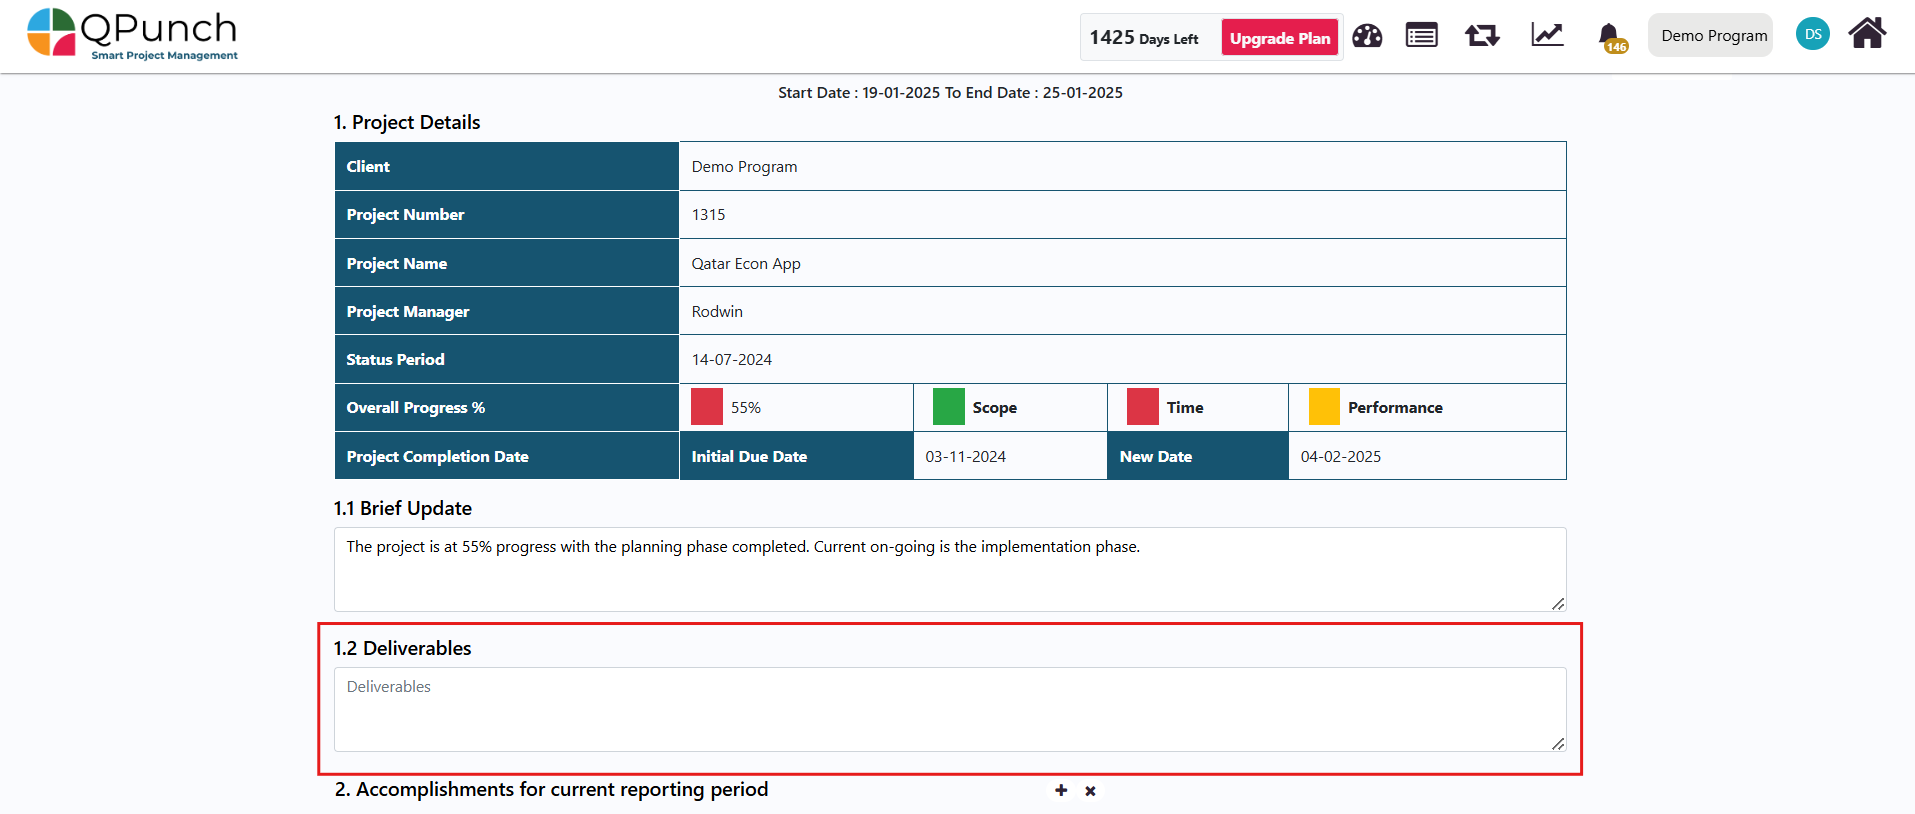
1. Project Details & Risk/Issue Classifications
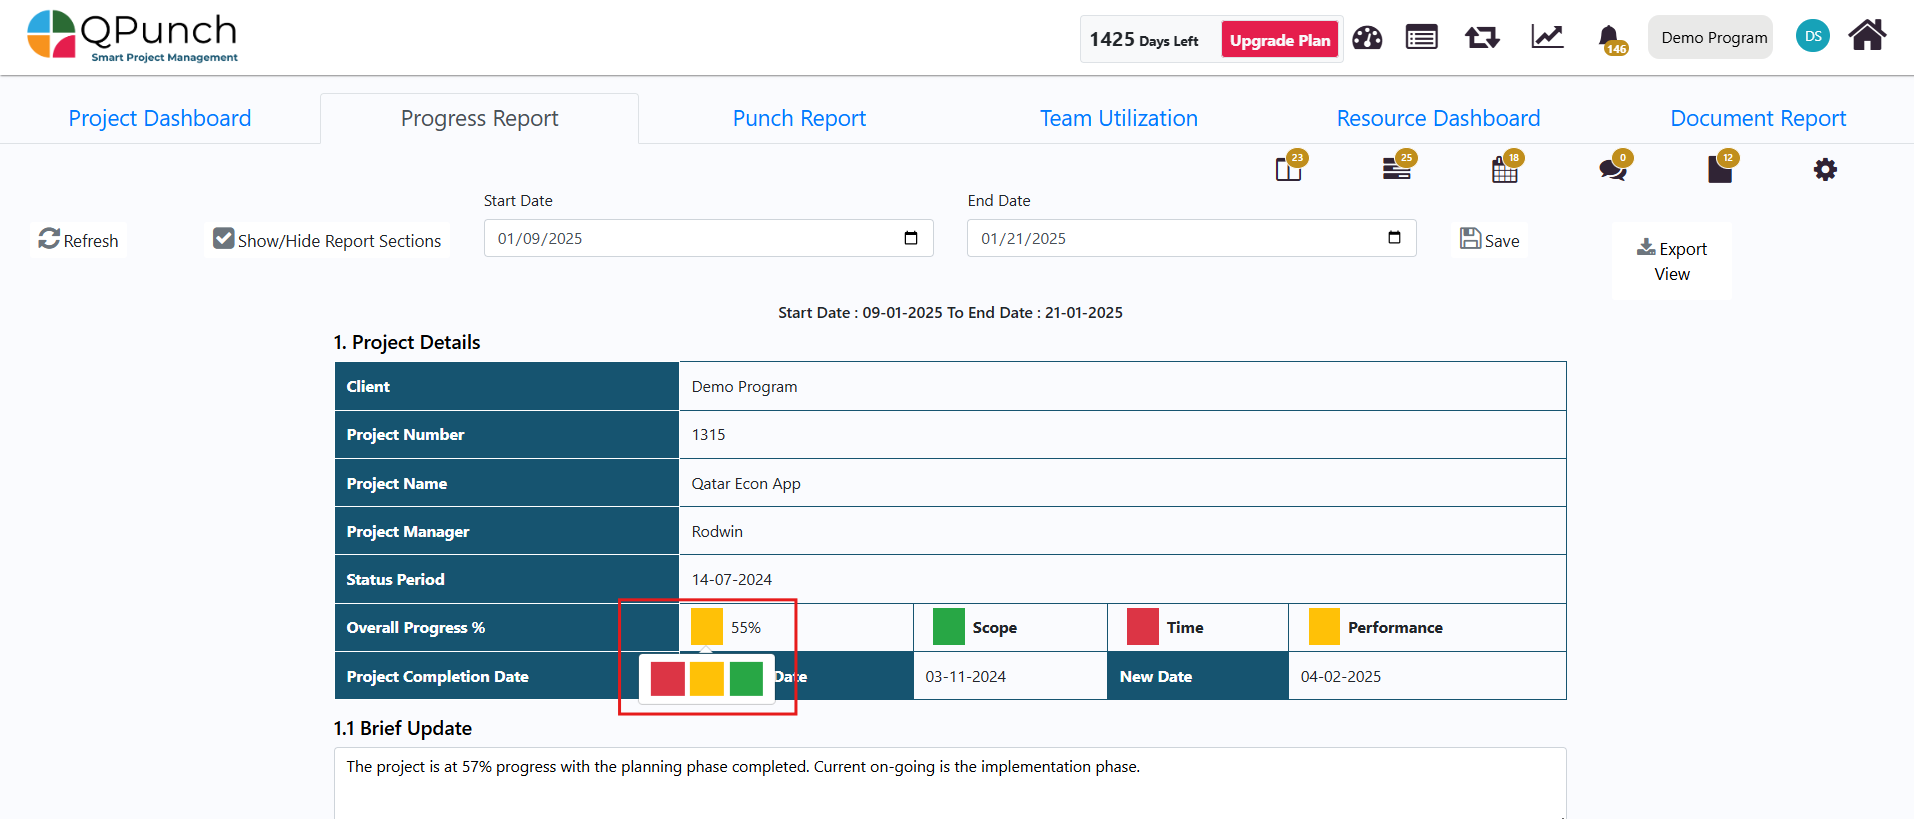
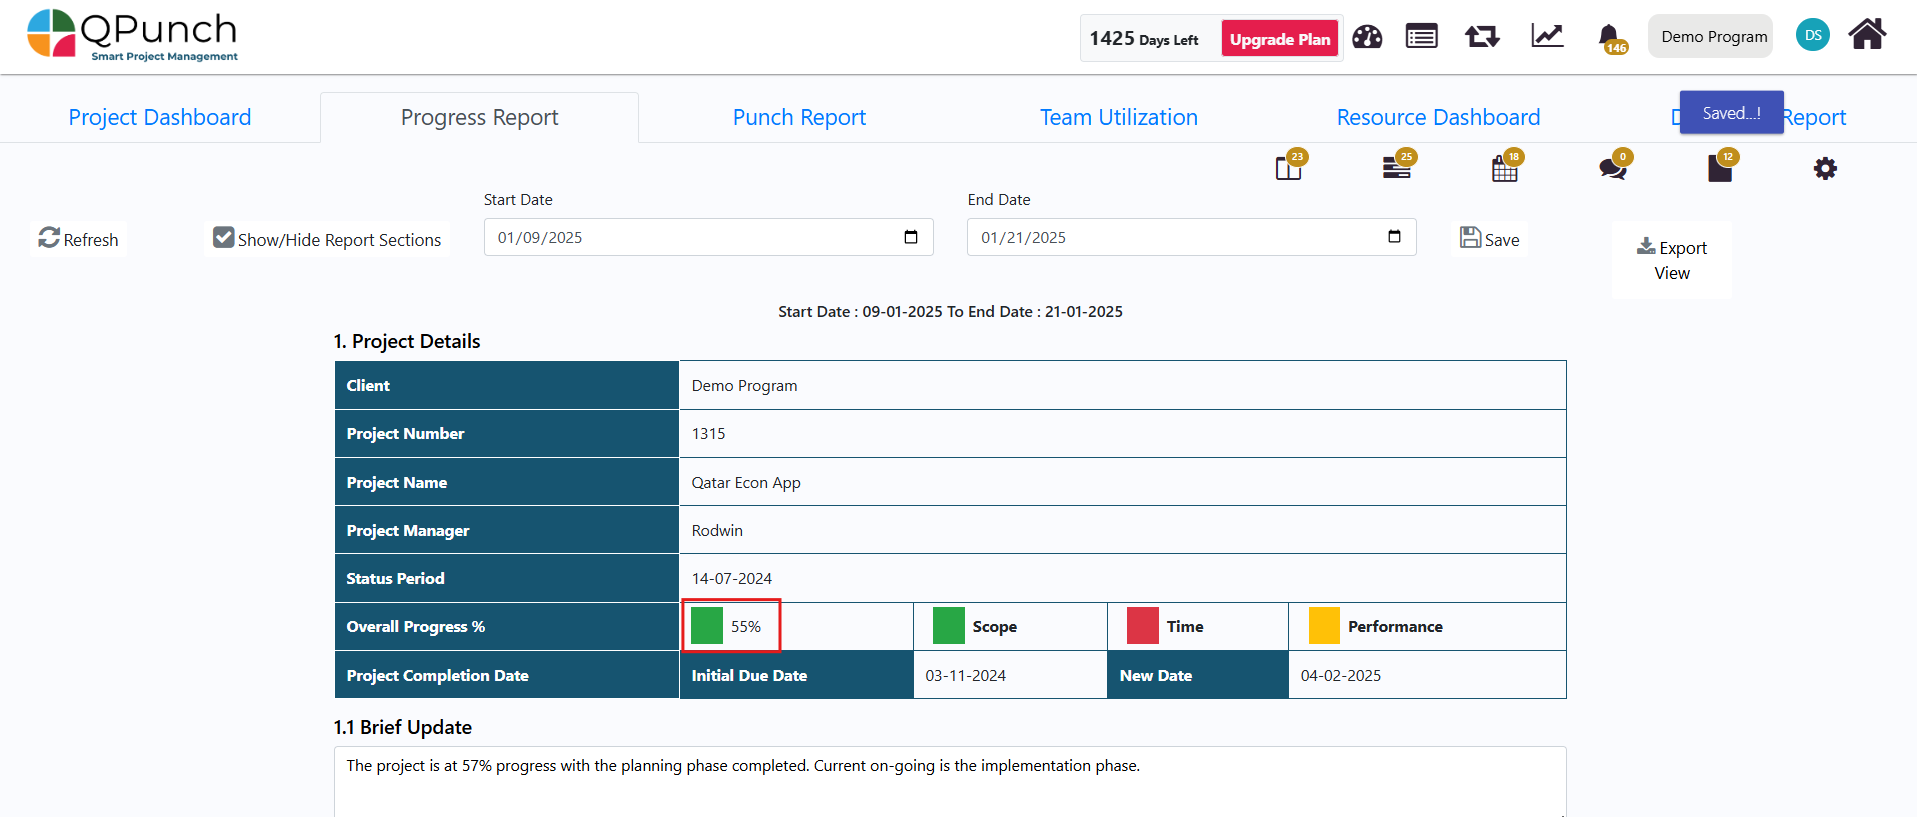
The Project Details section of the progress report displays key project information such as the project name, number, client, and project manager. It also shows important metrics like the overall progress percentage, budget and actual cost, and updated project completion dates. Additionally, it includes the RAG (Risk, Amber, Green) status, reflecting the project’s current health based on risk classifications and outstanding issue tasks.
Risk/Issue Classifications (RAG)
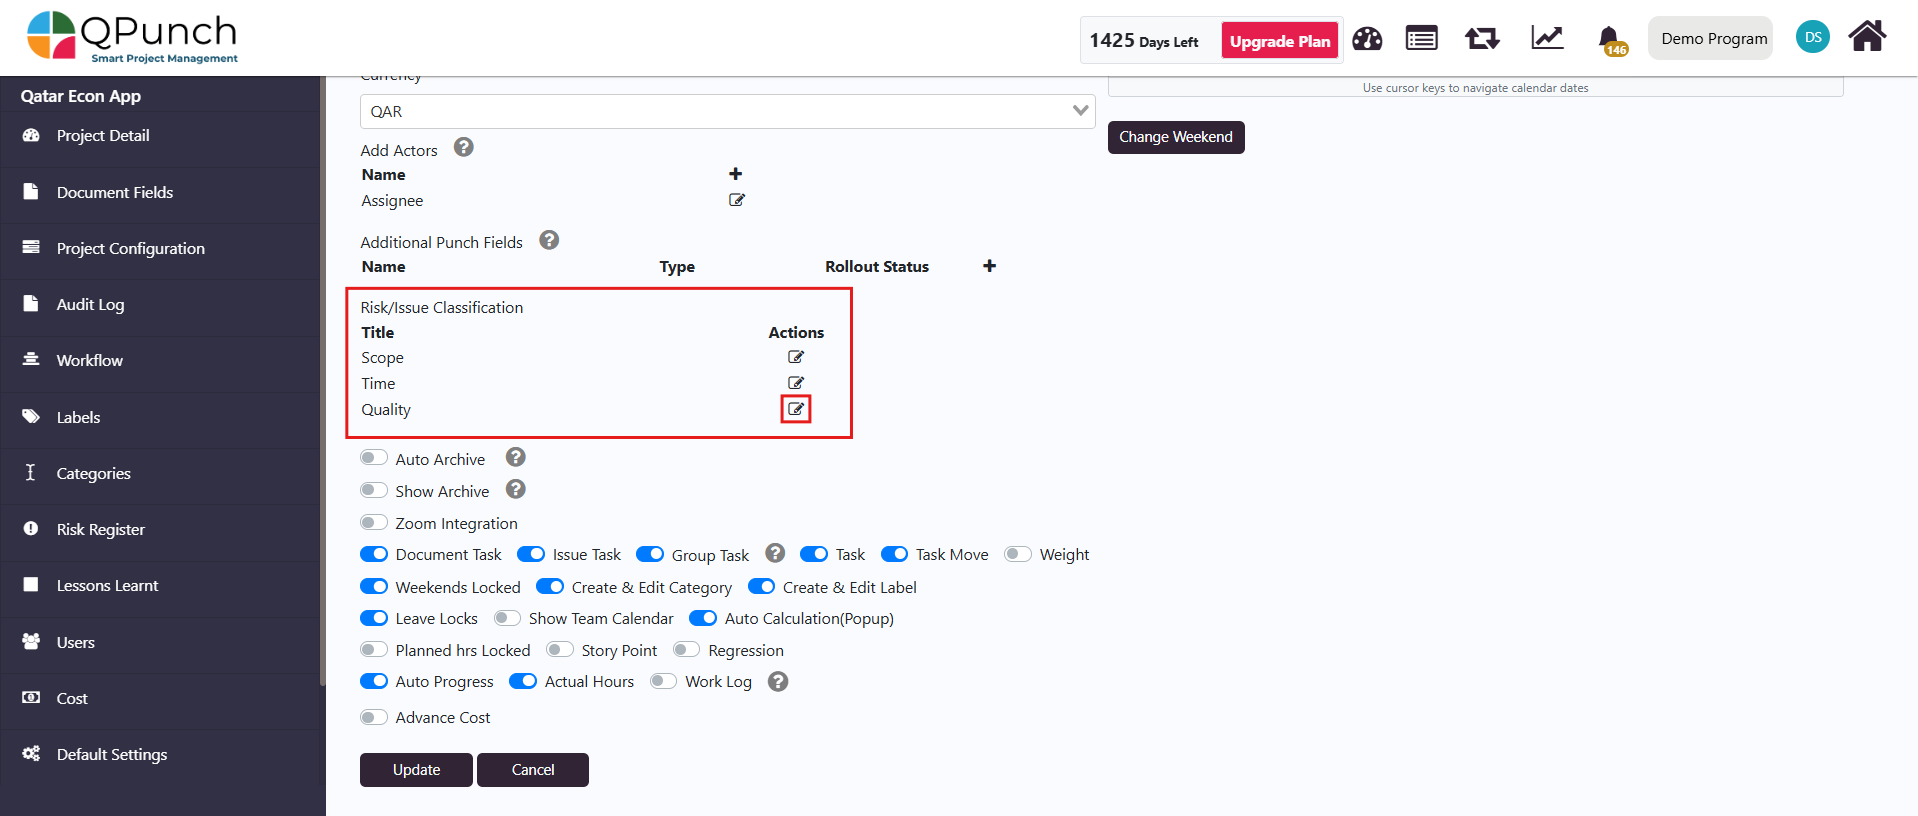
Scope, Time, Quality are the default risk and issue classifications. To customize these:
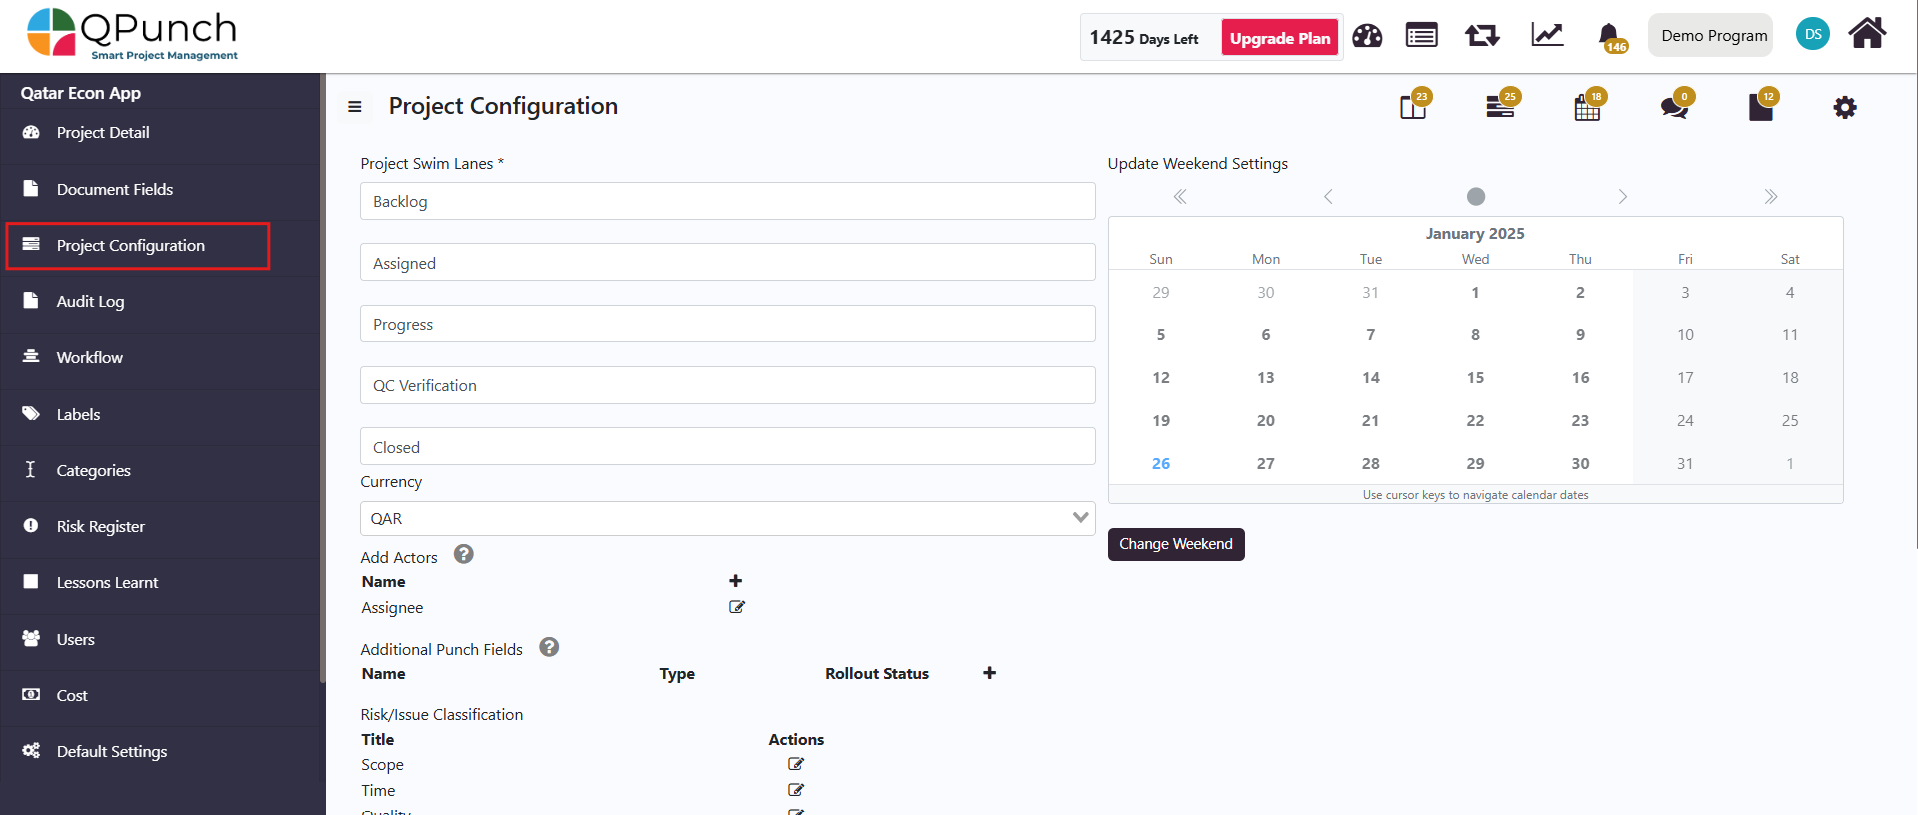
Navigate to Project Settings of the project.
2. In the side menu, go to Project Configuration.
3. Scroll to the Risk/Issue Classification area.
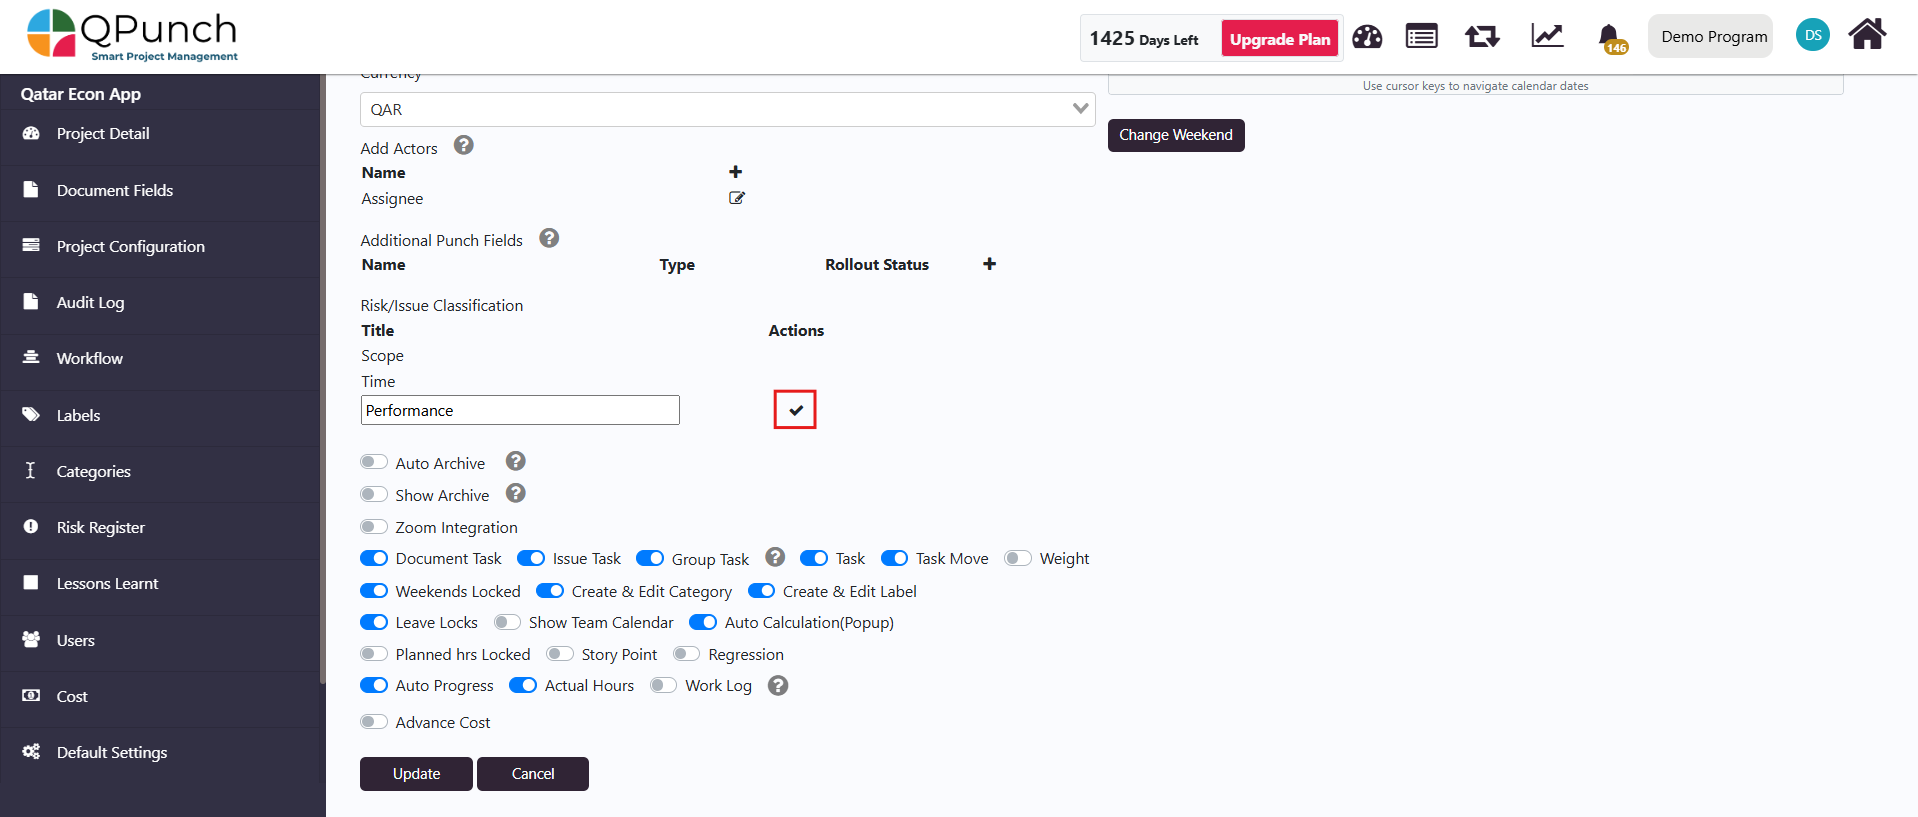
4. Click the edit icon next to each classification to rename them, then hit the check mark once done.
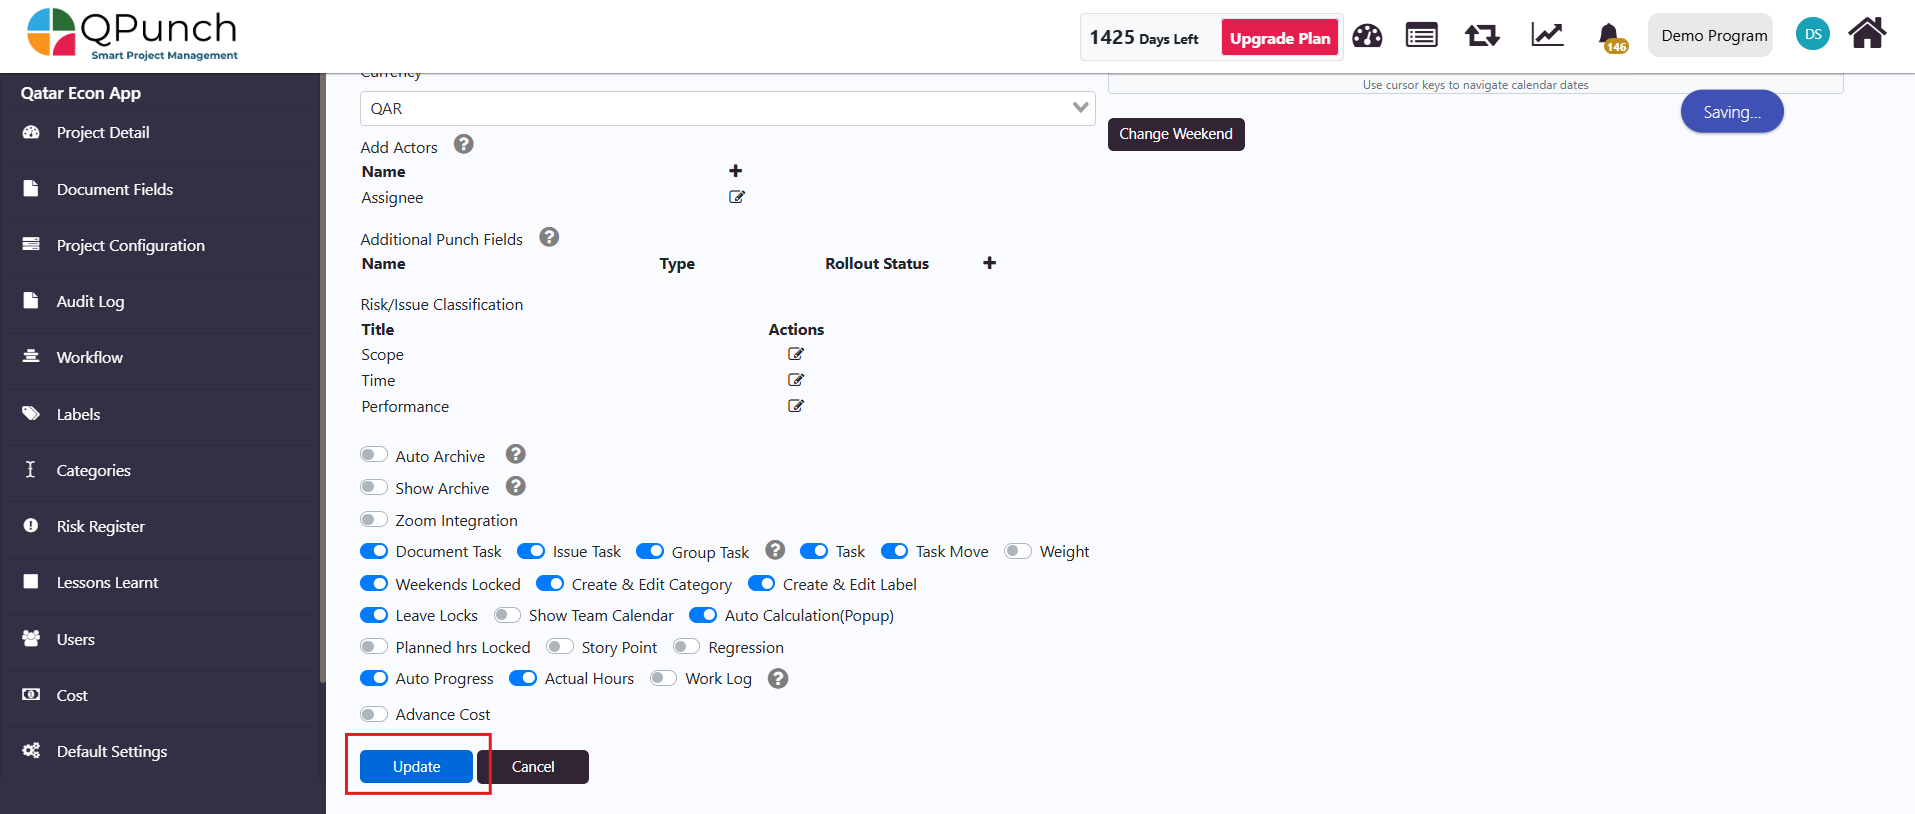
5. Once edited, click Update to save your changes.
Updating Overall Progress Color (RAG):
To change the overall progress color (RAG) that reflects the status of the three classifications, follow these steps:
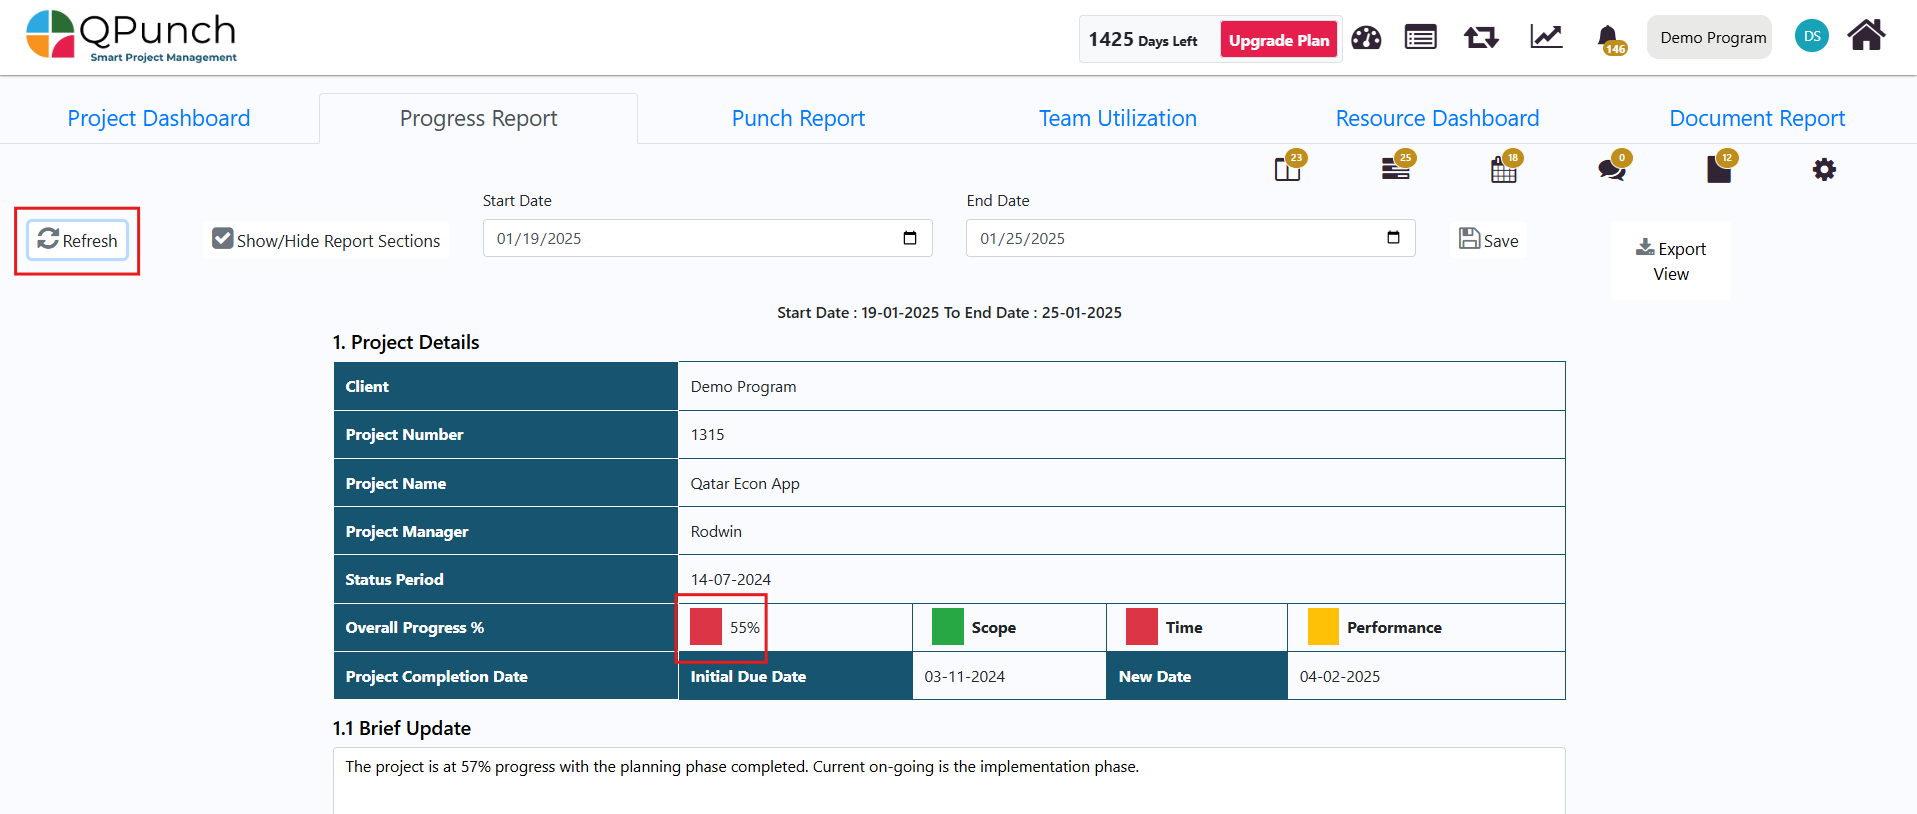
Next to the overall progress percentage, click on the color icon. This icon shows the status of the combined classifications, as well as the budget status.
Select from the available options: Red, Amber, or Green to update the overall progress color.
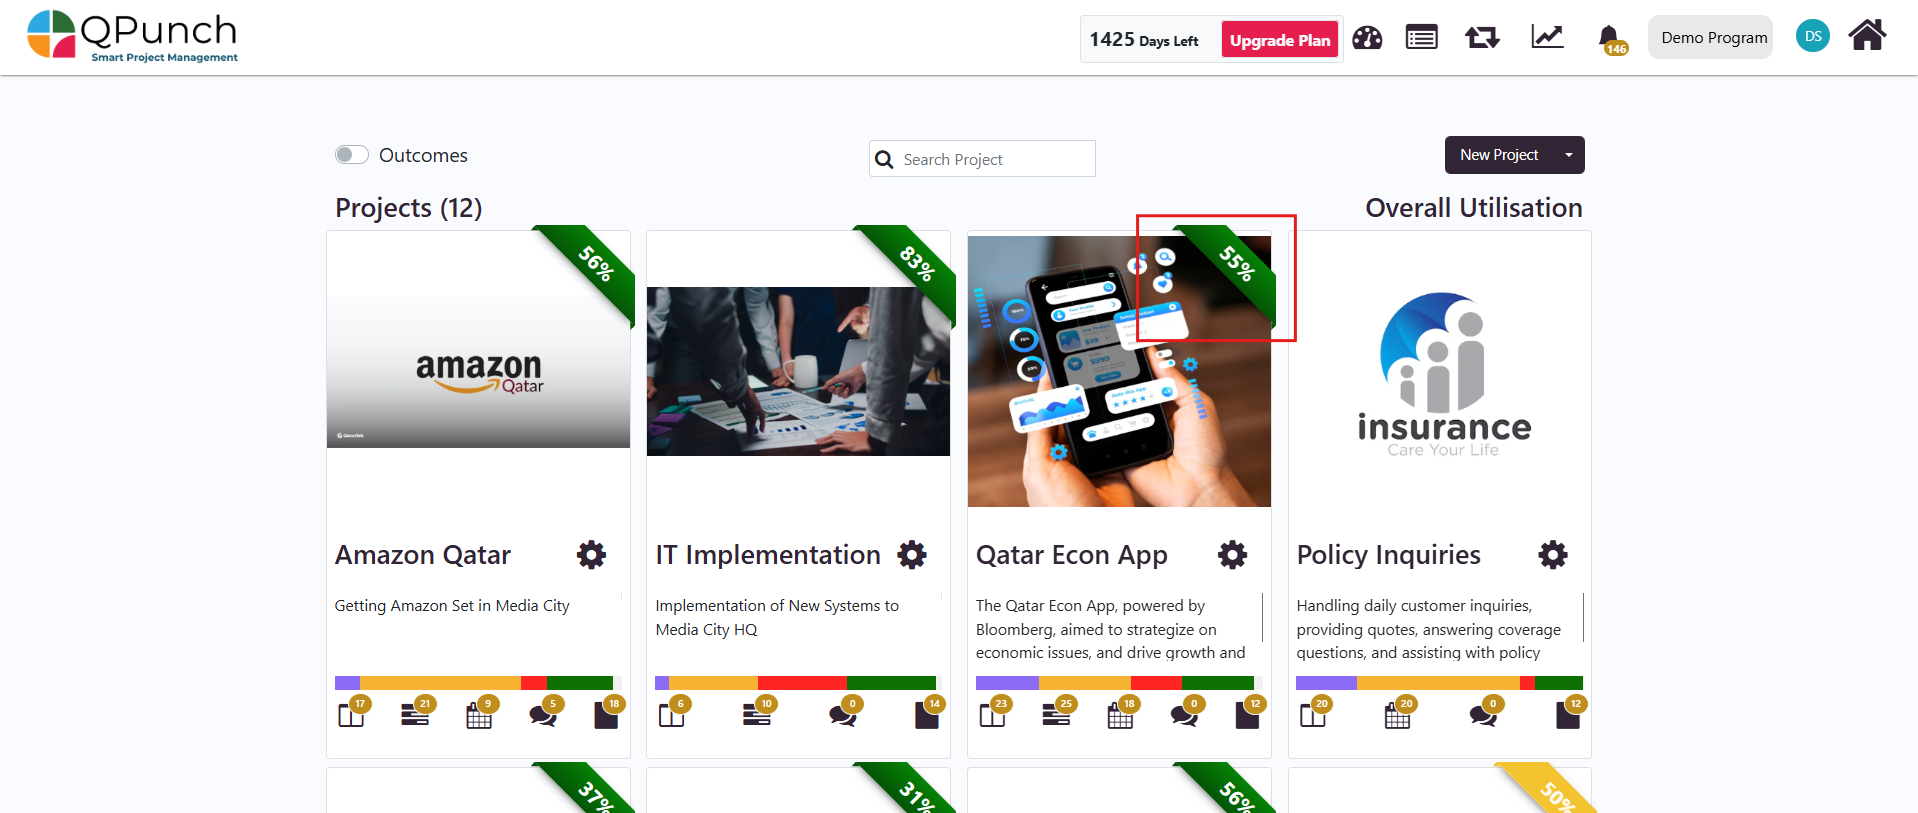
The new color will be reflected both in the progress report itself and in the ribbon on the project on the home page showing the project’s overall progress percentage.
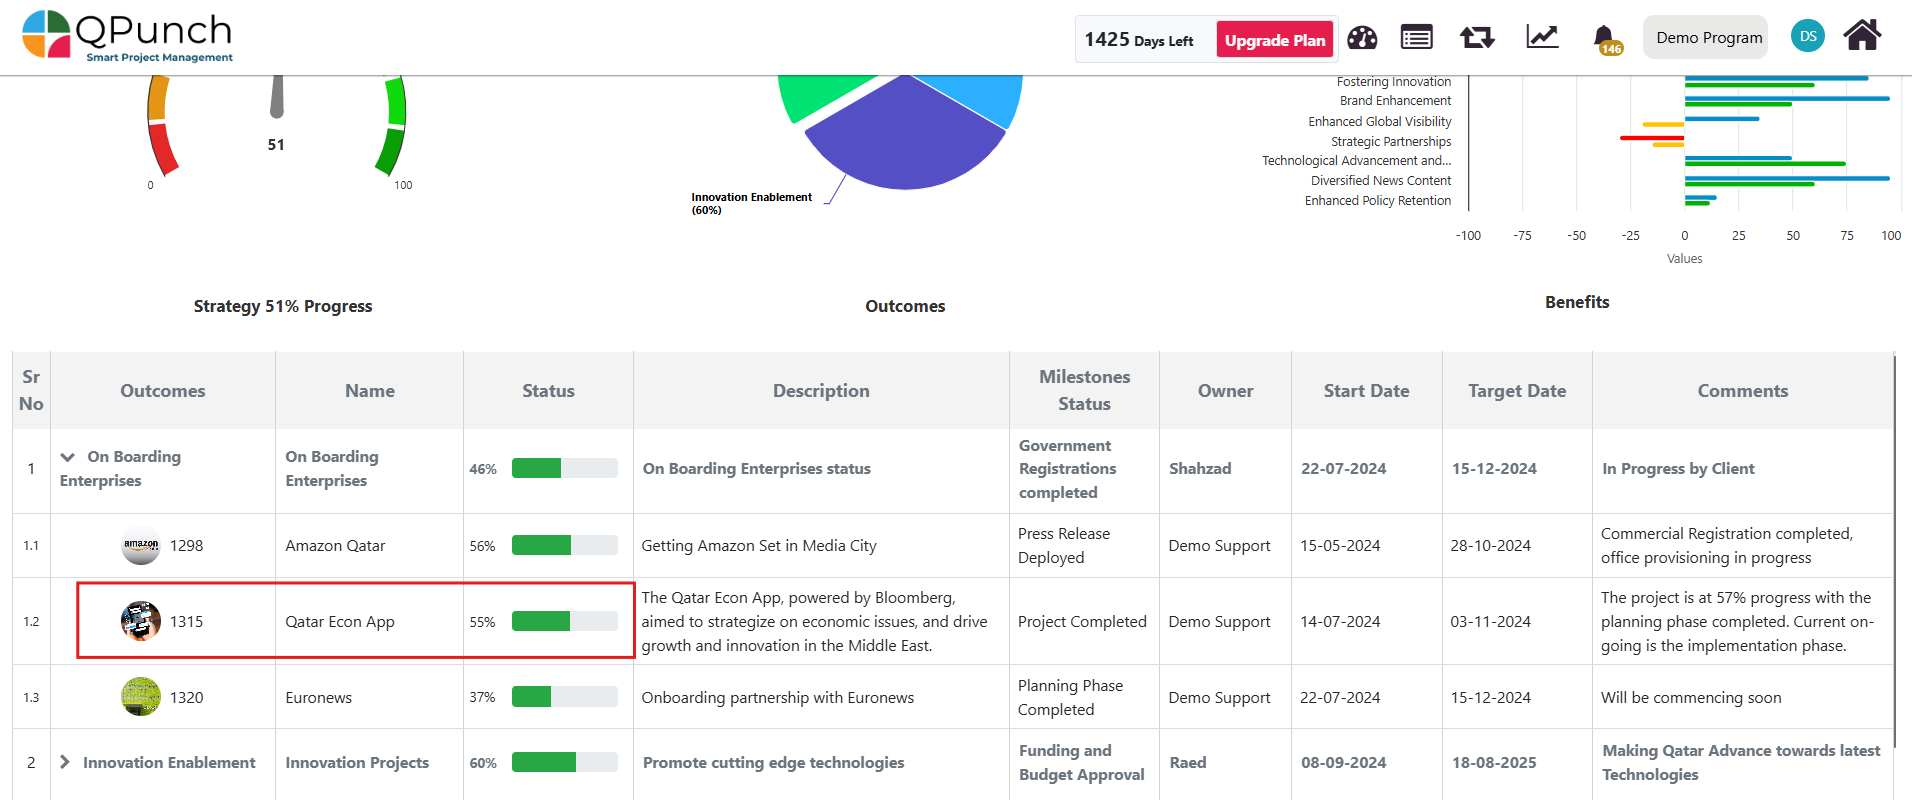
The updated RAG color will also appear in the Exec Report Table.
6. To revert to the original color logic, click on the refresh button at the top of the progress report, next to the Show/Hide Report Sections option.
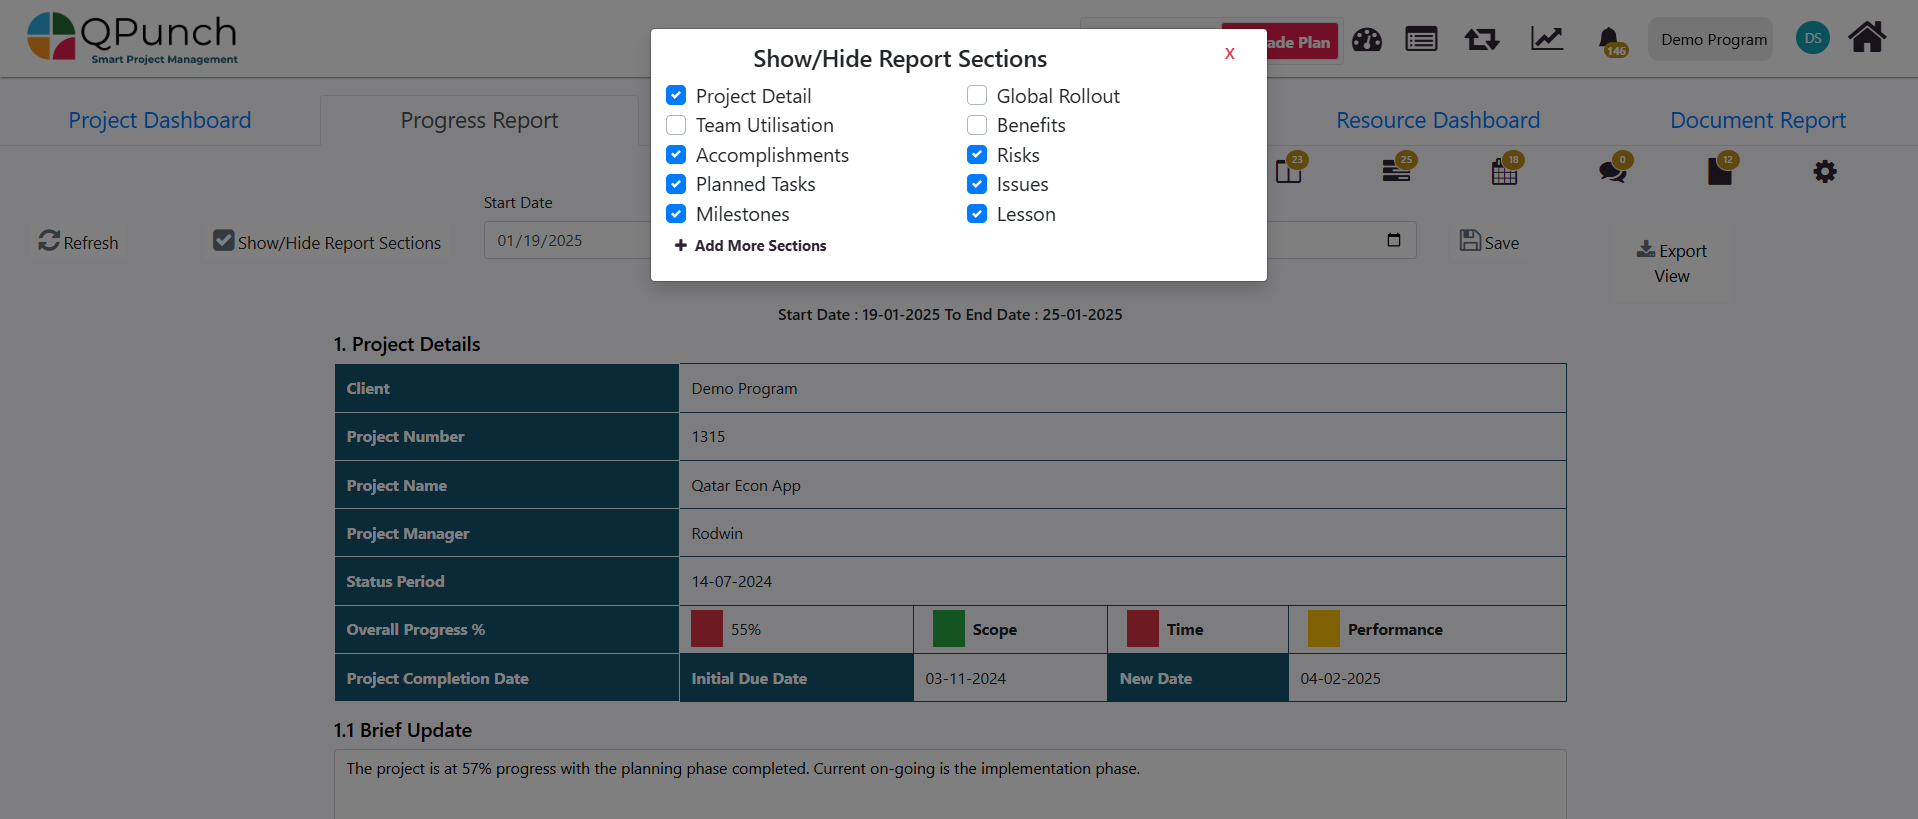
2. Show/ Hide Sections:
Visibility Options:
Click on the Show/Hide Report Sections.
You can check or uncheck boxes to show or hide sections of the report based on your preferences.
Add More Sections:
Additional sections can be added to the report, displayed as description boxes:
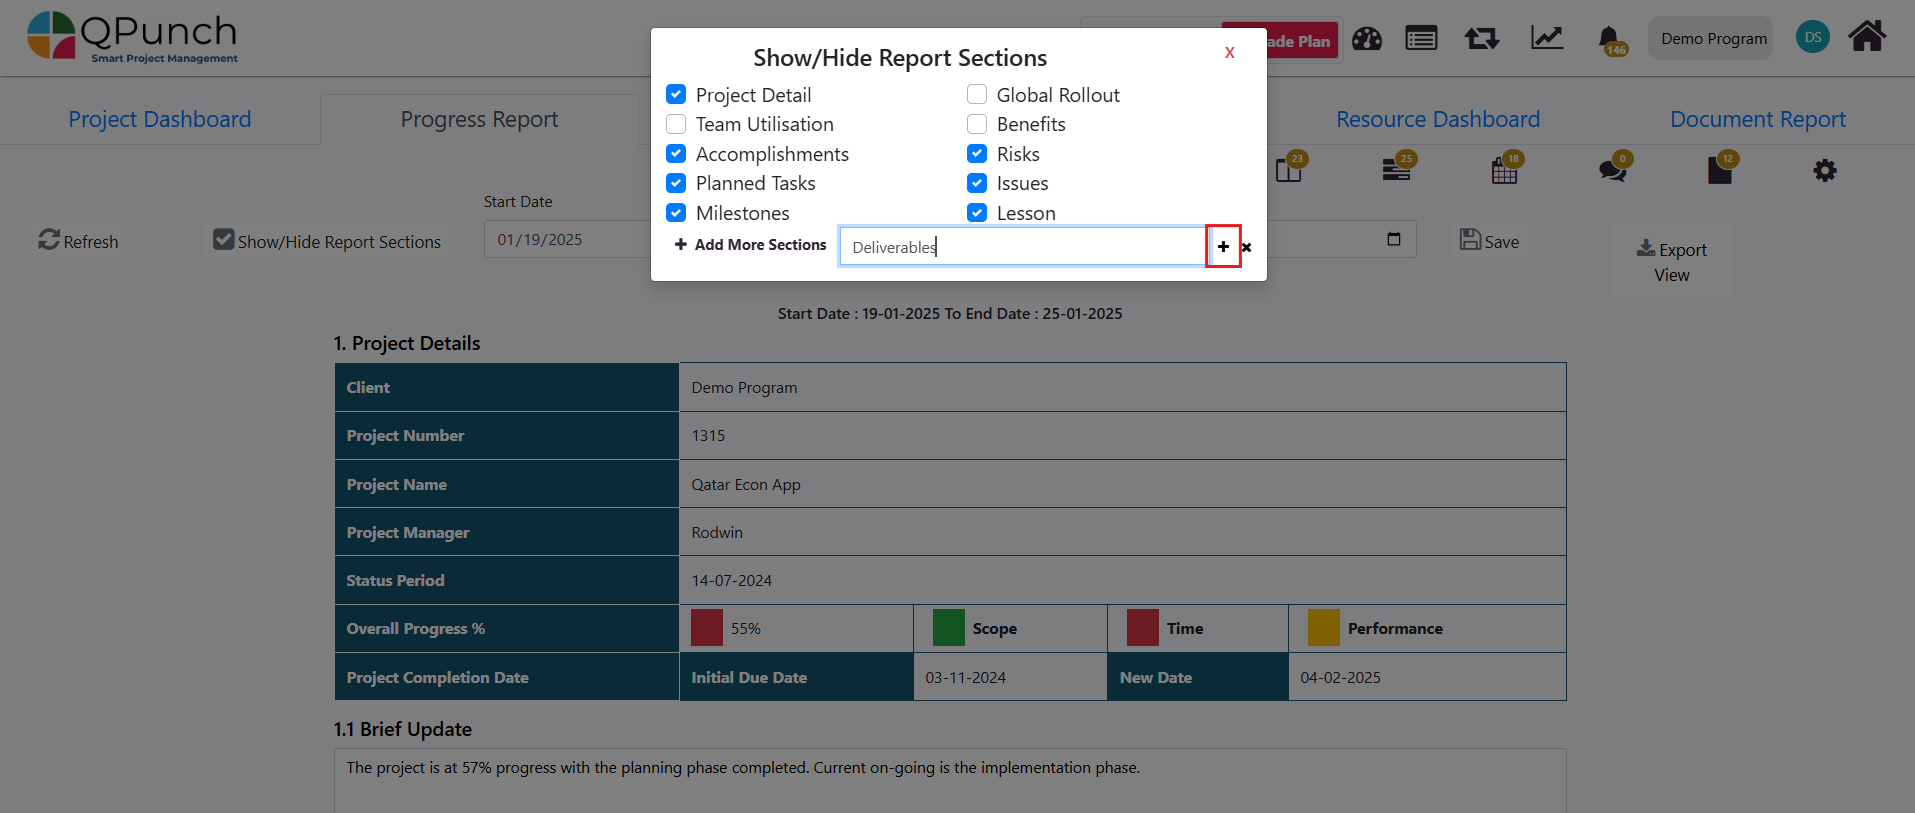
Click on the + Add More Sections button.
2. Name the new section as needed and hit the + icon to add the section to your report.
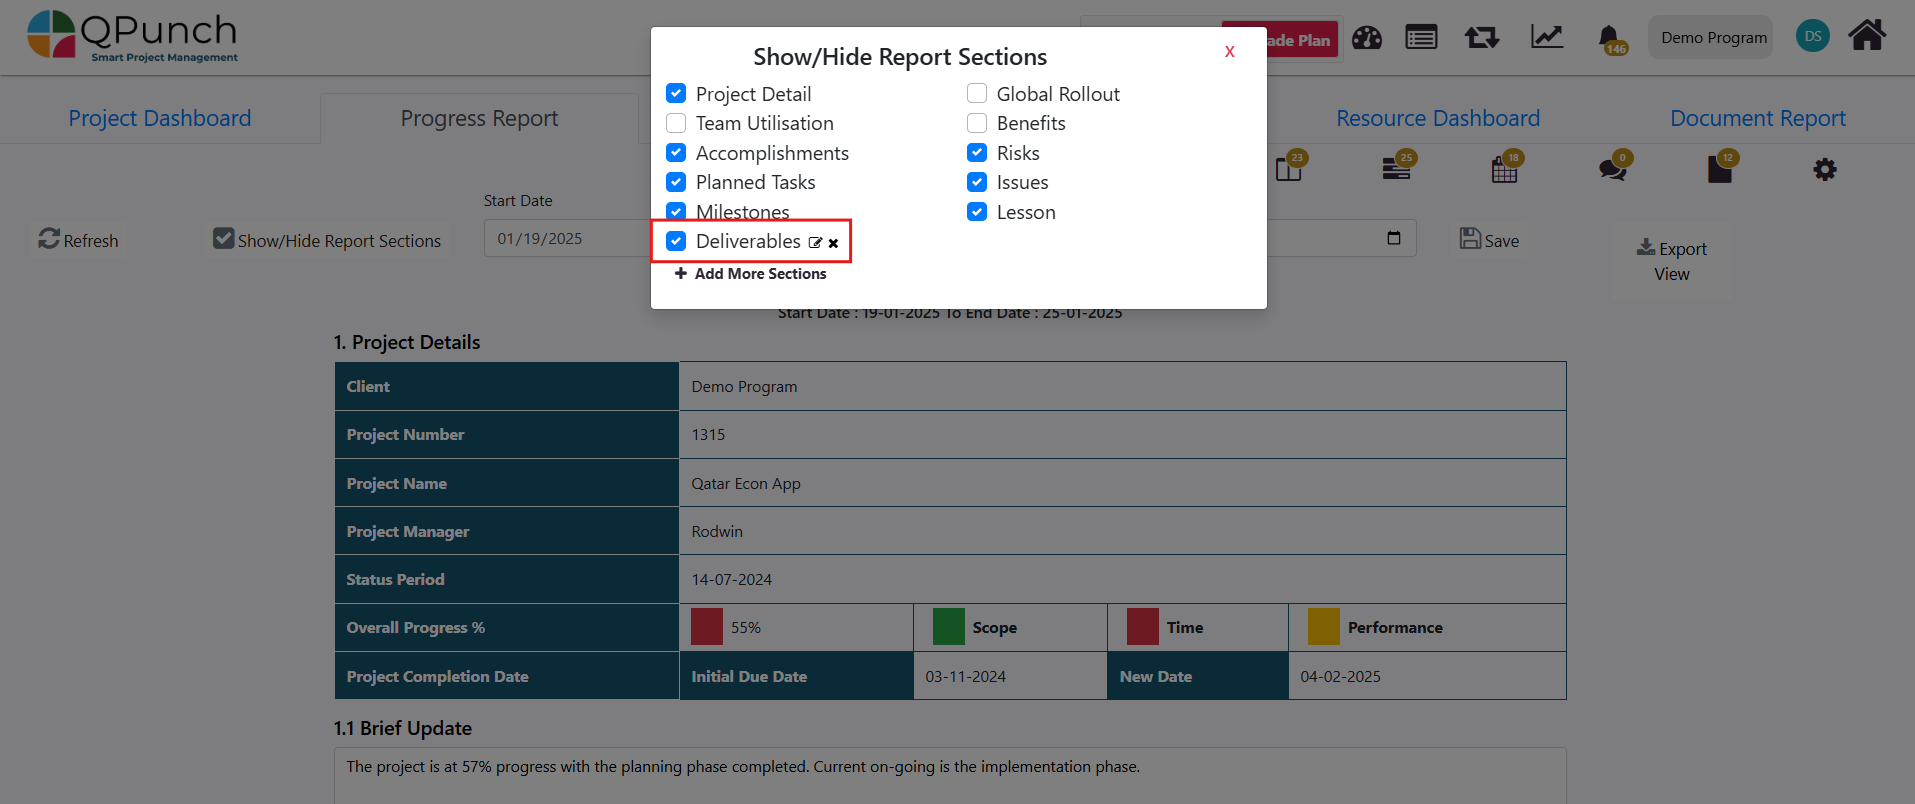
3. To hide a section from the report, simply uncheck the box. You may also delete the section by clicking the xicon next to the section name.
4. The new section appears as a description box/text field that users can now input information to, below the Brief Update section.
Conclusion:
By following these steps, you can effectively access, configure, and customize your Progress Report in QPunch to suit the specific needs of your project. From setting up the project details and managing risk classifications to customizing report sections and progress indicators, QPunch provides flexible tools to keep your project on track.