Create a new Project using a Wizard
Getting Started with New Project Wiz:
Before you begin, sign up for QPunch Smart Project Management tool for free trial. This documentation will help you setup your first project.
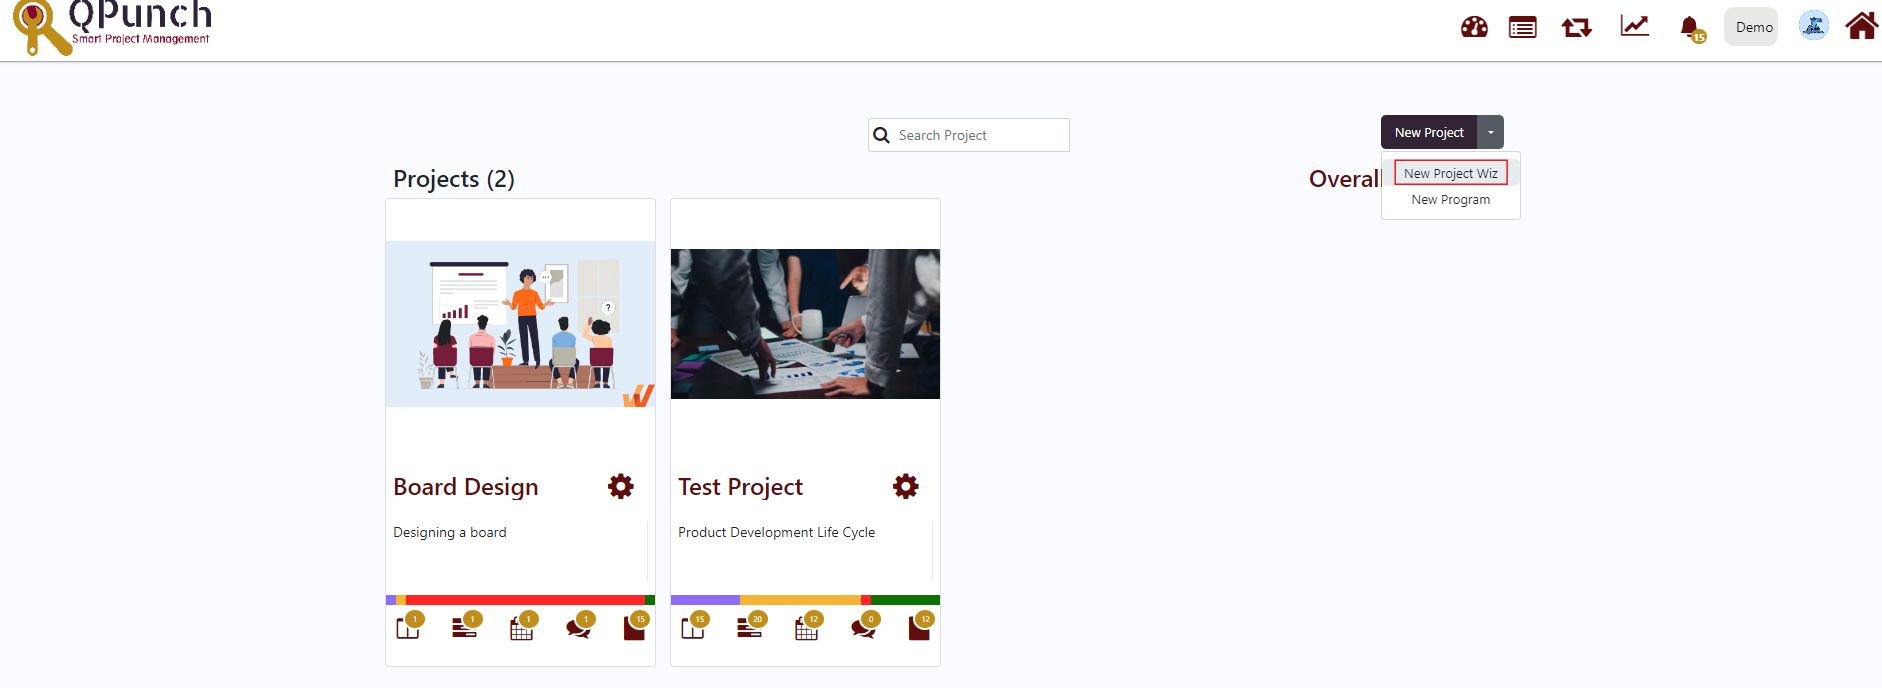
Step 1: Create a New Project
- In the QPunch dashboard, on the right, select dropdown beside the new project.
- Select New Project Wiz
Step 2: Setup Basic Project Details
- Enter your Project Name, Currency, Project Duration, Budget, and Project Description as per the requirement.
- Project image is optional. Either you can update an image now or later on.
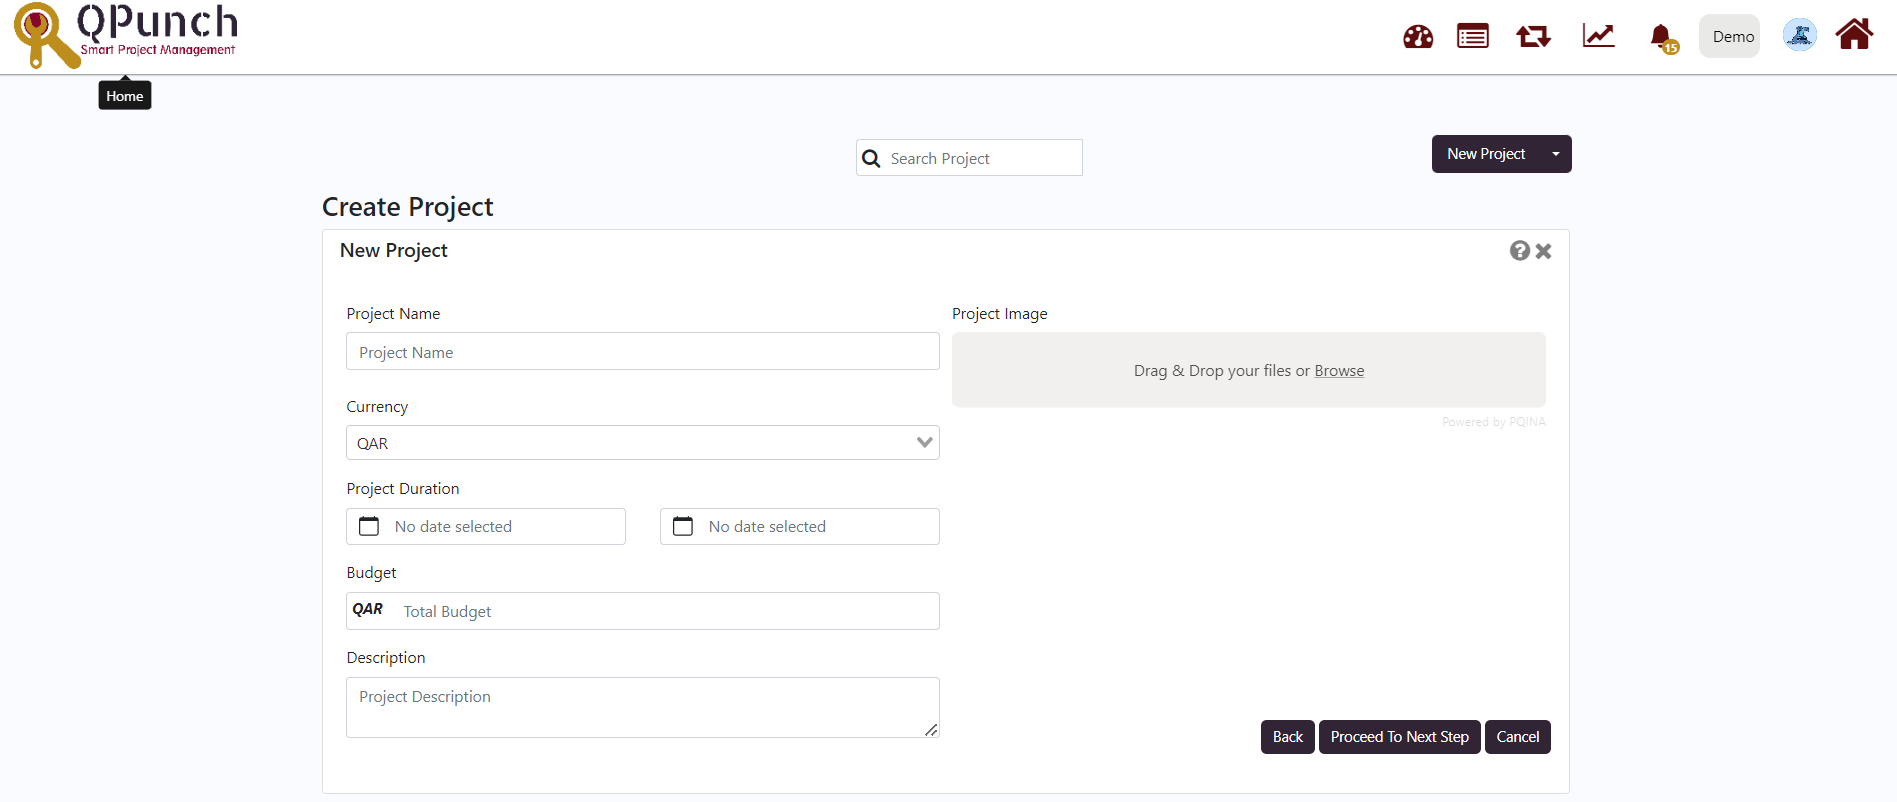
- Select “Proceed to Next Step” if you would like to continue setup the project.
Step 3: Pick up labels and categories
Further steps are optional to make your Punch/task creation work flow more user friendly.
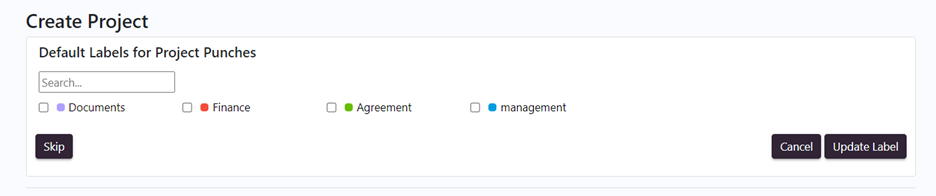
- This will provide you the list of labels which are already present in subscription level. You can select the labels which are required for your project.
- If you want to add new labels, enter the label title in the search bar
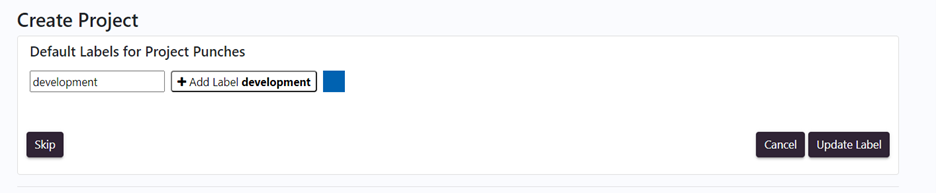
For e.g. : If we need to add a new label “Development”, enter the name in search bar, if the duplicate doesn’t exist it will give you option to add label. Along with that we can choose the colour for label by selecting the colour tile icon.
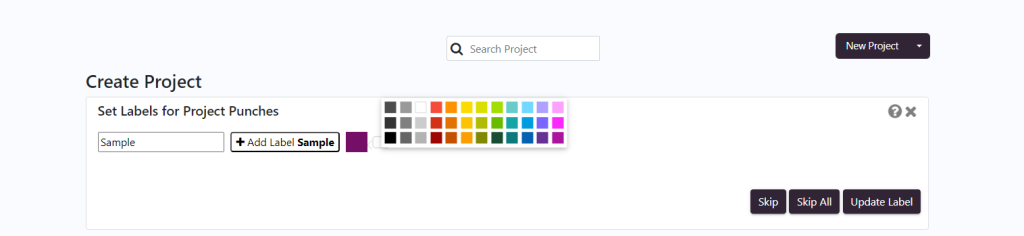
- Select (+) add label icon to add the label in the list.
- Setting up default labels are optional, if you would like to do this step later, select Skip button. Otherwise you can select the labels required for your project from the list and select “Update Label” button.
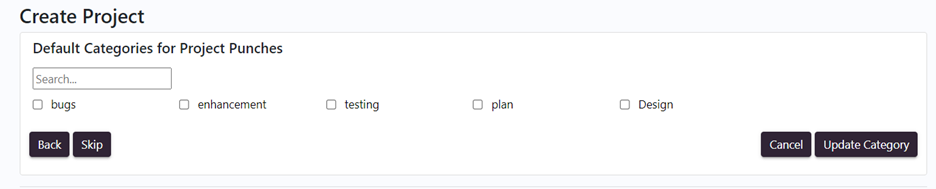
- After selecting “update label” / skip it will directly take you to the default categories page.
- Similar to label, in this you can select the categories which are required or otherwise you can enter a new category in the search bar
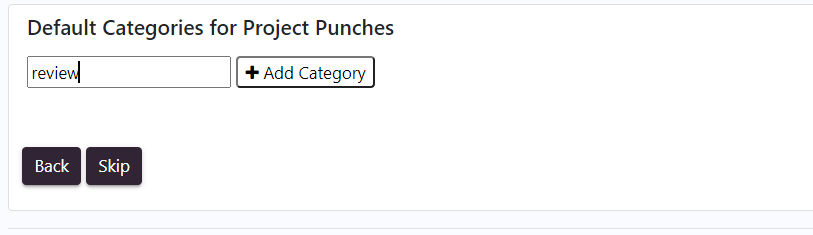
- Select (+) add Category icon to add the category in the list.
- Setting up default categories are also optional, if you would like to do this step later, we can continue by selecting skip button. Also, if you want to go back and make any further changes in the previous page select back button. Otherwise you can select the categories for your project from the list and select “update Category” button.
Step 4: Select Users
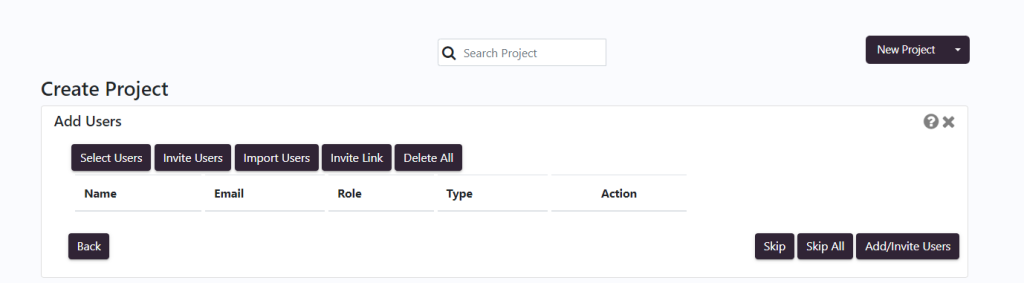
There are five tabs provided to add users in the new project.
- Select Users
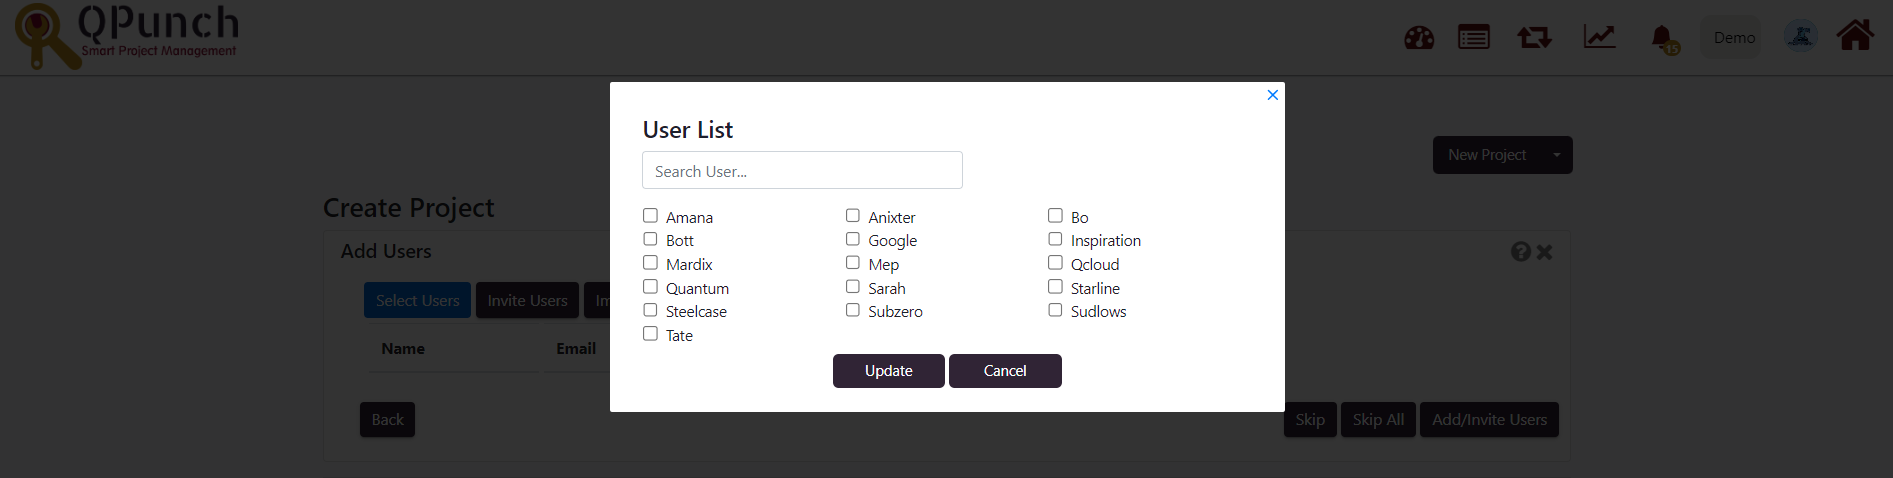
Click on select users if there are users already present in your subscription. Select the users you would like to add in the project and hit update button.
- Invite Users
If there are no users present in your subscription or if you would like to add any new user select Invite Users.
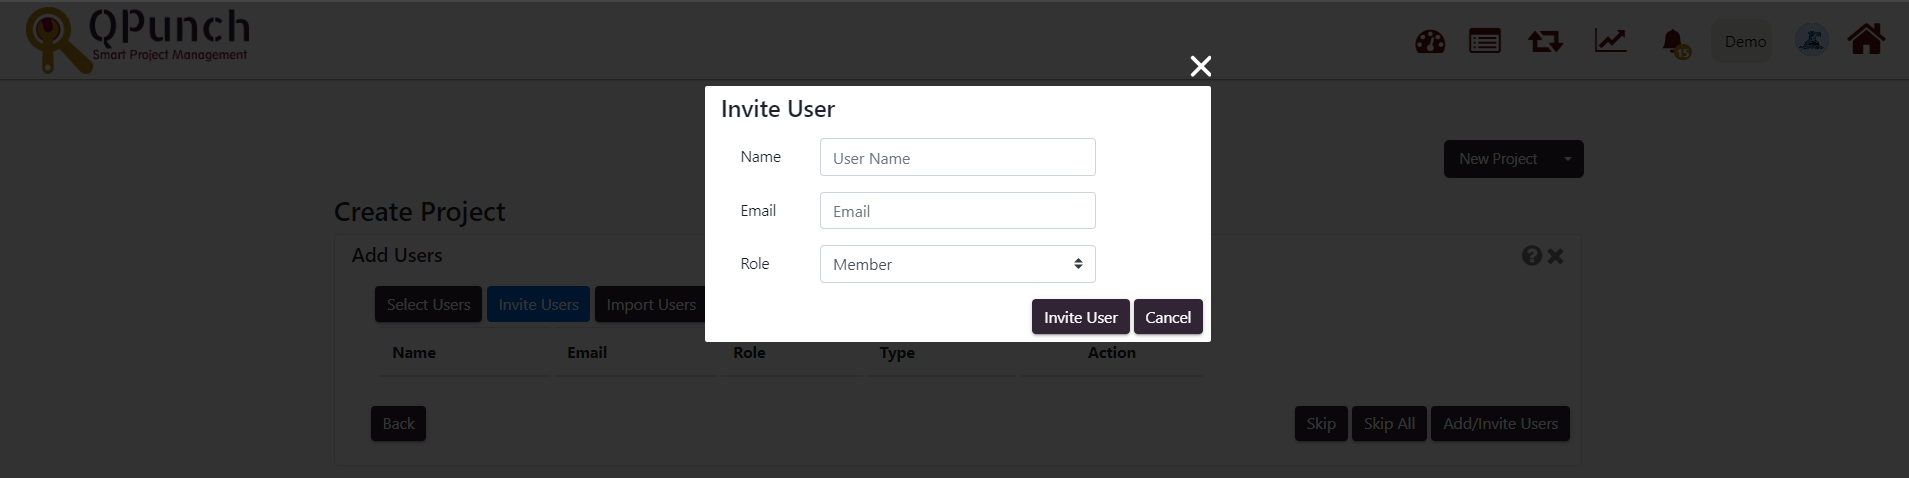
Enter the name email and select any role for the user and hit Invite user button.
- Import User
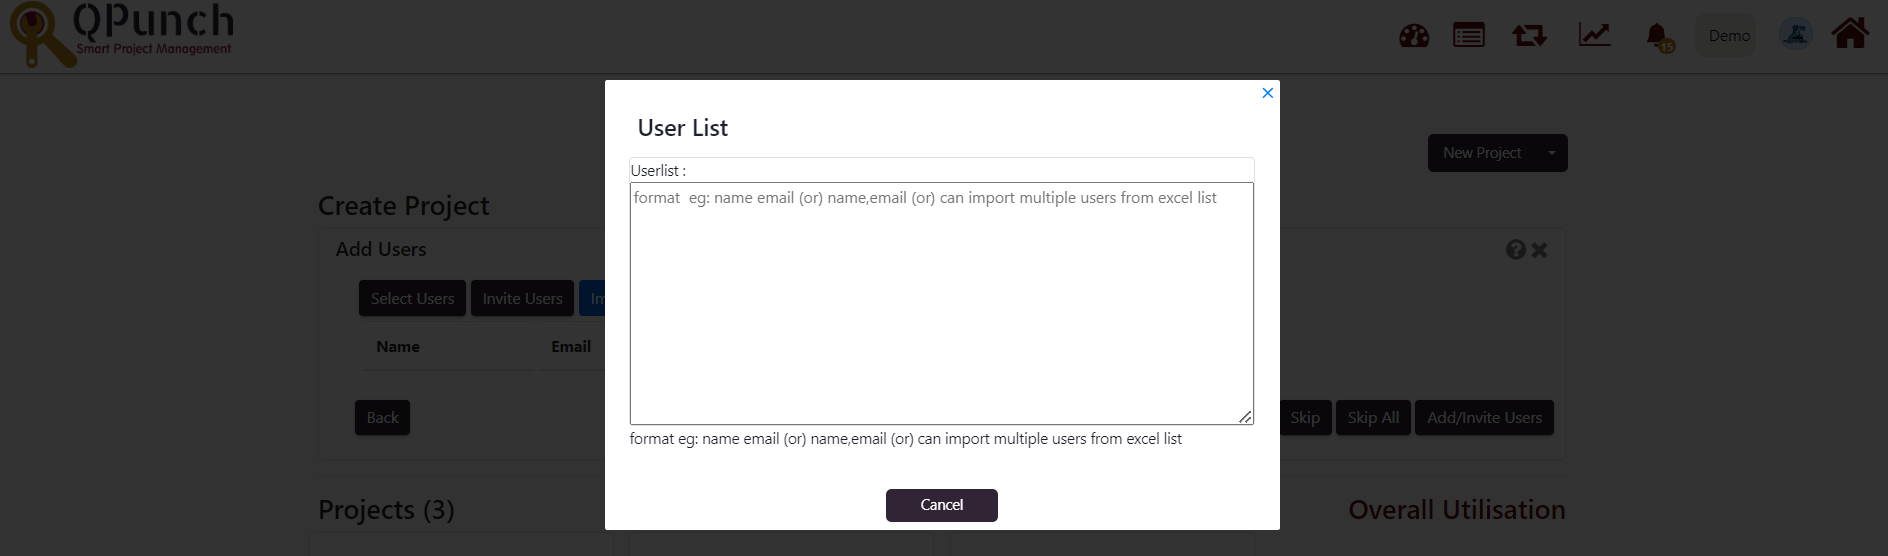
Import users helps you to add multiple users at a time in bulk.
We can enter users details in “name email” format or “name, email” format or can import multiple users from the excel sheet and hit import button.
Select “Add/Invite Users” button to add the existing users and invite the new users in the list or select skip button to ignore this step.
- Invite Link
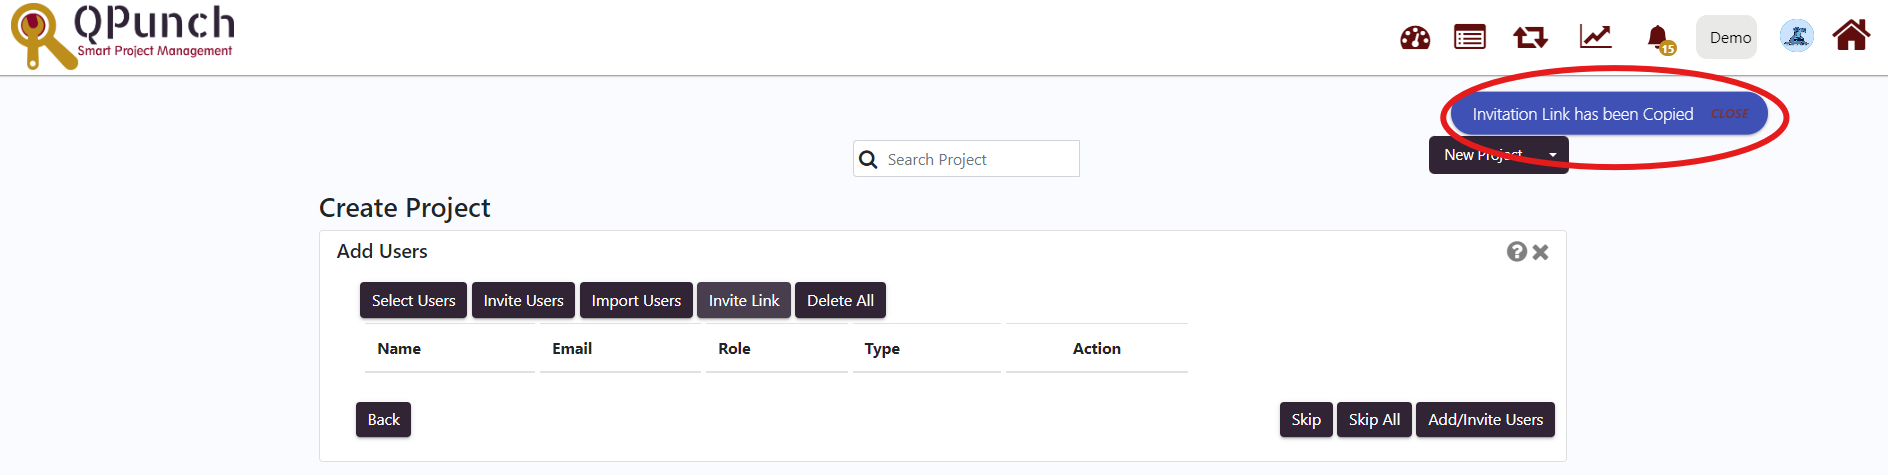
The invite link is copied to the clipboard when the ‘Invite Link’ button is selected. We can then share the project link to the users we wish to invite to the project.
- Delete All
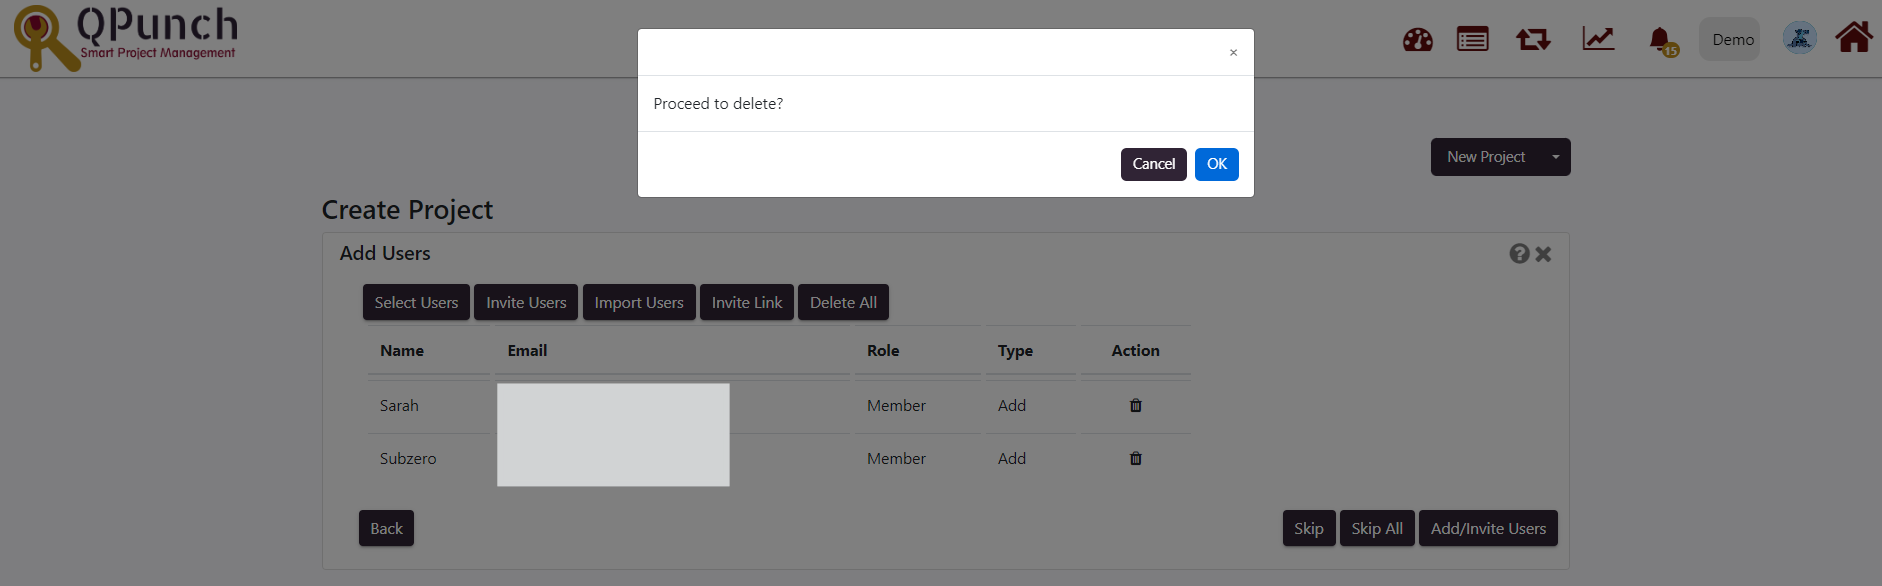
If you would like to remove any individual user of the project, select the delete icon on the right side of the action list. If you would like to delete all the users, hit the “delete users” button. This will remove the users whom you have selected to invite/add for your project.
Step 5: Set default project values

When you create new tasks or Punches, if you would like to auto-fill the fields to save your time can be set in this page.
- You can select an assignee from the ‘Assigned to’ drop down or keep it unassigned.
- Set a rate in the cost field if required for the task
- Setup default start date as any date from the current date. If you wish to begin the start date of the task 2 days from today you can set 2 days or if you wish to set today as a start date u can set 0 days.
- Similarly, for Due date you can select any date from the task start date.
- For distribution, we can set the percentage which shows the time distribution user invest on that task to work till due date.
For eg: if a task is for 2 days and distribution is 50% he/she work on that task half a day for 2 days. ie, he/she will be utilised 50% of their time in a day for 2 days on this task. If the distribution is 100% he/she work on that task full day for 2 days. Ie, he/she will be utilised 100% of their time in a day for 2 days on this task.
- Setup the priority of your task as Lowest, Low, Medium, High, Highest as per the requirement.
- You can select a category as a default from the list you selected in the previous steps which comes in the dropdown
- Similarly, for the label You can select a label as a default from the list you selected in the previous steps which comes in the dropdown
- All the above steps are optional, we can setup as per the requirement selecting “update default” button or ignore it selecting skip button.
Step 6: Import MS project file

Select “choose file” button to choose the .mpp file or .XER file from your desktop and import in the project. This will save your time by creating all the tasks for you by importing the project file. Select “import” or skip to continue.
Currently we support only these two extensions.
Step 7: Move work forward

Now your project is successfully created, you can go to punch page selecting “Go to Punch Page” button and begin tracking work. This will navigate you to the Kanban board. To track work items, move an issue from one column to another as it progresses through your team’s workflow.
Address On Maps
Ready To Get Started with Smart Project Management?