Every organization would possess a person in overall charge of the planning and execution of a particular project. QPunch has a simple way to assign a manager and their reporting staffs in any project. This documentation helps you better understand Manager Settings of QPunch Smart Project Management Tool.
To set a Manager,
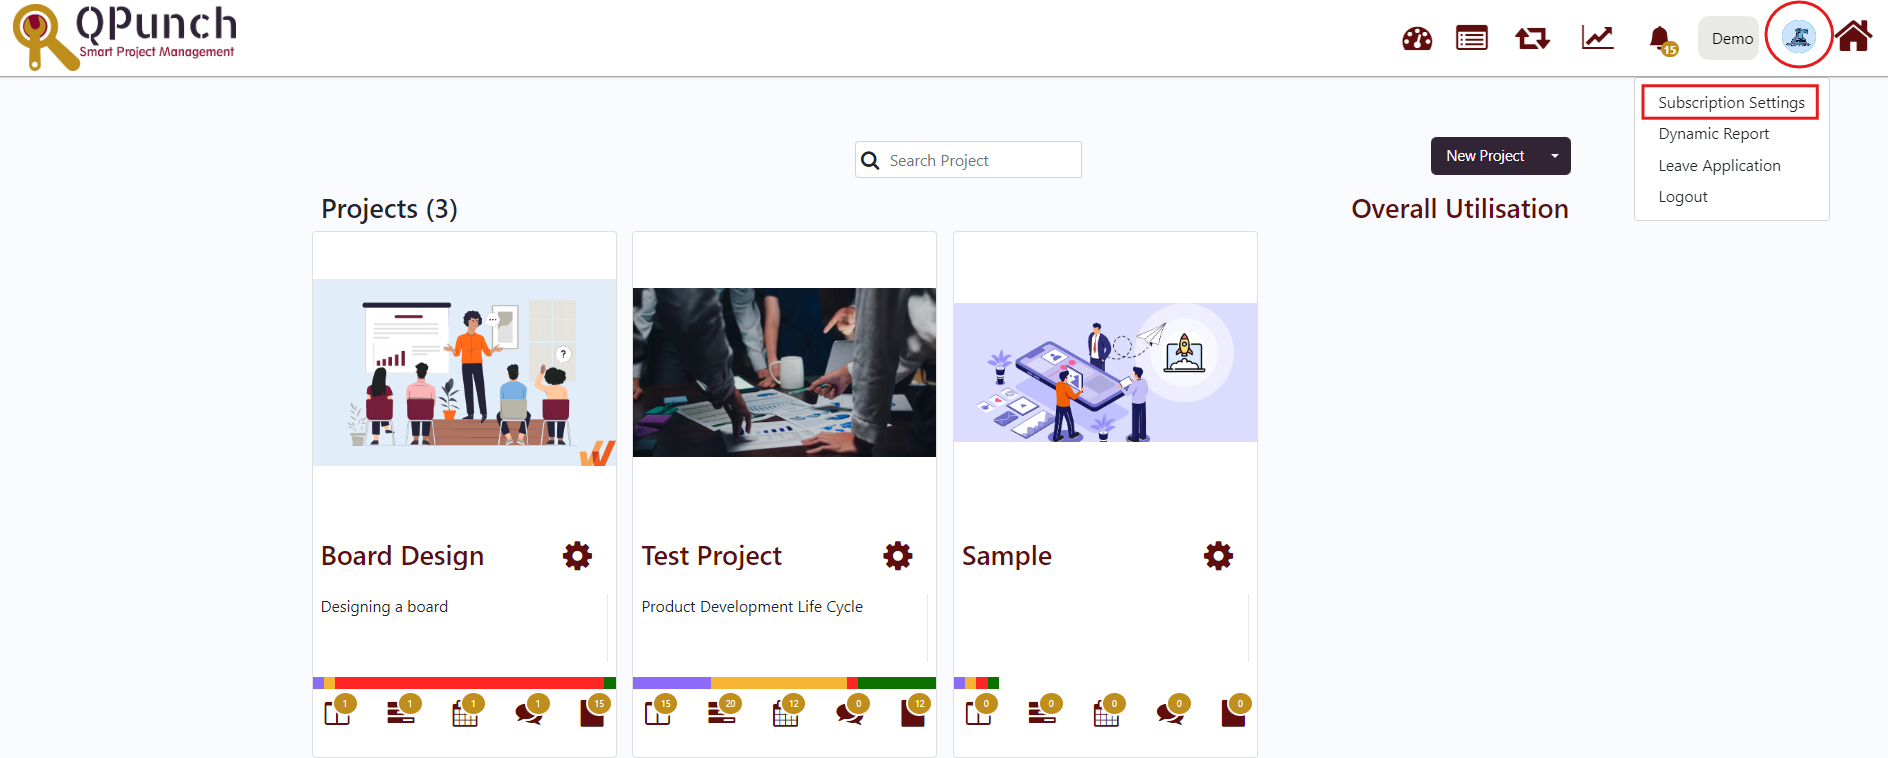
Click on the username icon on the top right corner of the QPunch home page.
Choose Subscription Settings from the menu
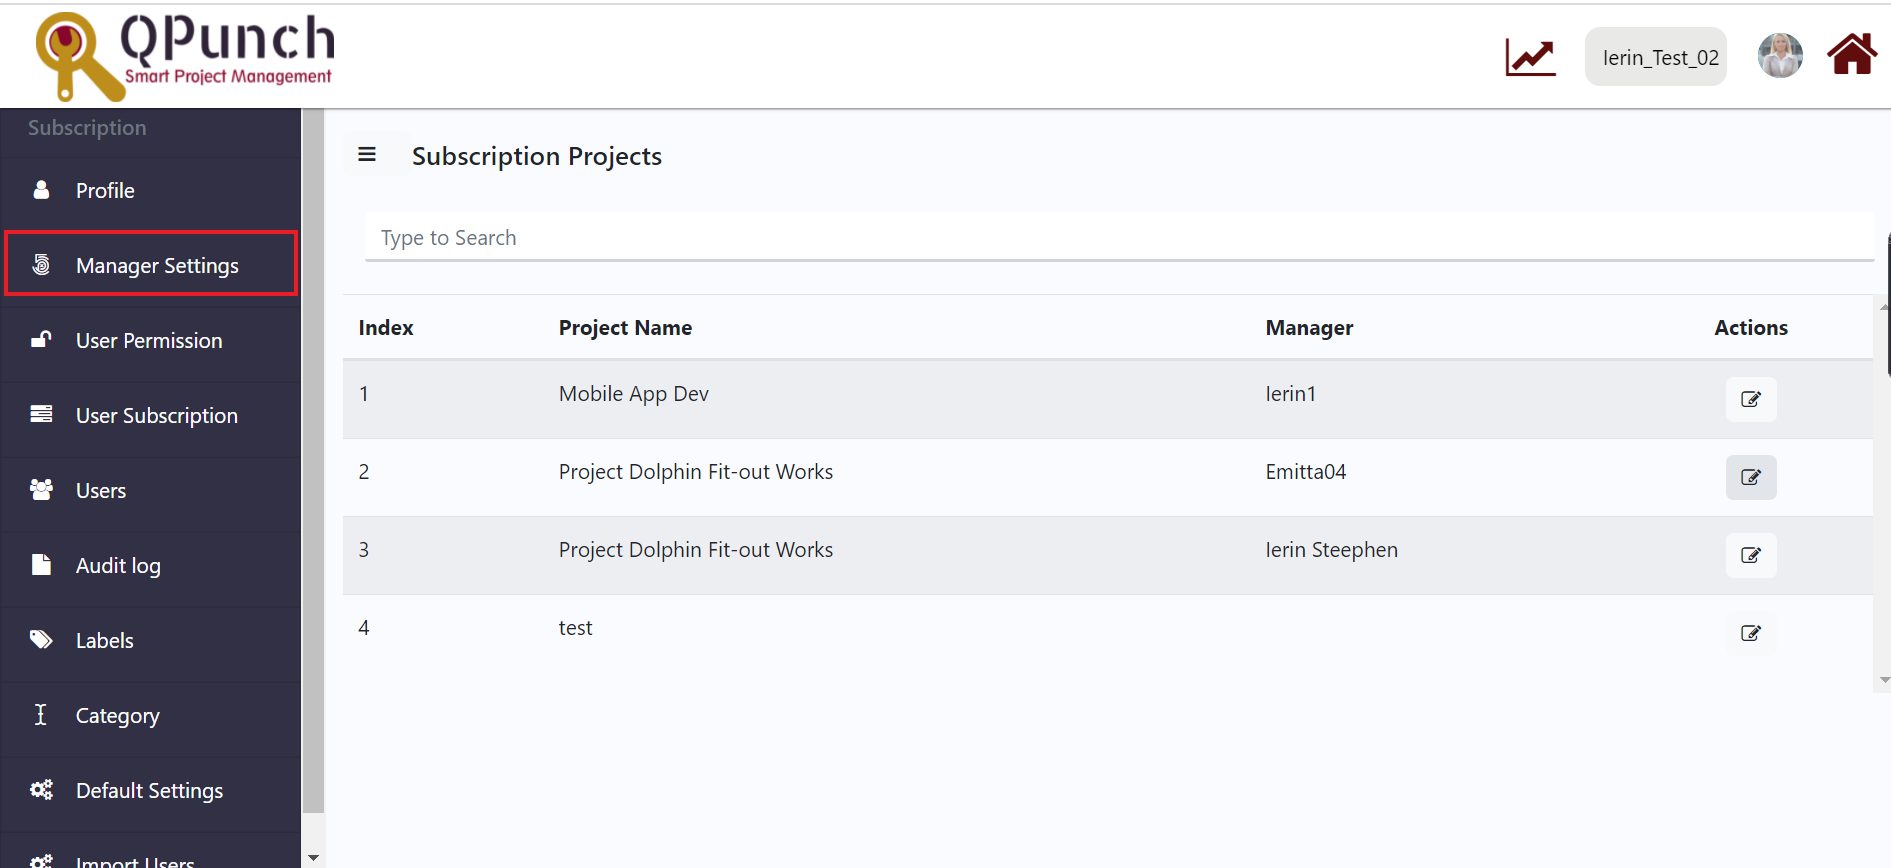
·Navigate to Manager Settings on the left side pane
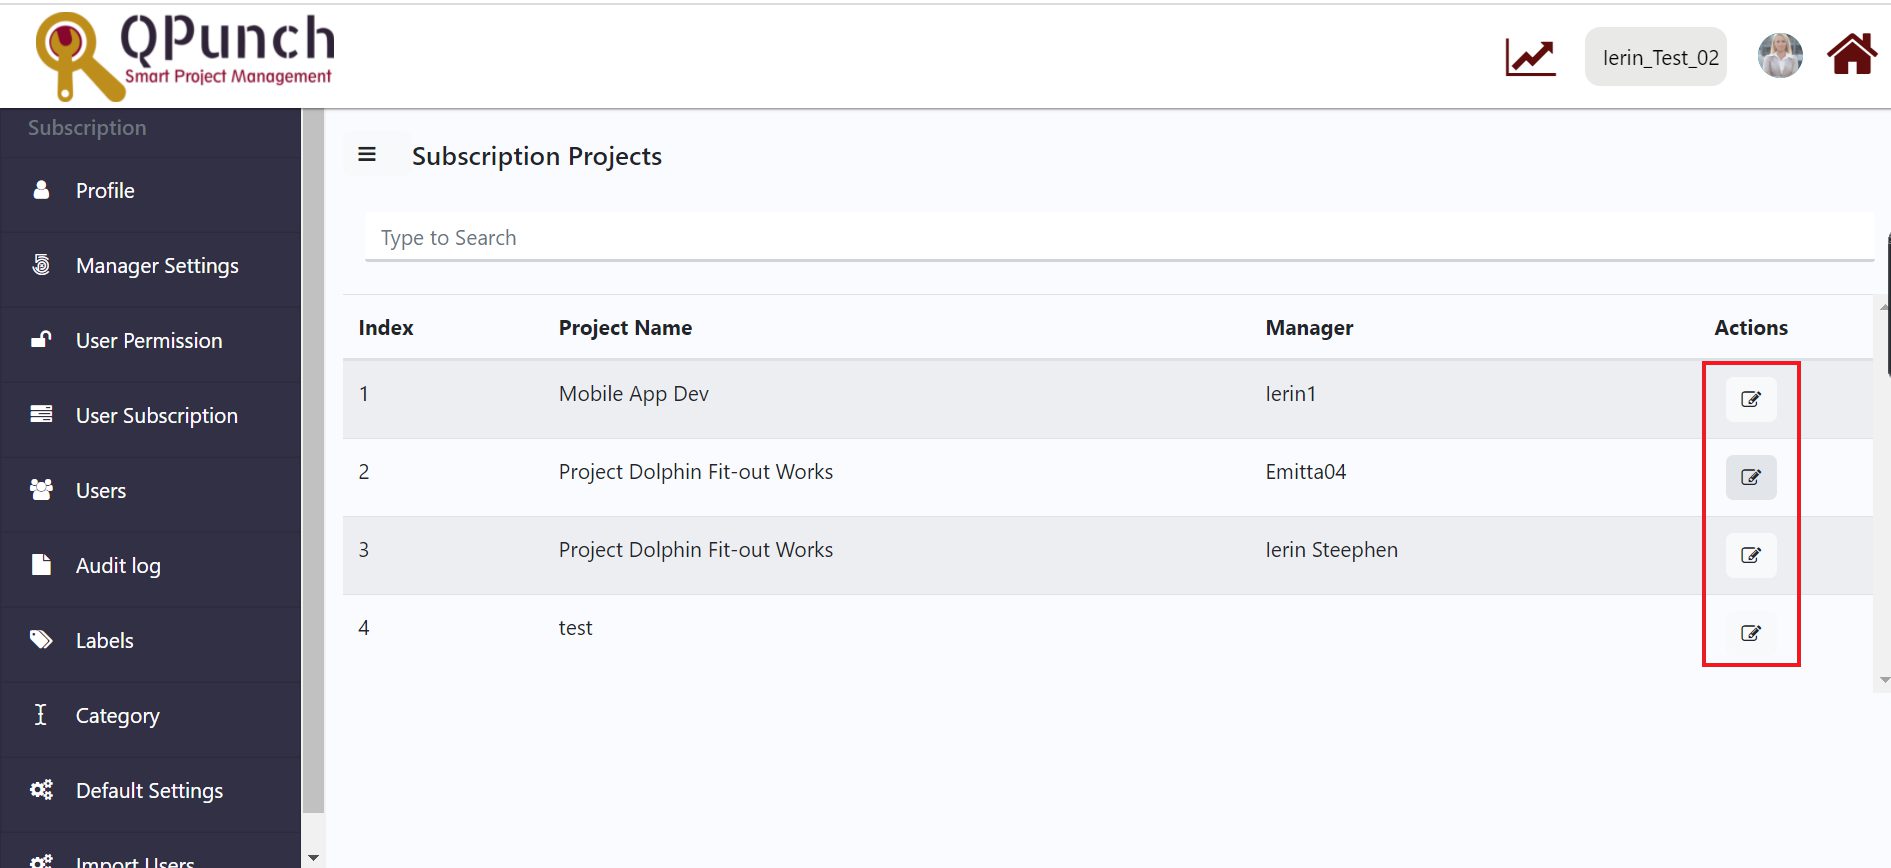
·To Add/Edit Manager, click on the Edit icon on the Right end, below the Actions Column
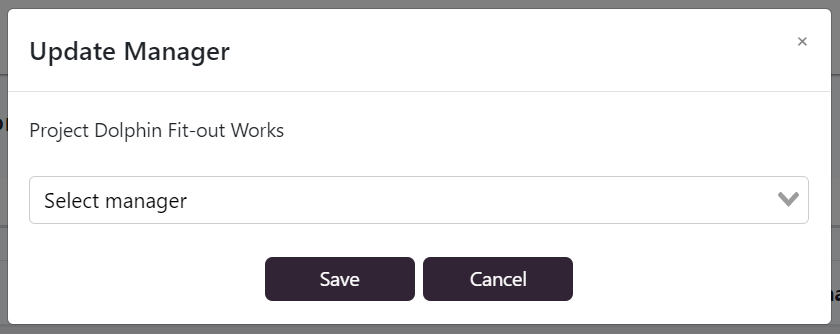
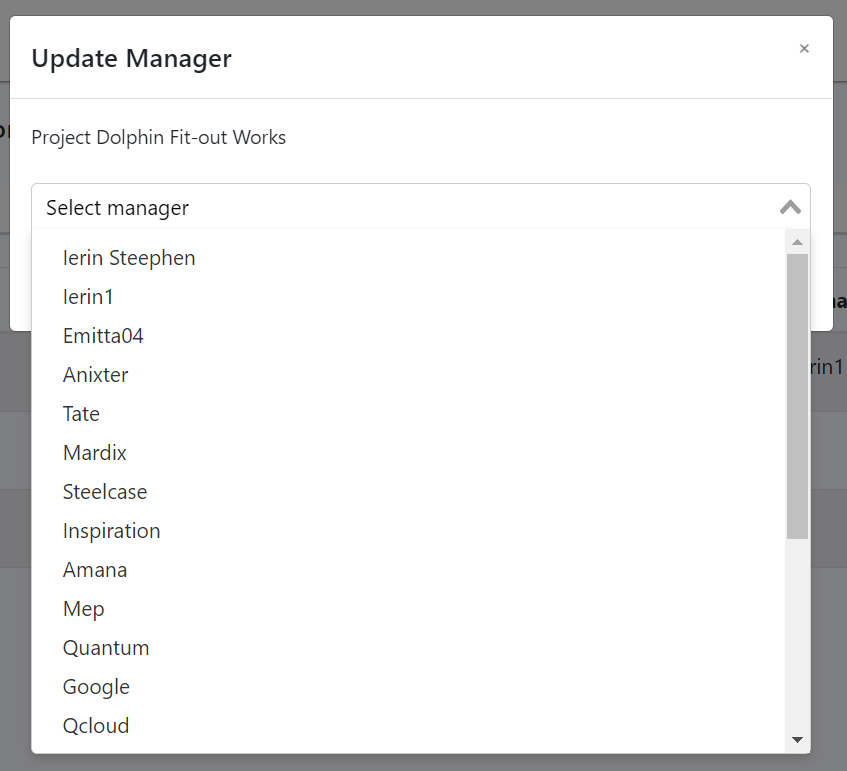
·An Update Manager window pops-up
·Select the Manager from the drop-down menu and press the Save Button
To set a manager for a user,
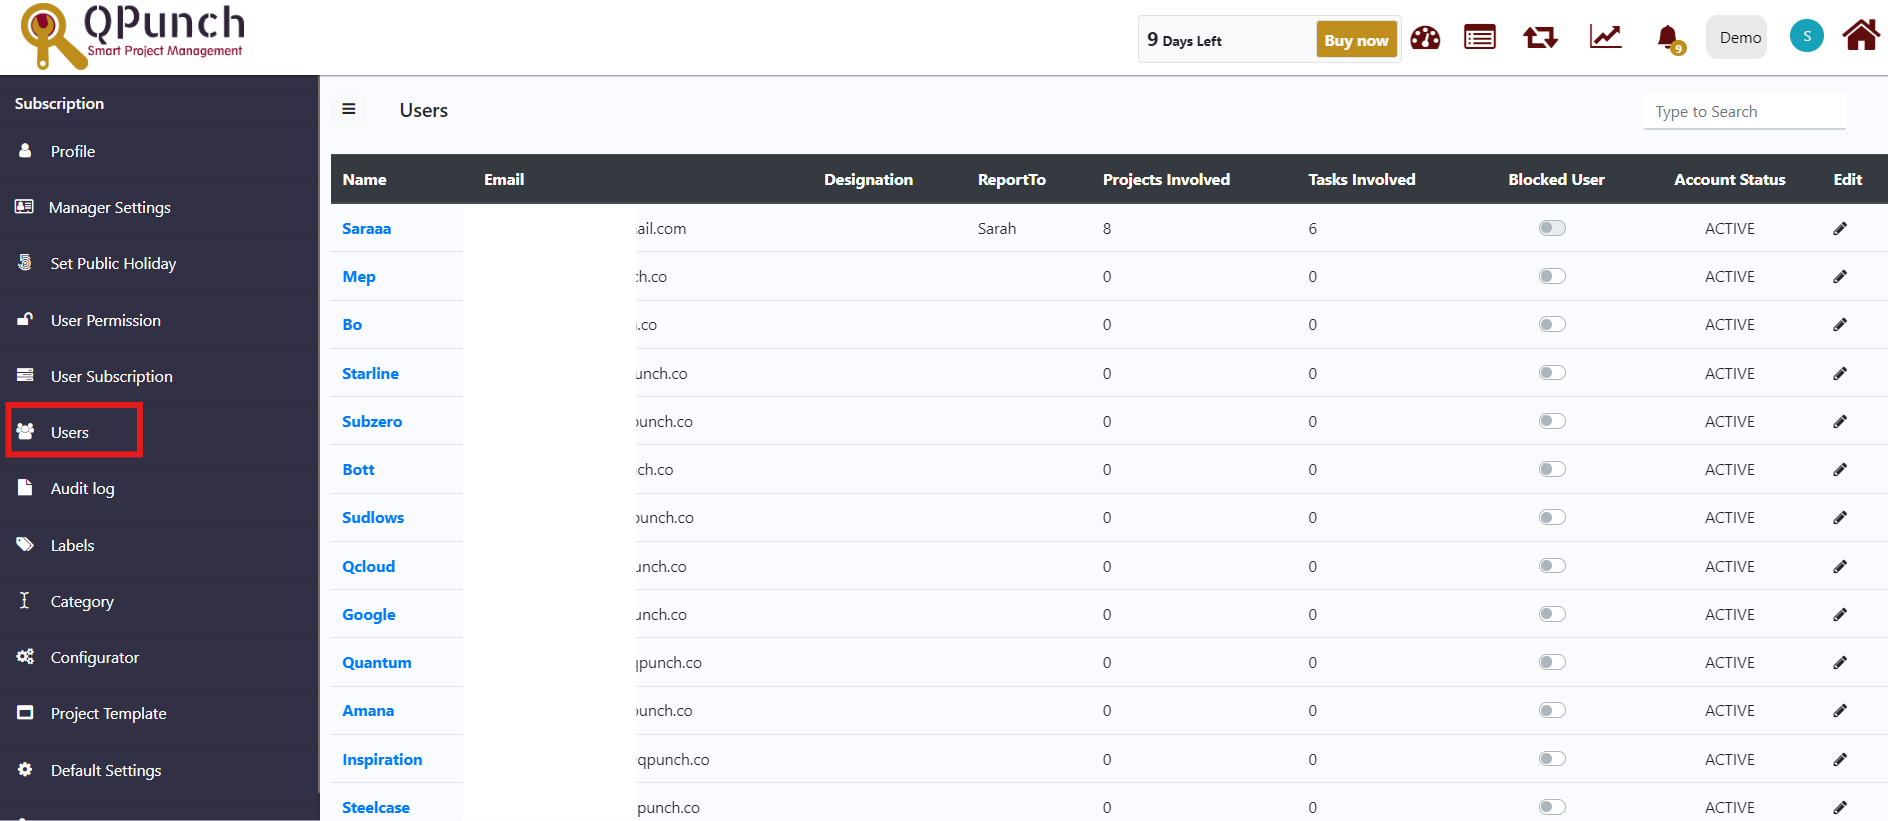
Navigate to Users on the left side pane
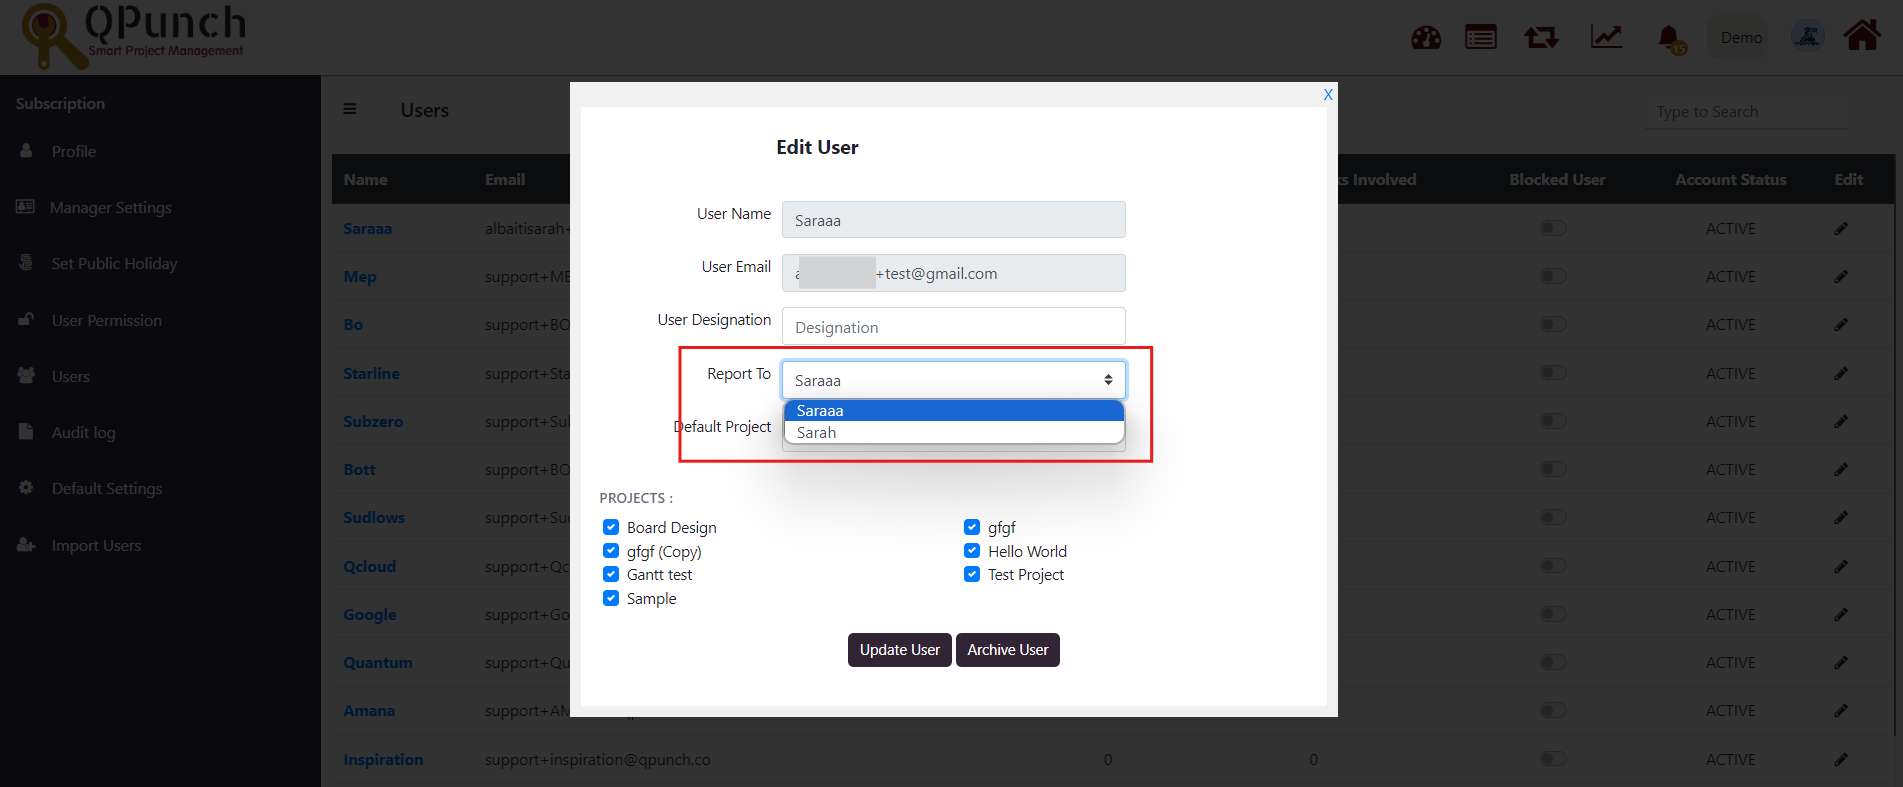
Click on the Edit button (pen icon) against the user and then the Edit User window pops-up.
Choose the manager name from the Report To dropdown menu
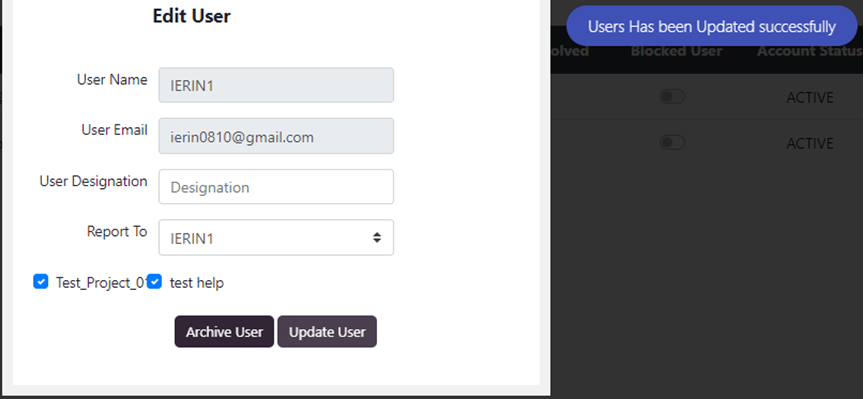
Click on the Update button and the notification appears as “User has been updated successfully”