Taking leave is essential for employees across organizations and it is in this scenario that QPunch makes keeping track of leave easier and more accurate. Management needs to spend less time on monitoring and responding to leave requests using the tool. This documentation will help you better understand the working of leave application module in the QPunch Smart Project Management tool.
The various steps that are covered in this guide are:
How to apply for a leave?
How to view the status of leave application?
How to update/cancel a leave application?
How to approve/reject a leave request from employee?
How to plan tasks according to the leave status of an employee?
Before you start, make sure that the owner has set a manager for each user, to whom he/she reports to. If not set, the leave application request cannot be processed as the input is validated to check for an existing ‘Reports To’ manager for that employee.
To set a manager for a user, do the following steps:
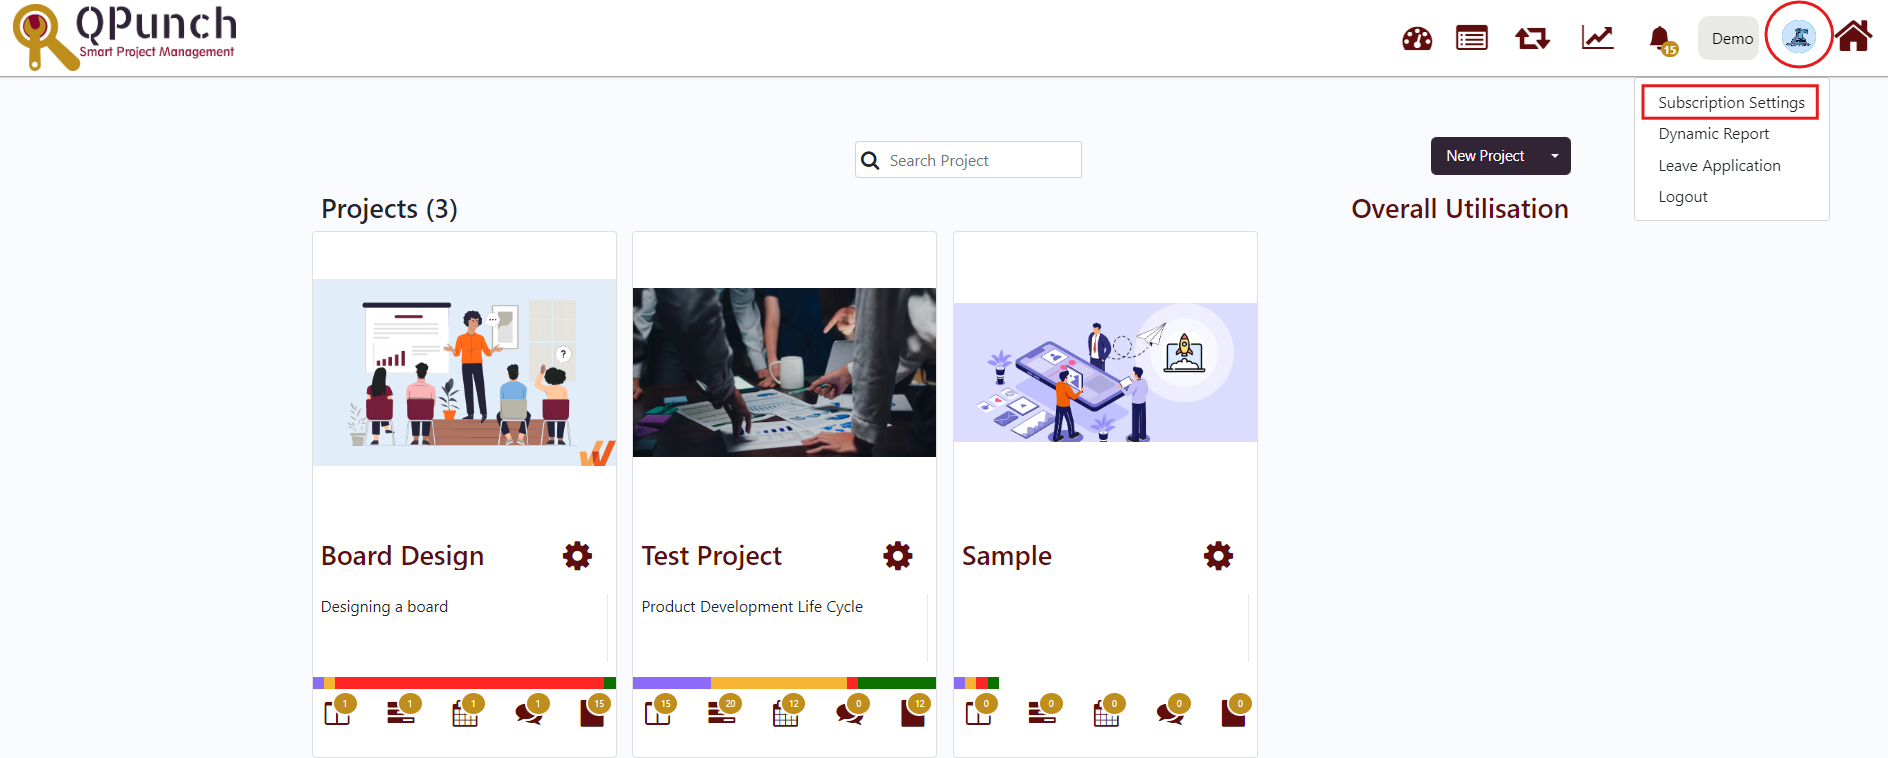
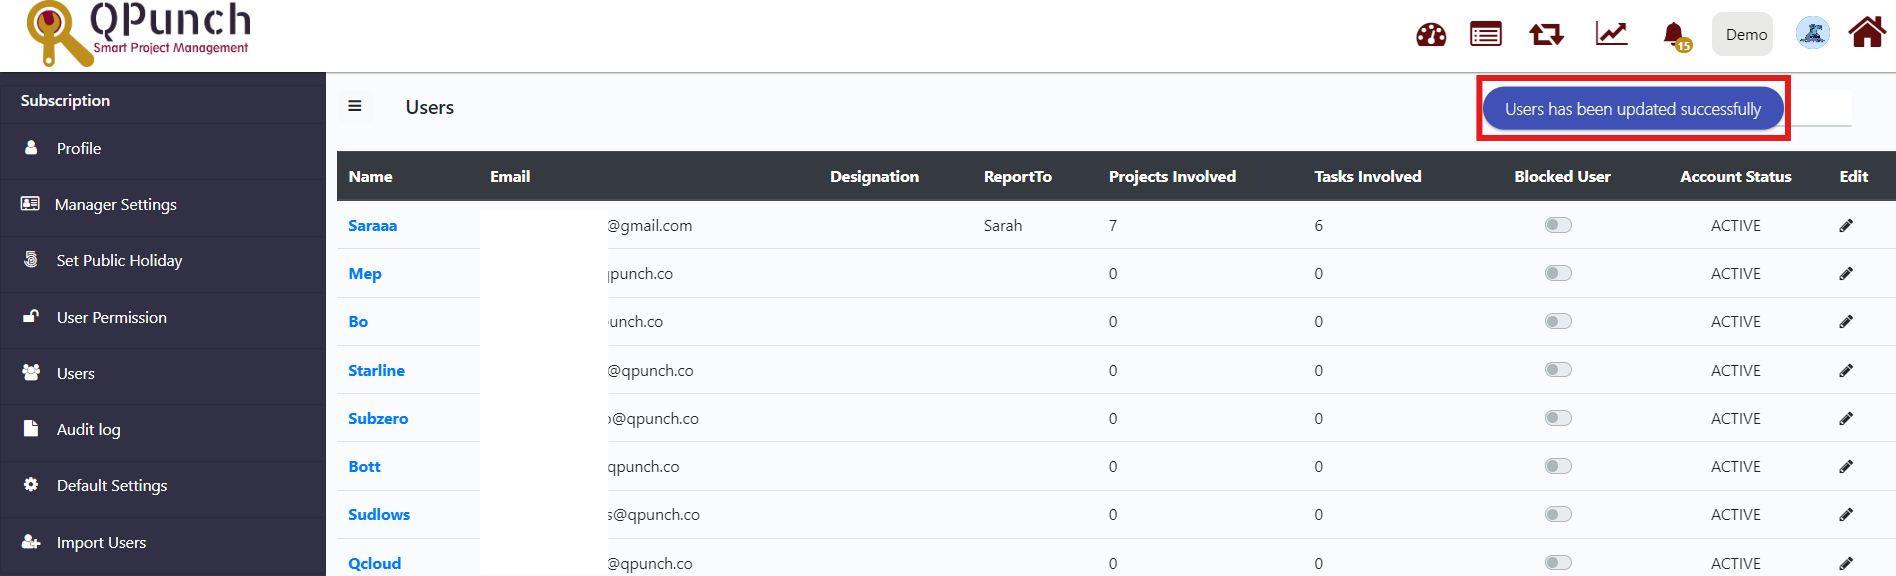
i. Click on the username icon on the top right corner of the QPunch home page.
ii. Choose Subscription Settings from the menu
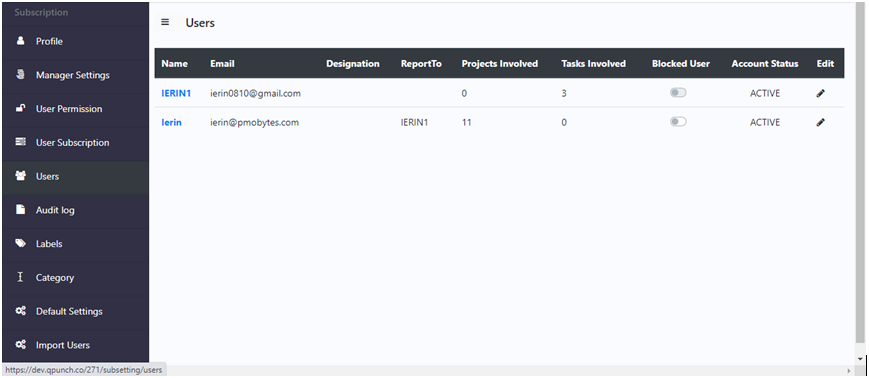
iii. Click Users on the left side pane
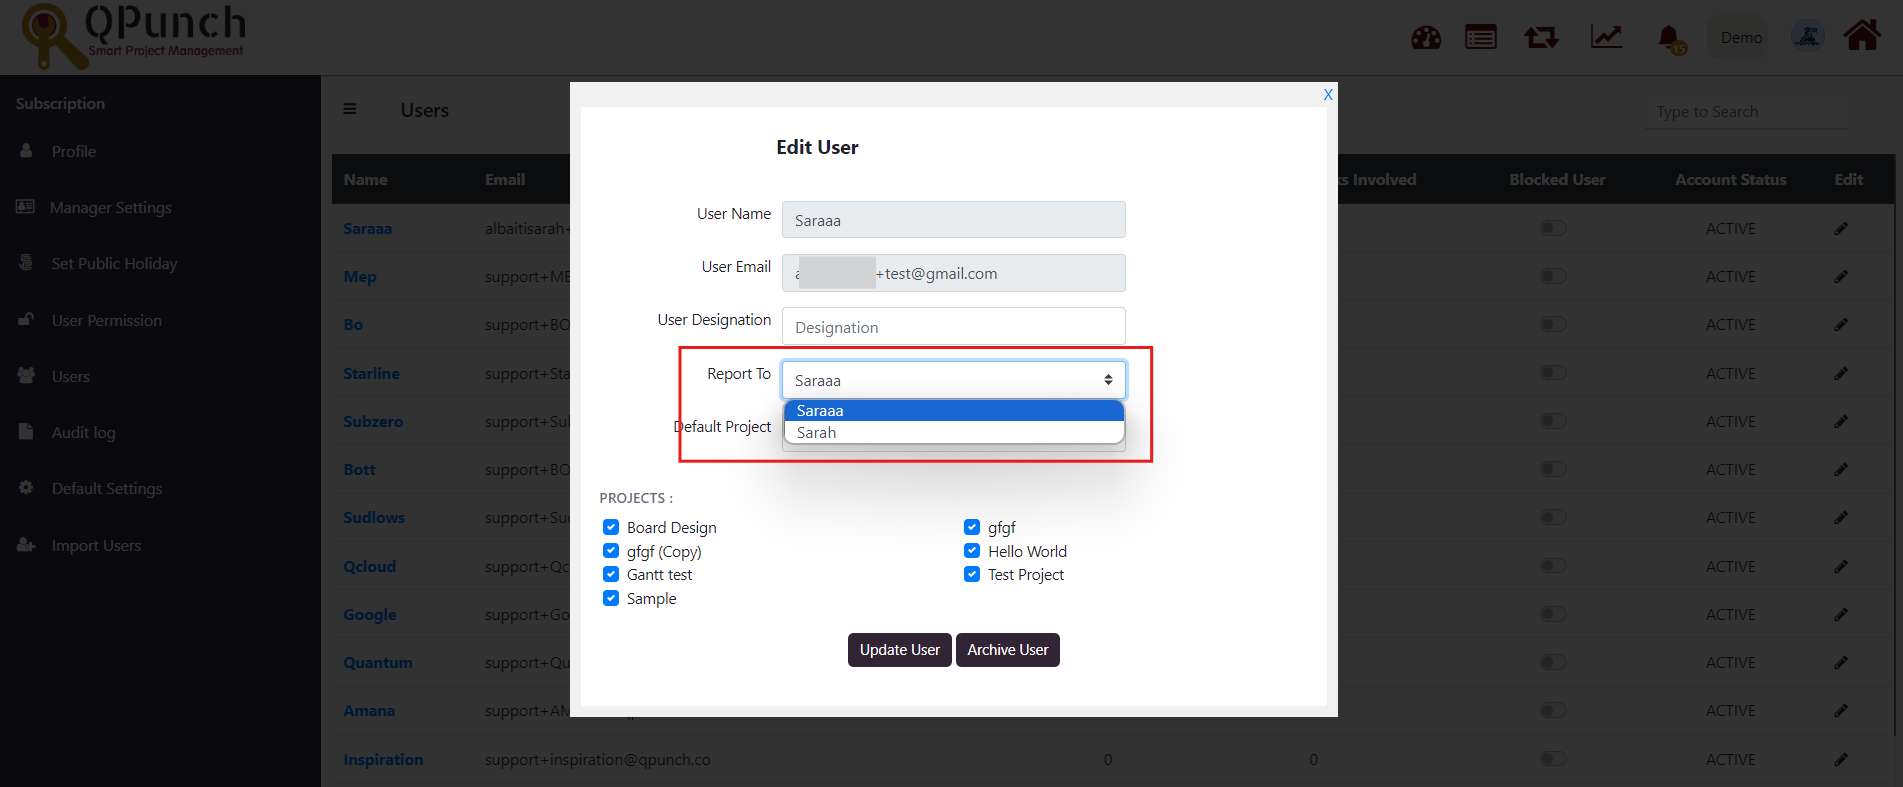
iv. Click on the Edit button (pen icon) against the user and then the Edit User window pops-up.
v. Choose the manager name from the Report To dropdown menu
vi. Click on the Update button and the notification appears as “User has been updated successfully”
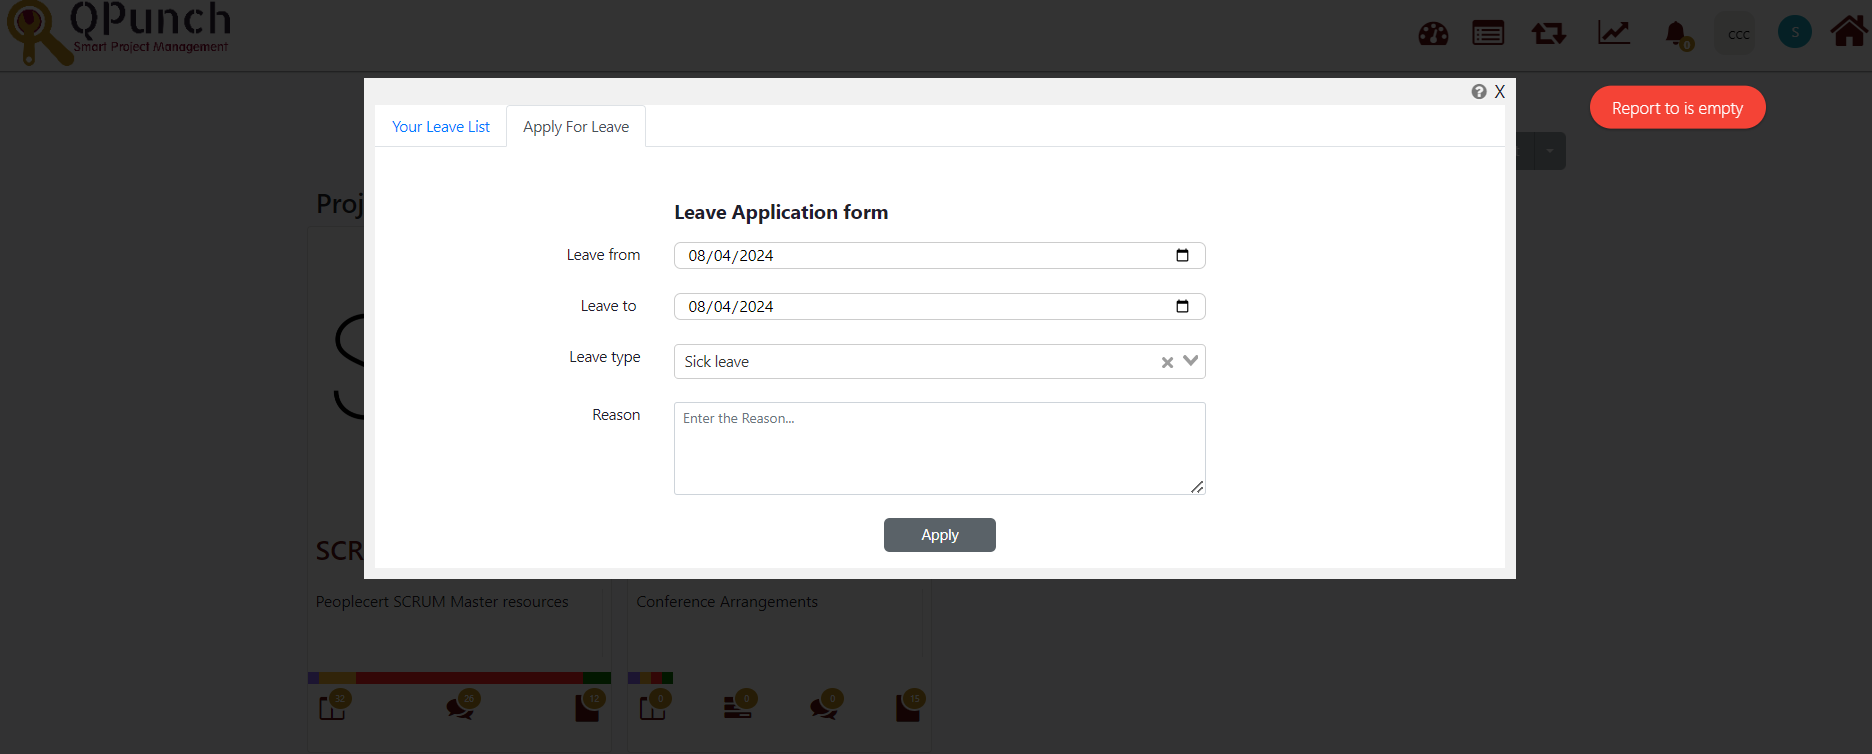
Step 1: Apply for Leave
Allow employees to apply for leave on their own, providing From date and To date. Also, know the reason for the leave taken.
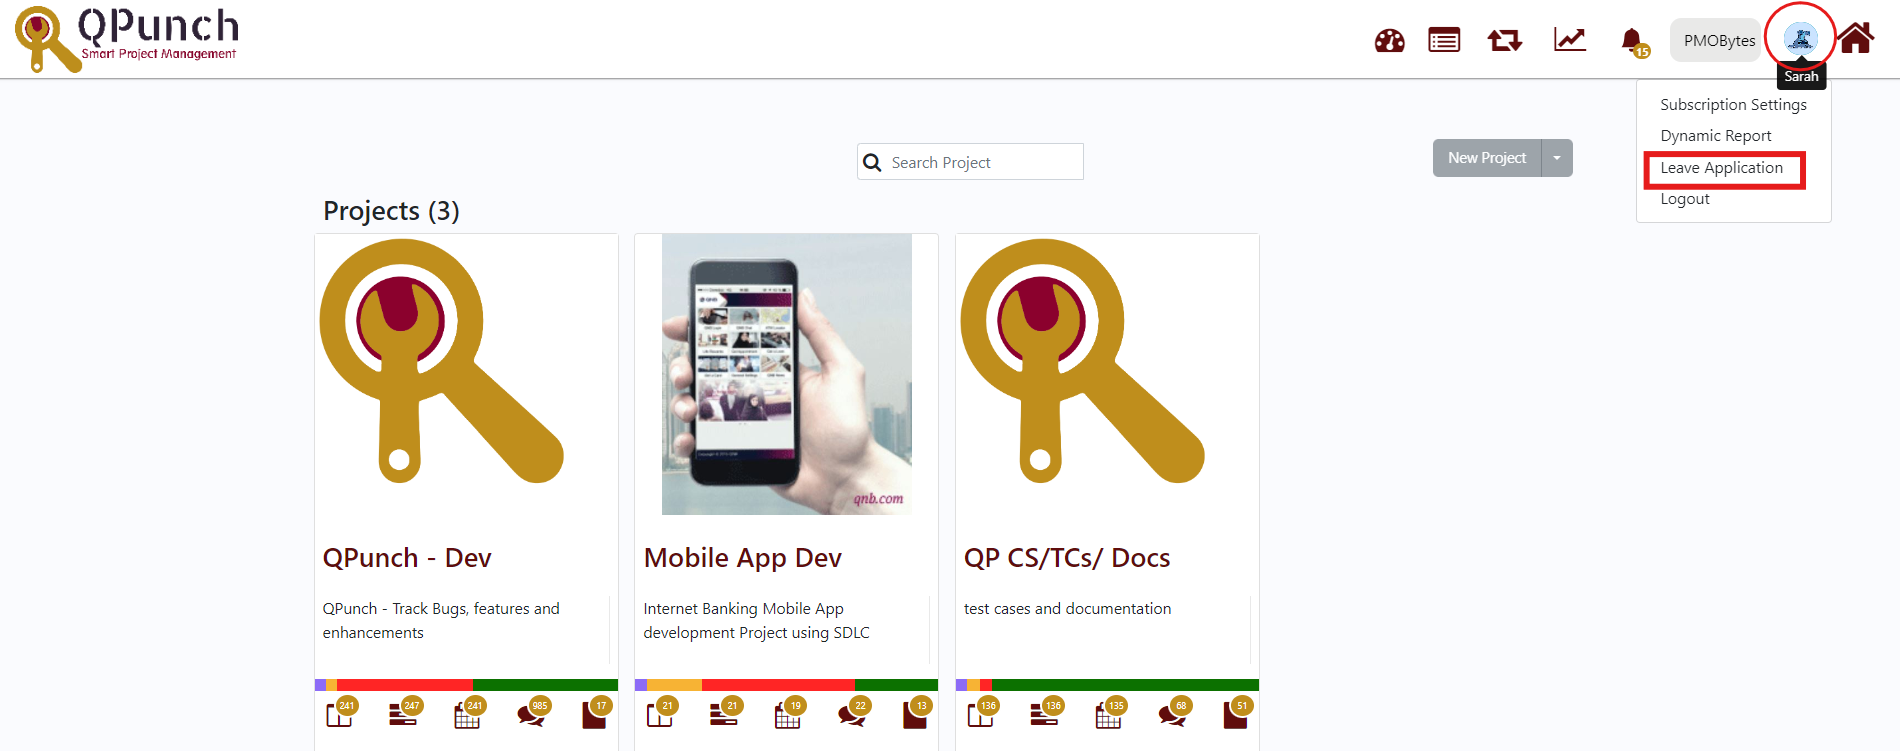
i. Click on the username icon on the top right corner of the QPunch home page.
ii. Choose Leave Application from the menu.
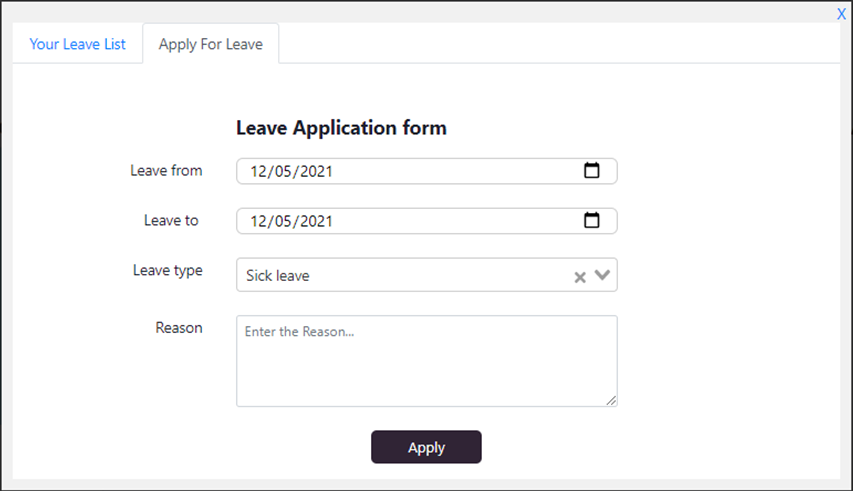
iii. A pop up page opens up with two tabs. Click on Apply For Leave tab.
iv. Choose a Leave from date and Leave to date from the calendar provided on the right end of the input text box. Typing the date on your own is also permitted.
v. Choose any of the Leave Type from the four options provided in the dropdown menu.
vi. Reason is optional. However, the reason of leave can improve transparency and thus leading to higher chance of leave approval.
vii. Click on Apply button
Step 2 : View the status of your Leave Application
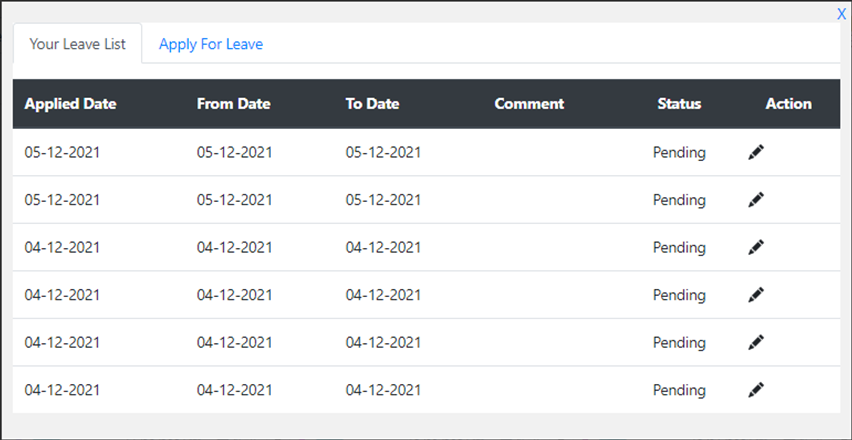
View details about your leave application such as Applied Date, From Date, To Date, Comments from manager and the status of your leave application in just a click
i. Click on Your Leave List tab.
ii. View the status of your application directly on this tab.
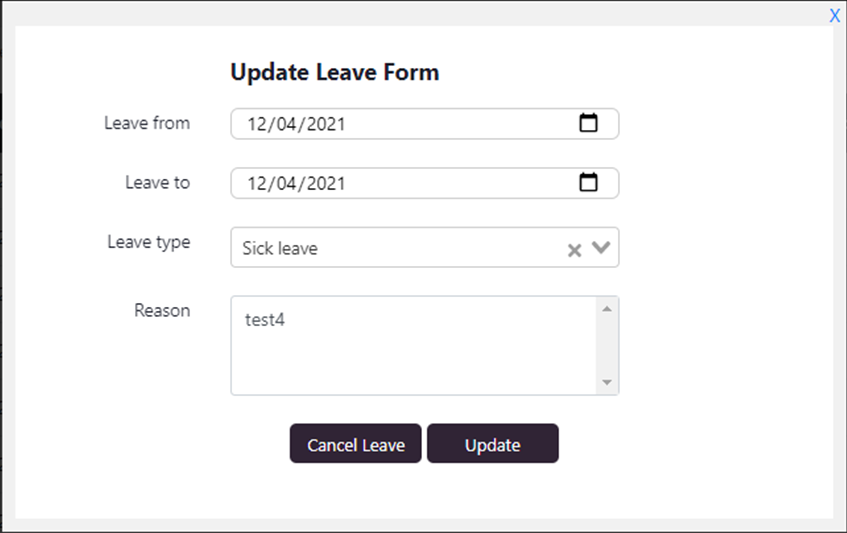
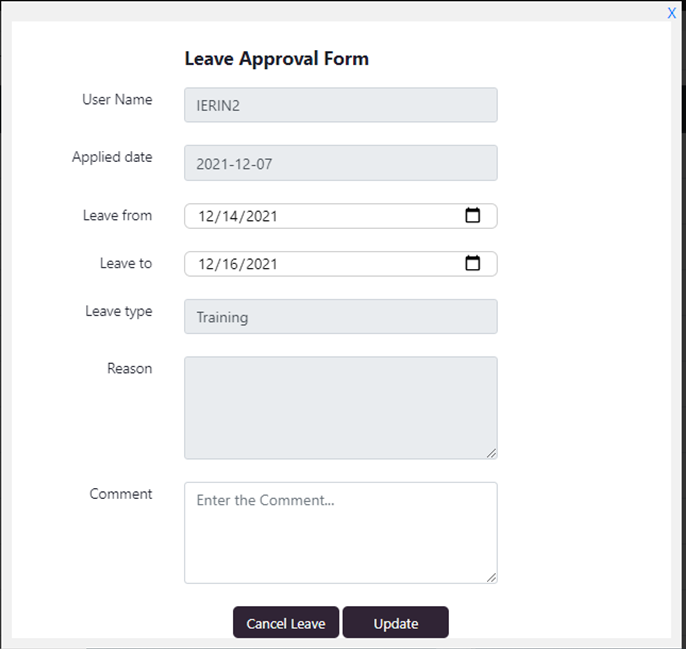
Step 3: Update/Cancel Leave
It is possible for the employee to edit/cancel the leave application until the manager approves/rejects the leave. Sometimes, if user changed their mind and wish to cancel their leave, QPunch’s leave application module allow the user to cancel leave on their own, so that user don’t need to reach out to the manager to cancel it.
i. In Your Leave List tab, click on the corresponding pen icon displayed at the right end under the field Action.
ii. An Update Leave Form pops up.
i. Edit the required fields and click on Update button.
ii. Click on the Cancel Leave button if you wish to cancel the leave.
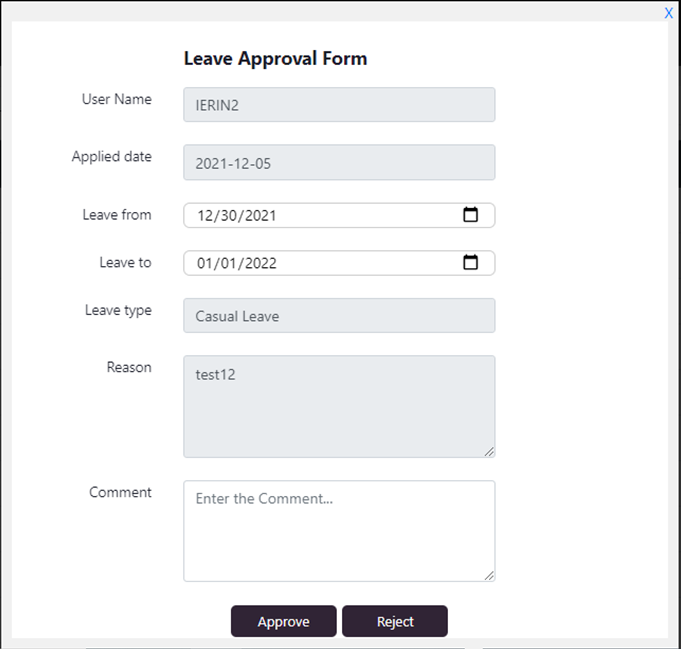
Step 4: Approve/Reject Leave Requests
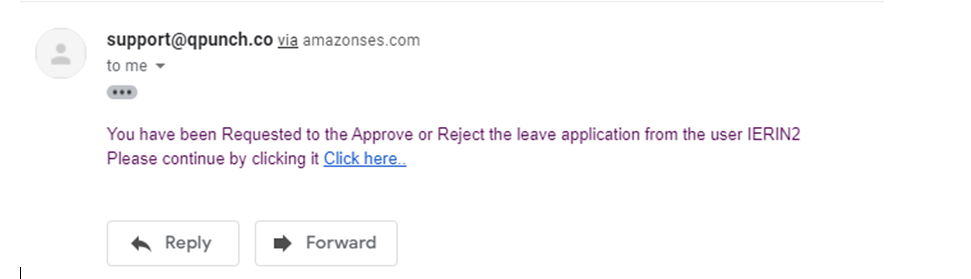
QPunch allows managers to have complete control over their employee’s leave schedule. Be able to approve or reject their requests for a seamless flow of the organization. A notification email is sent to the manager to whom the employee reports to, to provide a quick and easy view of the leave application.
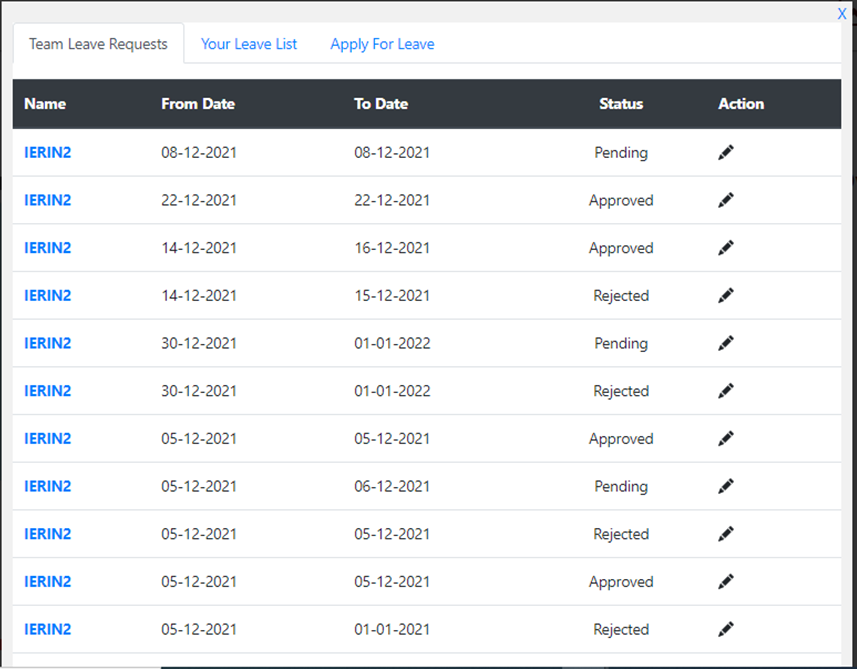
i. Navigate to the Team Leave Requests in either of the following ways:
a. Click on the link provided in the email notification received
b. Click on the username icon on the top right corner of the QPunch home page and choose Leave Application from the menu.
i. Click on the Action button (pen icon) on the right end.
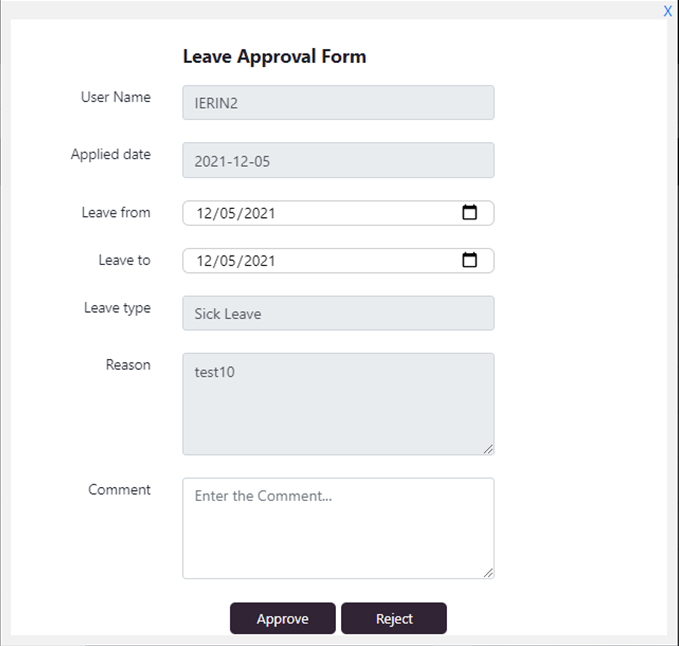
ii. A leave Approval form pops up.
iii. Manager has edit privilege on Leave From and Leave To dates. Click on the calendar icon provided in the input text box to select new dates.
iv. Comment is optional. Manager may ignore it if in case it seems unnecessary.
v. Click on Approve/Reject button.
vi. Employee receives an email notification regarding the decision of manager.
vii. Manager can still cancel/edit a leave request even after Approving/rejecting it.
Click on the Edit (pen icon) in the Team Leave Requests
A leave Approval form pops up with two buttons Cancel Leave/Update.
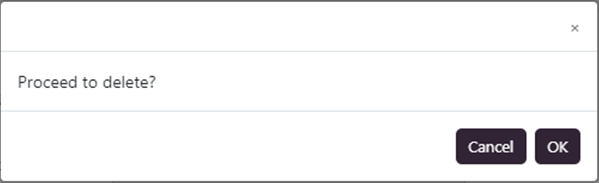
Click the Cancel Leave button if you wish to cancel an Approved Leave.
Click OK to confirm your cancel in the pop-up.
viii. Manager can also Approve a leave request that was Rejected earlier.
Click on the Edit (pen icon) in the Team Leave Requests
A leave Approval form pops up with two buttons Approve/Reject.
Click the Approve button if you wish to Approve a Rejected Leave.
Step 5: Plan tasks according to the leave status of the employee
Properly planning tasks according to your team member’s leave means you can map the utilization of employee in advance.
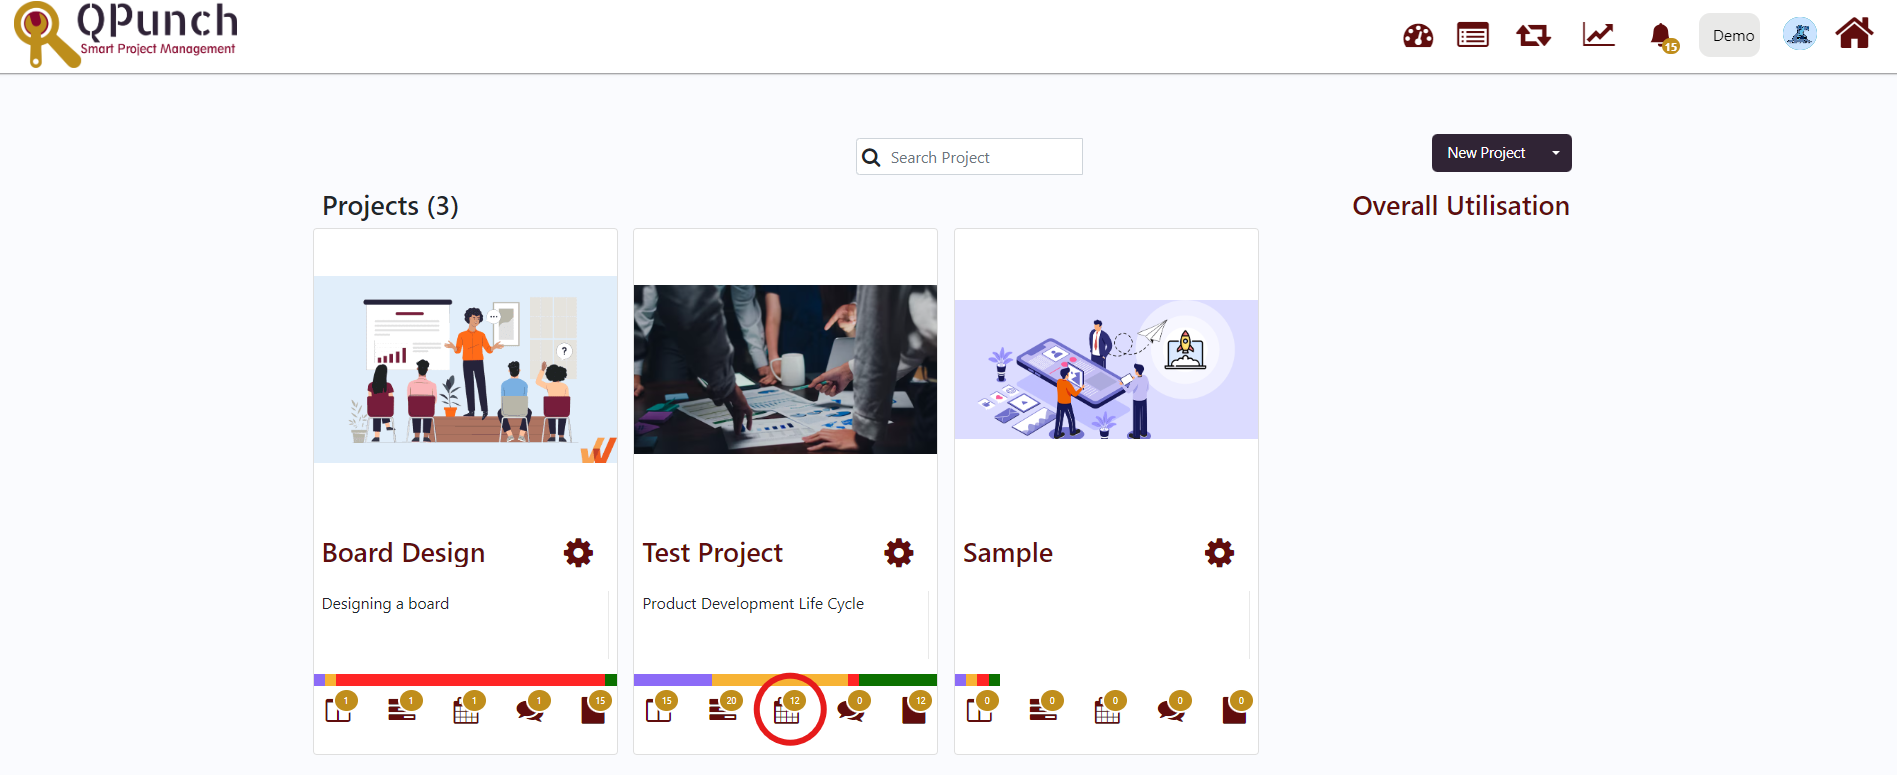
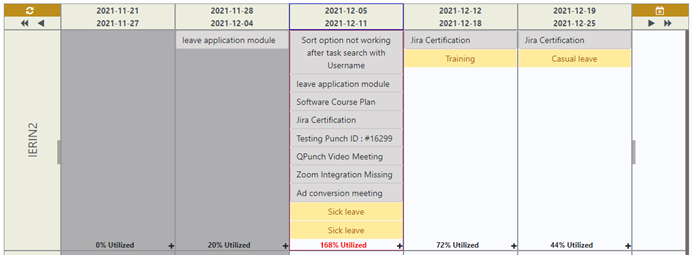
i. Click on the calendar icon displayed at the bottom of your project’s name in the QPunch home page.
ii. Calendar page opens up. Here you can view the leaves applied by the employee, seven days in a week merged in a column. Employee name is displayed on the left side.
iii. Click on the plus icon (+), if you wish to add any task for the remaining weekly utilization.
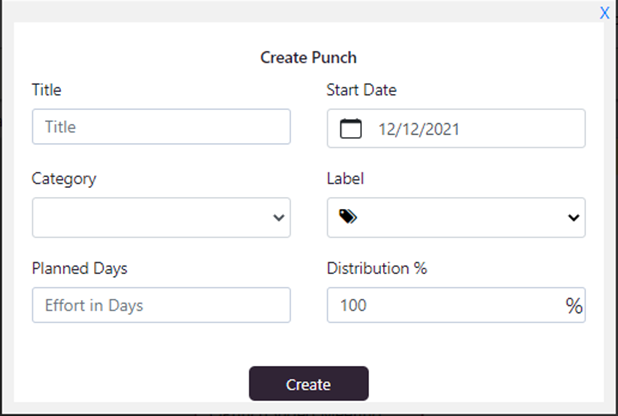
iv. A Create Punch Form pops up.
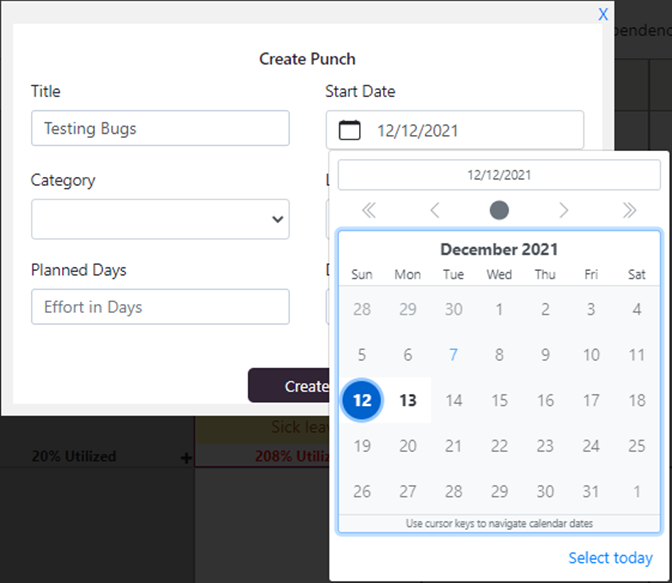
v. Fill the required fields. Here the Start Date calendar icon displays only the days except leave applied dates in that week. Rest days will be greyed out.
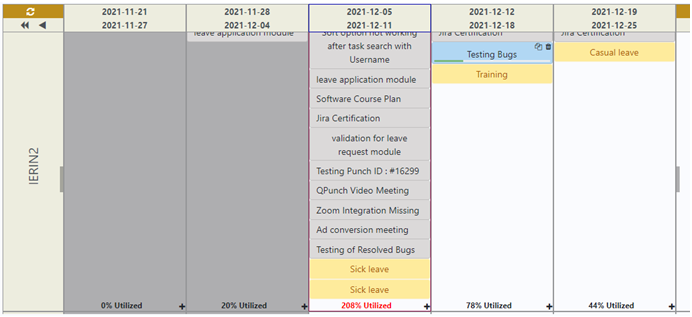
vi. Click on the Create button.
vii. The newly created task will be visible in the calendar and the utilization also increases accordingly.